2.1 Create the Request Form
Purpose
ServiceNow offers multiple ways to create a user experience for submitting a form. In this exercise, we will learn one quick way to get users off paper forms and emails.
- Go to App Home tab, "App home Telework"
- On the application homepage, locate the Experience section and click the ⨁ Add icon.

This takes us to a selection where we can identify the type of experience we wish to create.
- Select the Record Producer option.
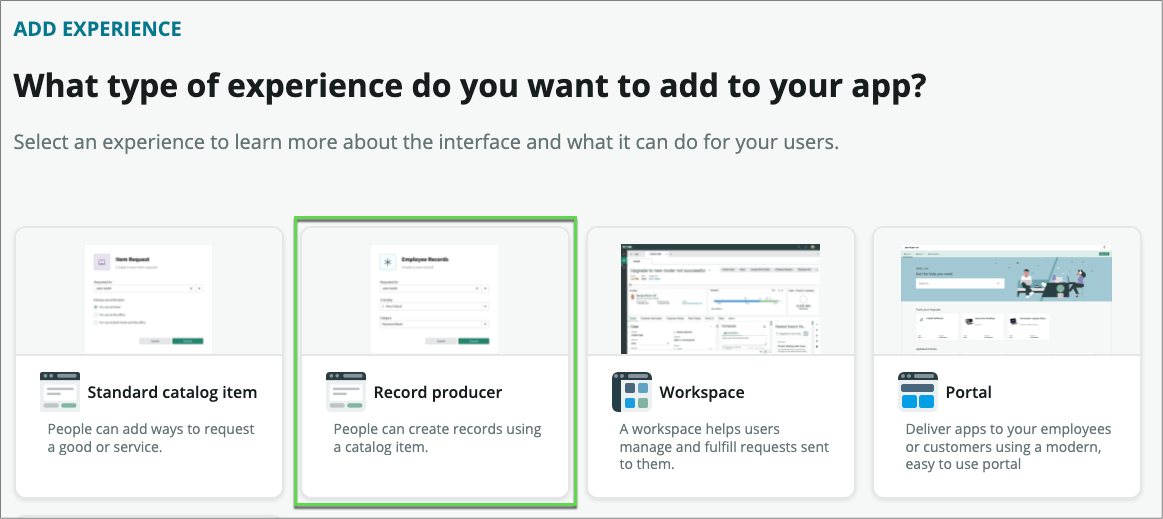
A record producer is a specific type of catalog item that allows end users to create records from the service catalog.
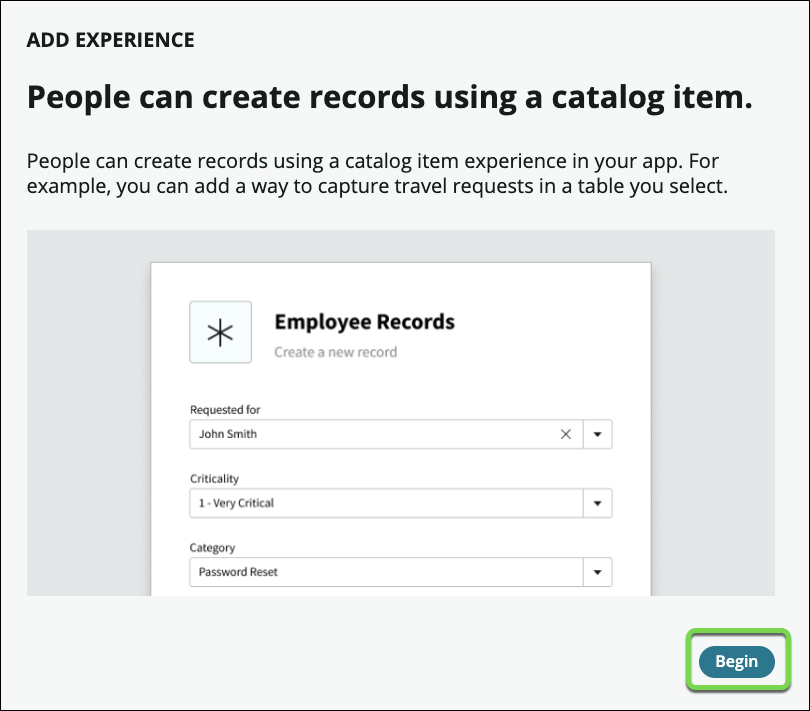
- This launches the record producer creator.
- Click on the button
Set the following values (💡 double-click, copy & paste into the form).
Field Name Field Value ① Name Apply for Telework ② Short Description Use this form to apply for Telework ③ Click on the button. 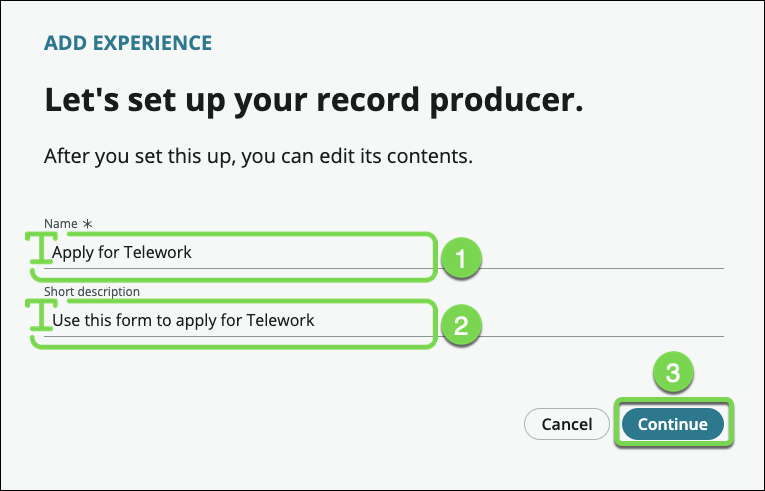
- Click on the button.
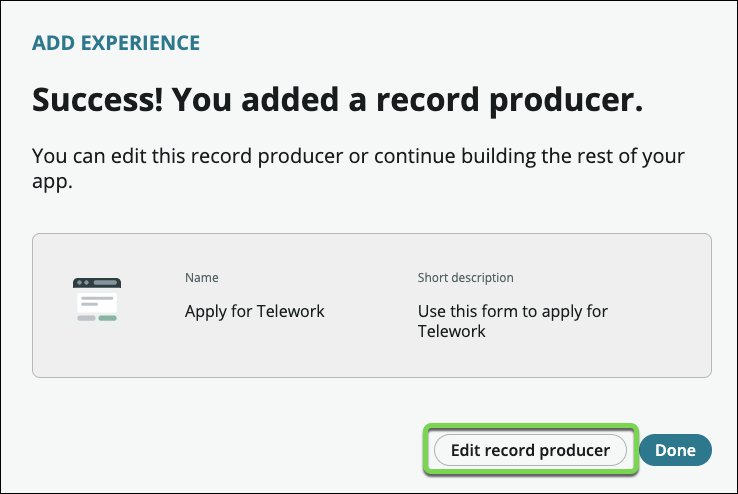
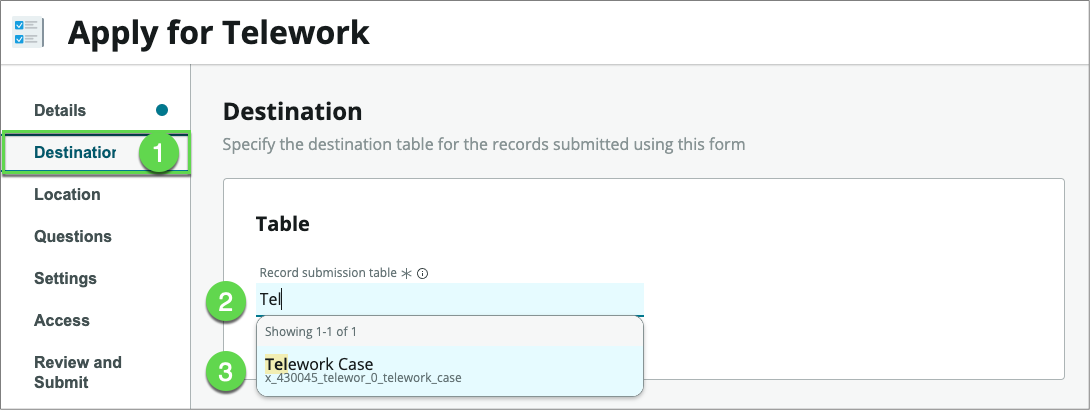
- Click on Destination , then type Tel, and select the Telework Case table.
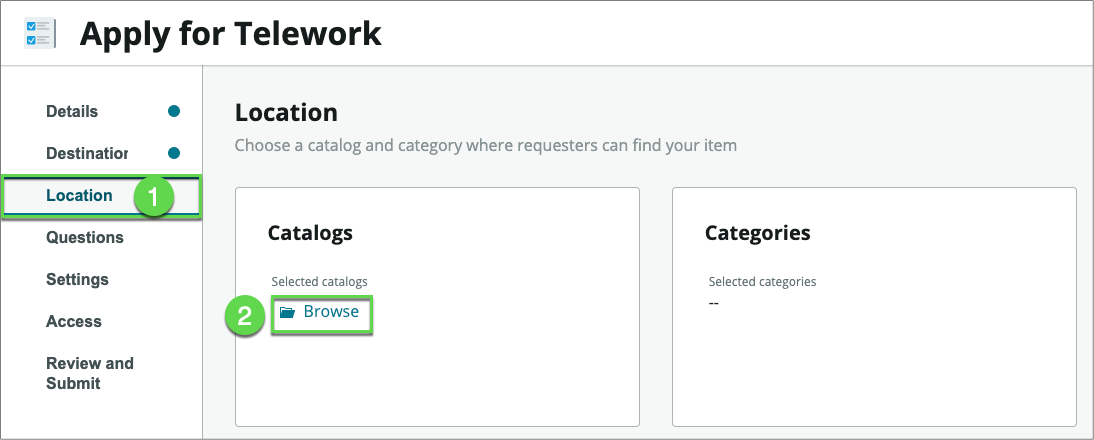
- Click on Location , then under Catalogs, click on Browse.
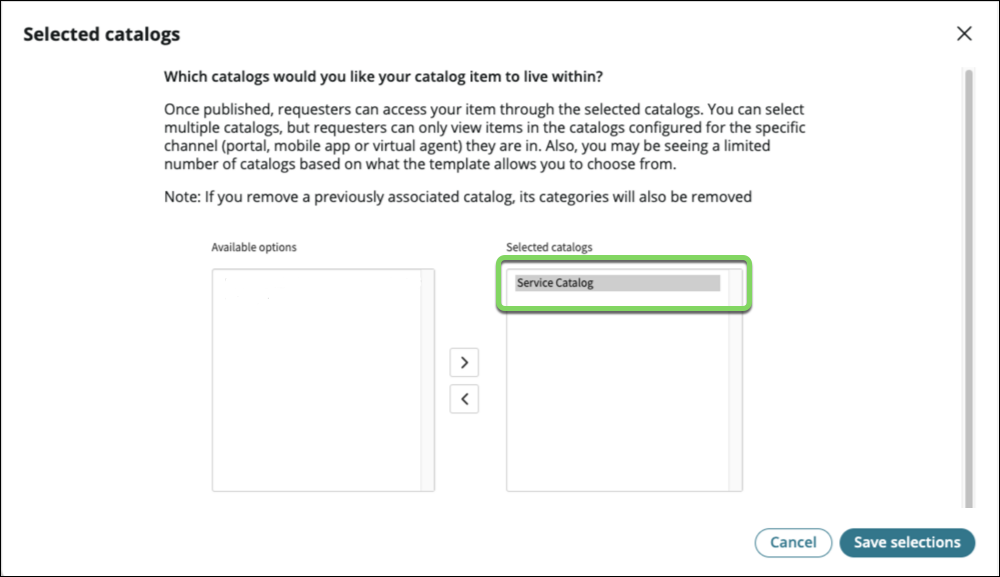
- Click on Service Catalog , then click on the right arrow to move the item over to the Selected list.
- At the bottom, Click on the button.
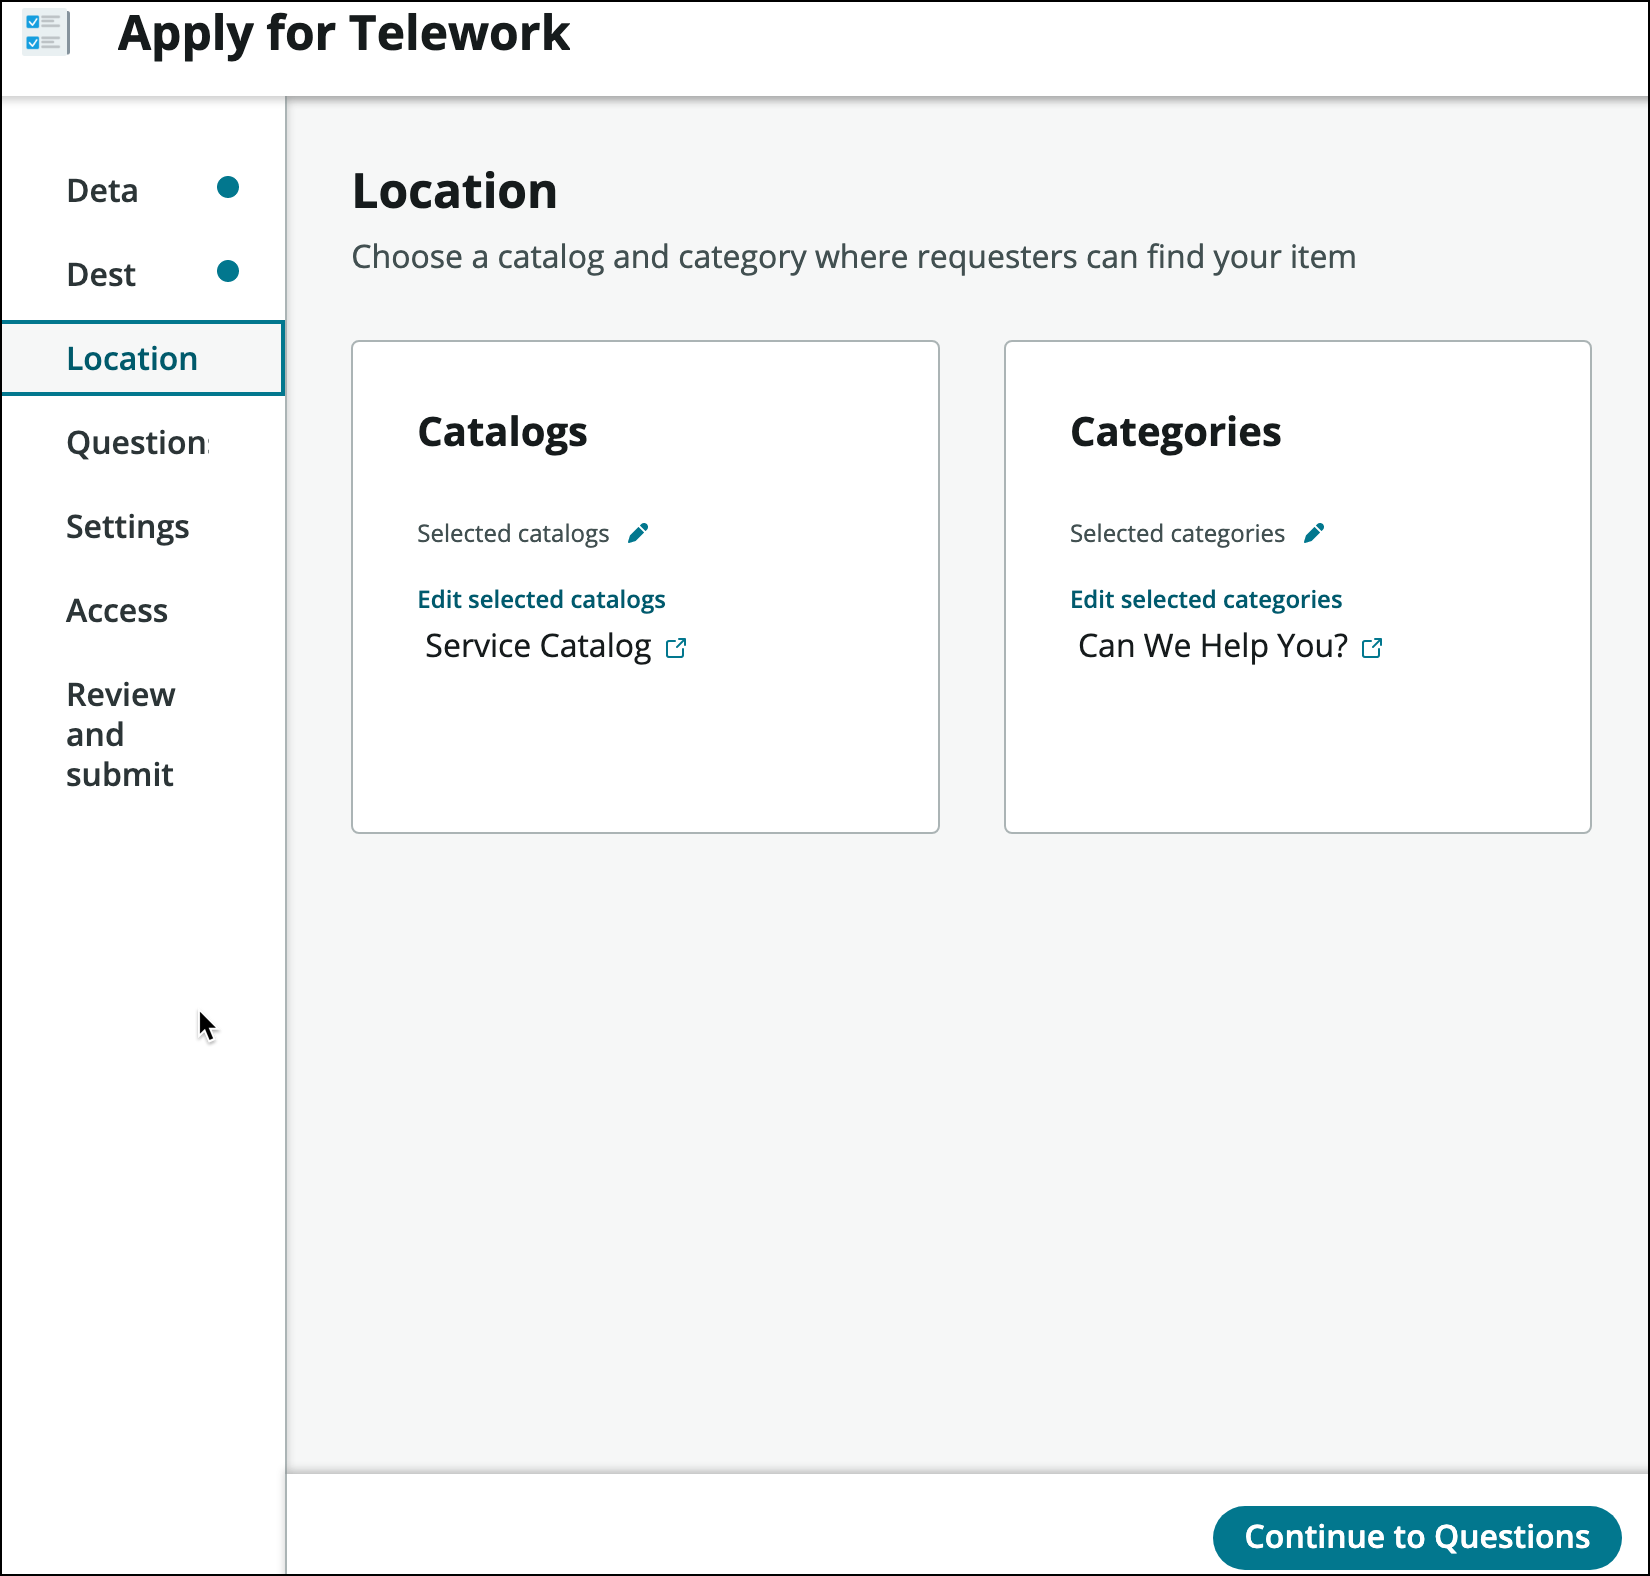
- Under Categories , click on Browse.
Move Can We Help You? to the right-hand side and Click on the button.
Your screen should look like below.
- Let's add questions to the form. Click the button.
Unlike in a paper-based form, we don't need to ask users to fill personal information like first name, last name, …, or date of request. That information will be automatically attached to the case. This makes filling forms so much faster.
- We want to allow users to open a case on behalf of another individual, so let's start by asking users " Who is this request for?" and " When do you need this?"
- Click on Questions.
- Click the arrow next to then click "Question set".
- Select "Standard Employee Questions" and click Submit.
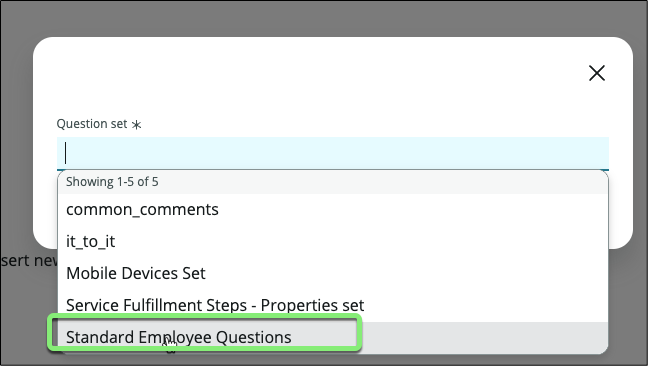
This will add two frequently asked questions on forms. Click the little arrow on the left to see the questions.

One key information we need users to provide is the type of arrangement they are applying for.
Click Insert new question.
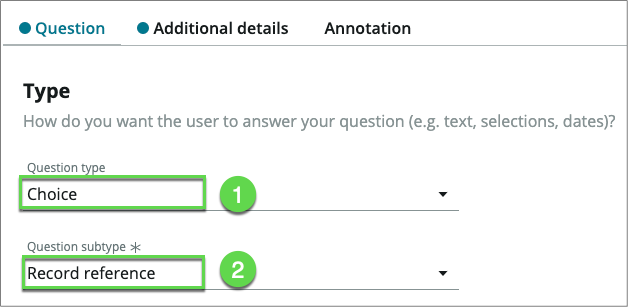
For Question type, select Choice.
For Question subtype , select Record reference.
Scroll down to the Details section.
In the Details section, enter the following information: (💡 double-click, copy & paste into the form).
Field Name Field Value 1 Map to a specific field Checked 2 Table field choose Arrangement 3 Question label What type of Telework arrangement are you applying for? 4 Mandatory Checked 5 Question Preview Notice on the right panel, then Question Preview shows what the question will look like to the user. infoNotice the Question Preview that shows what the question will look like to the user.
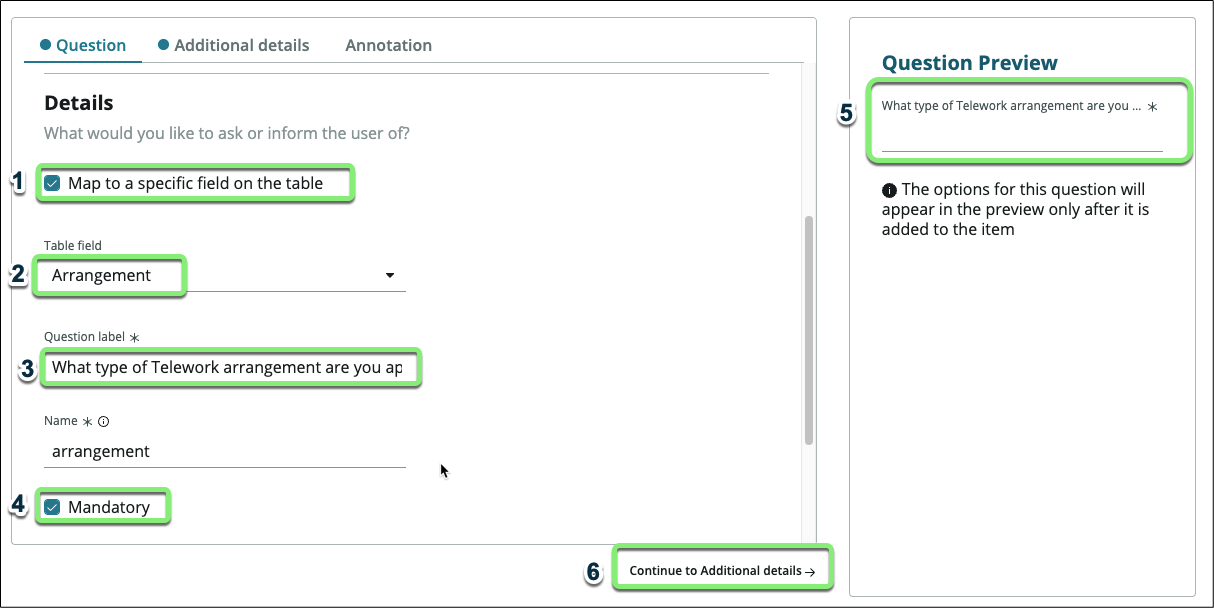
Click on Continue to Additional details →.
In the Additional details section, set the Source Table to the Arrangement table we imported earlier as options for this question.
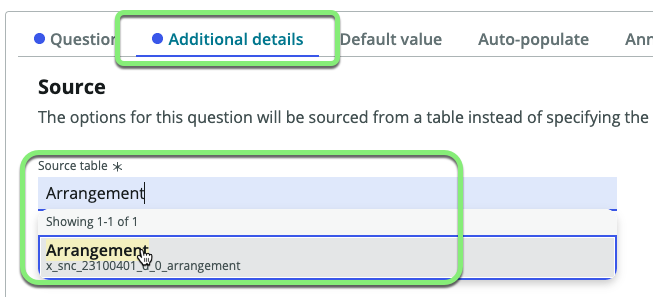
Then Click on the Annotation tab.
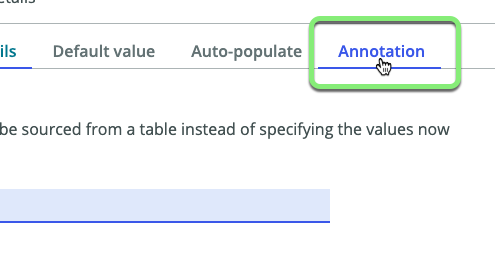
In the current process, the team is spending a lot of time correcting and manually re-routing applications due to people confusing the different types of Telework arrangement.
Let's fix that.
We'll use the Annotation tab to provide users with additional instructions for the question.Check the box Show instructions.
Open the file: telework form annotation.docx.
Copy all the text in the file ( ⌘ Cmd or CTRL+A, CTRL+C )
Paste it into the Annotation section of the Telework Form (⌘ Cmd or CTRL+V ). You can choose to either keep or remove formatting.
Click on the button.
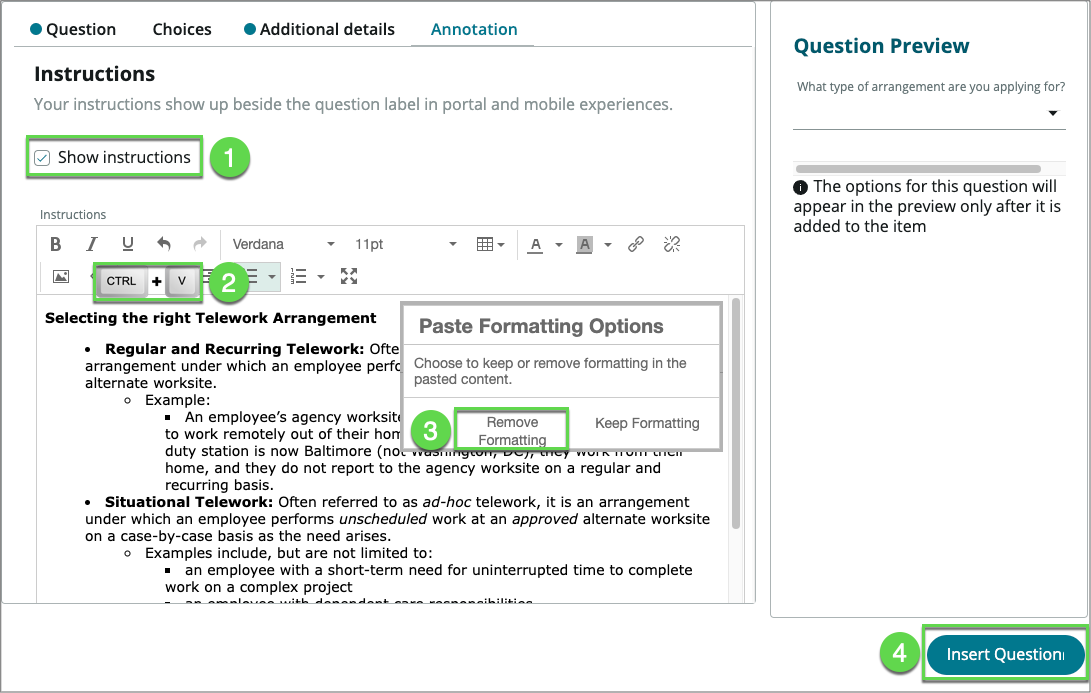
- Back to the main form, Click on the button.

When users select the arrangement type Situational , we'll prompt them for the number of days per week.
- Set the following values in the Type section:
Field Name Field Value Question type Text Question subtype Single line 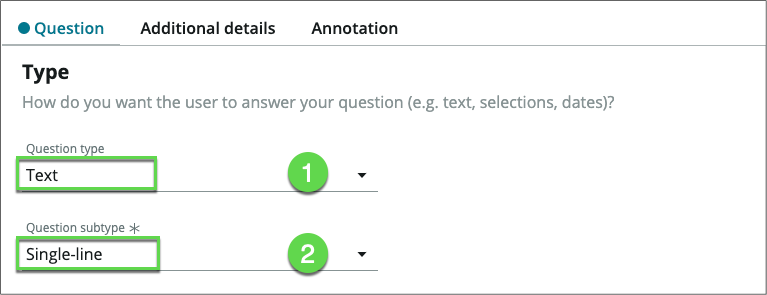
Scroll down to the Details section.
In the Details section, enter the following information: (💡 double-click, copy & paste into the form).
Field Name Field Value Map to a specific field Checked Table field Days per week Question label Number of Days per Week? Name days_per_week - Click on Additional details.
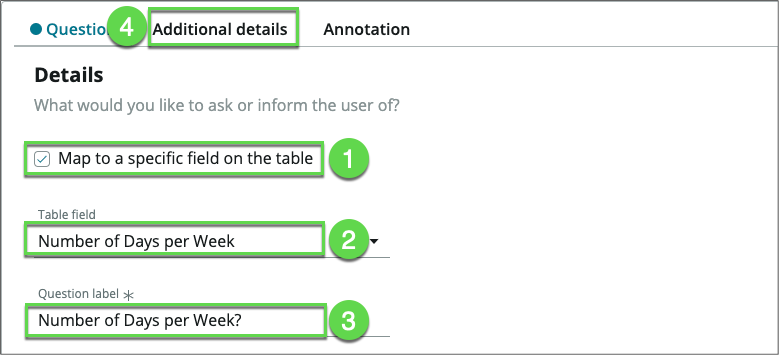
In the Additional details section, for the Text validation field, select Number.
Click on the button.
- Set the following values in the Type section:
Back on the Questions page, we're going to define the dynamic behavior of the question "Number of Days per week?" based on the answer to the previous question "What type of Telework...?"
- For the question "Number of Days per Week?", click on the behavior icon, then click Define new behavior.

- In the Actions tab, we'll specify the behavior we need:
Field Name Field Value Make the question mandatory Yes Make the question visible Yes 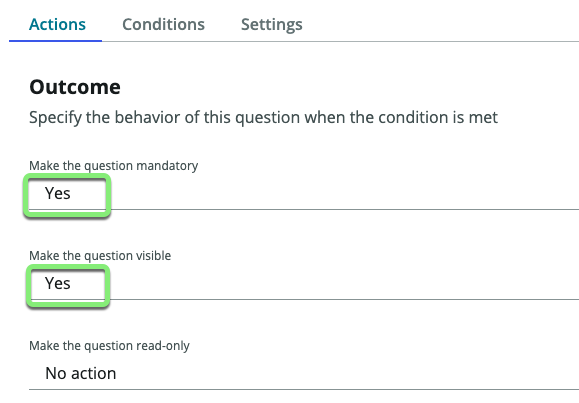
- Click on the Conditions tab.
- Set the Dynamic Behavior Condition filter to
arrangement is Situational Telework 
- Click on the button in the bottom right.
This will create a UI effect where the "Number of Days per Week" field will only appear when "What type of Telework arrangement are you apply for?" is "Situational Telework".
Back on the Questions page, we're going to ask for the reason for Teleworking. Click on .
- In the Type section set the following values:
Field Name Field Value Question type Choice Question subtype Dropdown (fixed values) 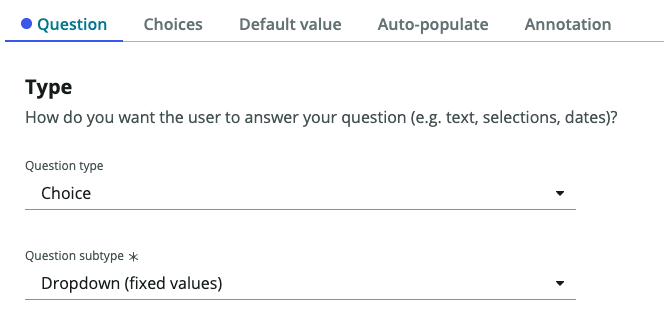
Scroll down to the Details section.
In the Details section, enter the following information: (💡 Copy & paste into the form).
Field Name Field Value Map to a specific field Checked Table field Reason Question label What is the reason for Teleworking? Name reason Mandatory Checked 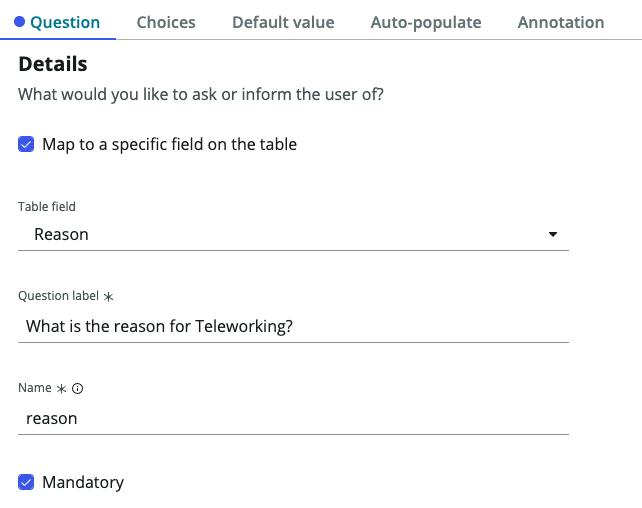
- Click on Continue to Choices.
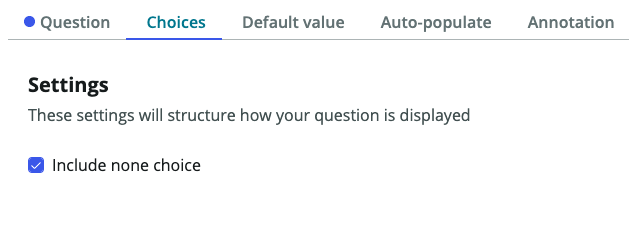
- Check Include none choice.
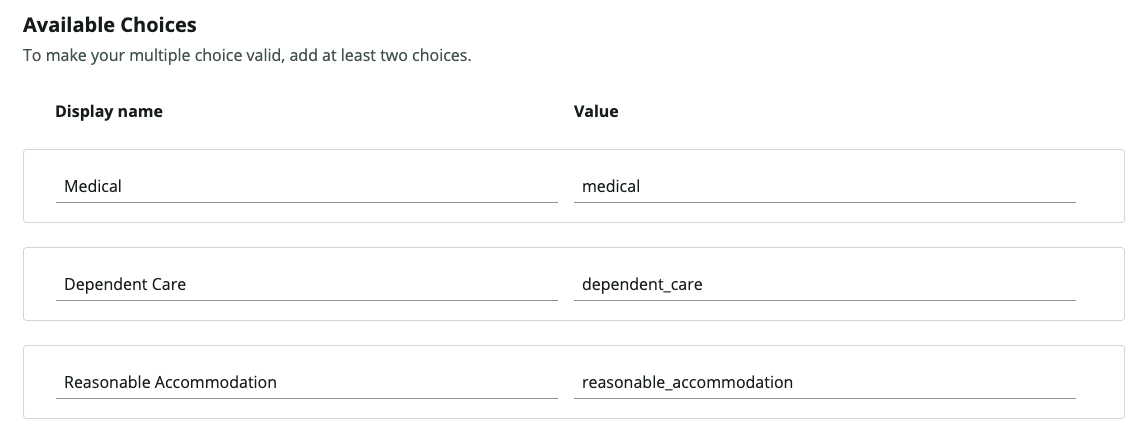
- In the Available choices section, click the + to insert a new choice. Add the following choices. (💡 Type in the Display Name and the value is created for you).


Display Name Value Medical medical Dependent Care dependent_care Reasonable Accommodation reasonable_accommodation Should look like this when complete:
- Click in the bottom right.
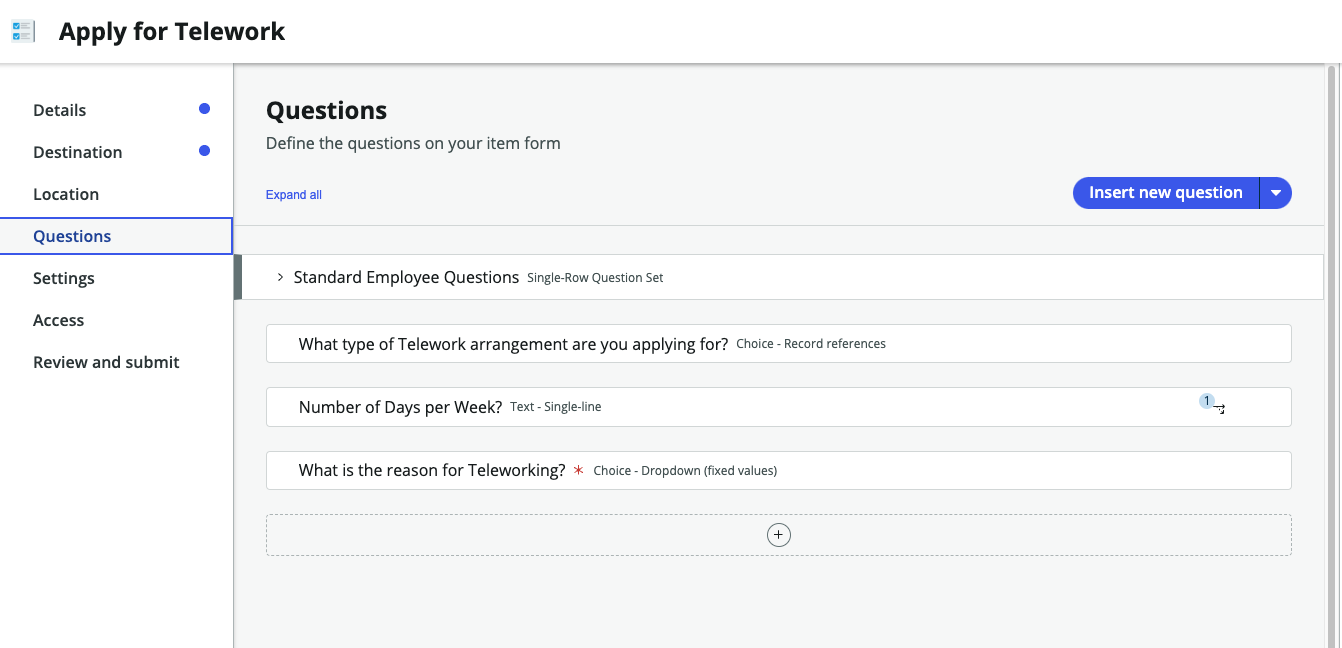
Your screen should now look like this:
Back to the questions page:
- Click .
- Click .
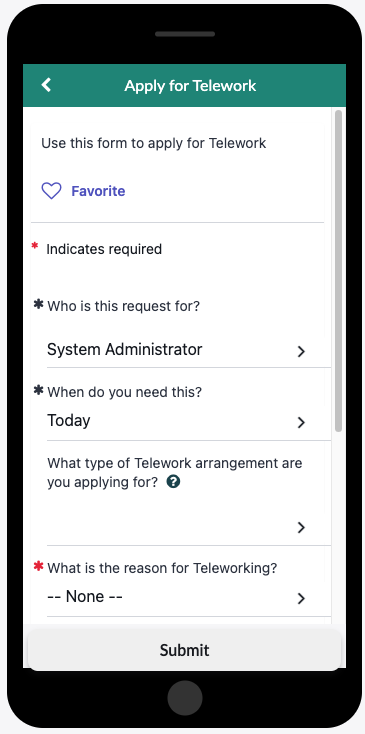
The Preview page allows to visualize what our form will look like in different experiences. (You can interact with the item but not submit it).
Portal Now Mobile 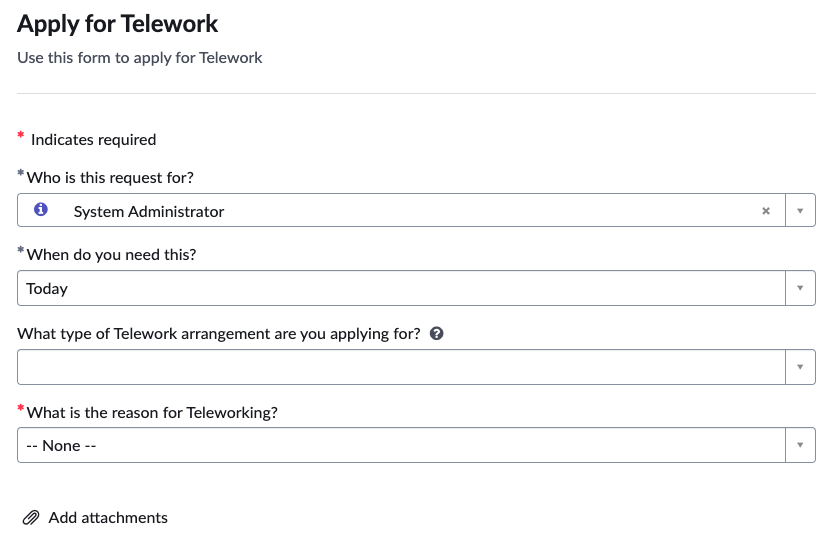
- Close the Preview by clicking on the X on the top right.
If you want to preview your catalog item in the Virtual Agent you will need to activate the plugins_ _ Glide Virtual Agent and Service Management Virtual Agent Topic Blocks. Additional setup beyond that is required to get NLU to perform a topic conversation via the Virtual Agent. Feel free to experiment this after completing the entire lab.
Let's publish the form to the Service Portal.
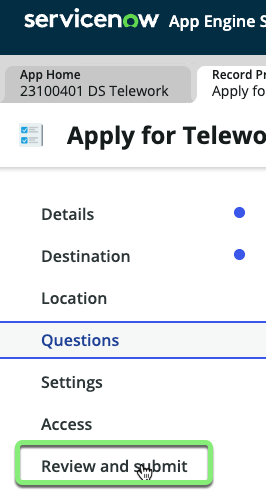
- Click on Review and Submit.
- Click in the bottom right.
- Congratulations! The form is published on your development instance.
Click .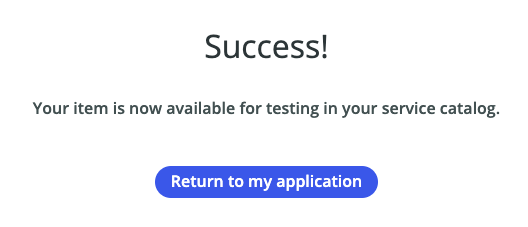
Let's see how users can easily find it on the Service Portal
- Go to the browser tab with ServiceNow Admin Home page.

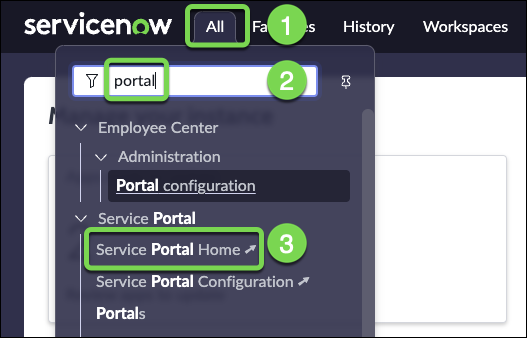
- Open the Service Portal by doing the following:
- Click All.
- Type Portal.
- Click on Service Portal Home.
- In the portal, search for "Telework"
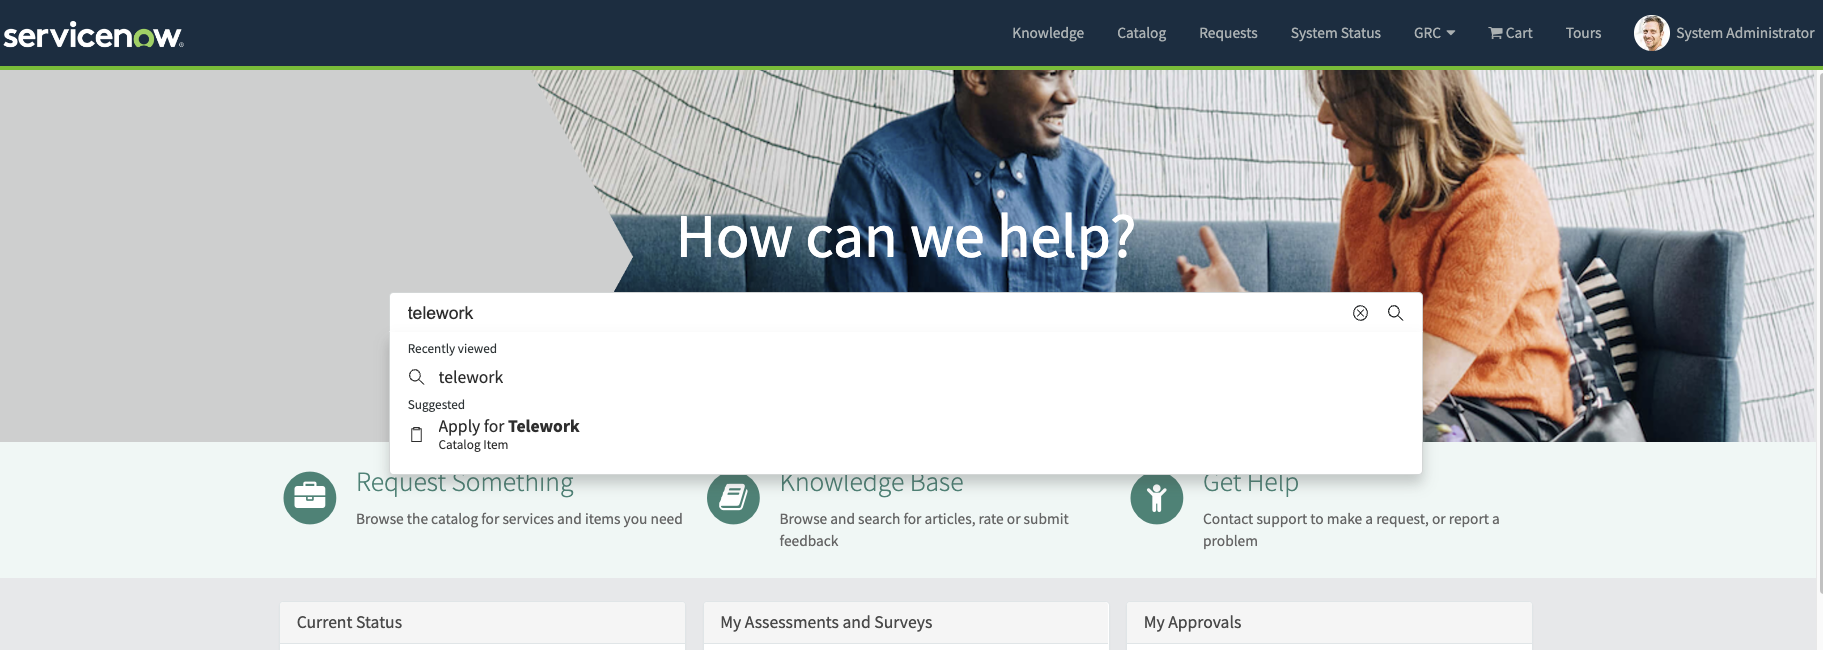
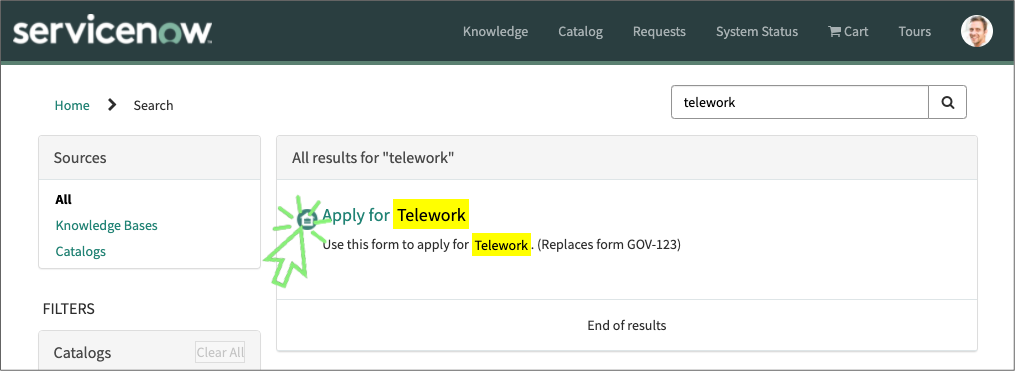
The catalog item is found.
- Click on the item to Apply for Telework.
In the Details section, enter the following information: (💡 double-click, copy & paste into the form).
Step Field Name Field Value 1 Who is this request for? David Loo 2 When do you need this? This week 3 What type of Telework arrangement are you applying for? Situational Telework 4 Number of days per week? 3 5 What is the reason for Teleworking? Dependent Care 6 Click on the button. 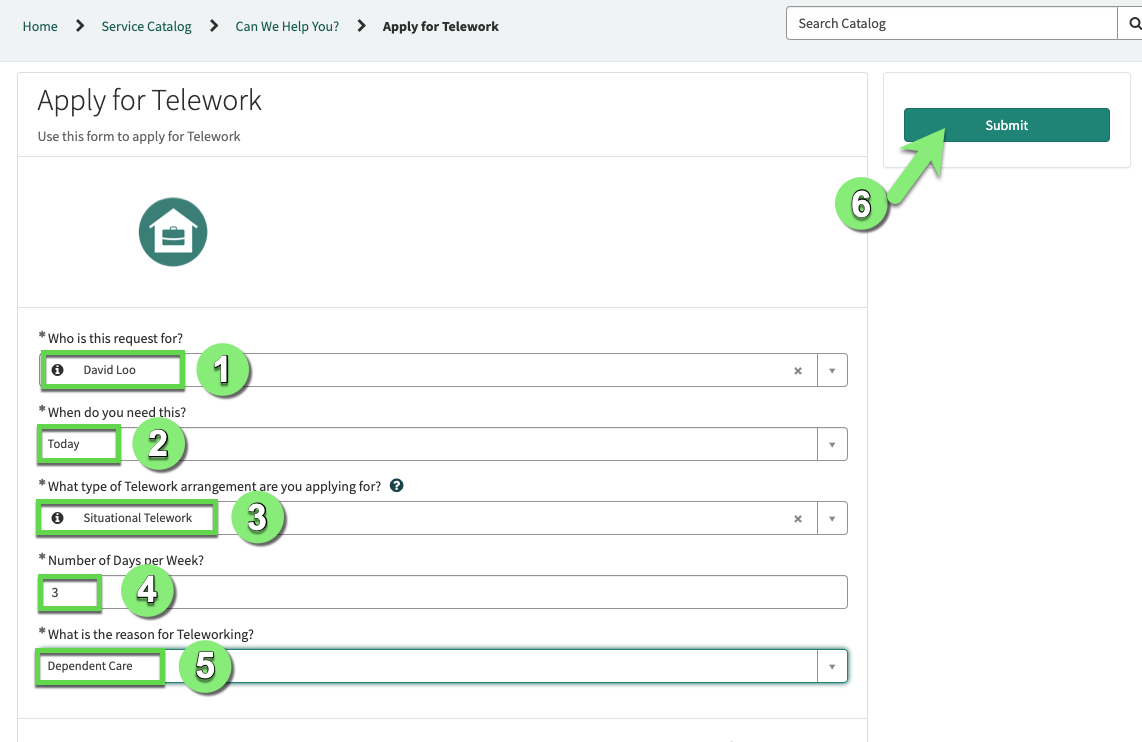
Exercise Recap
In this exercise, we learned how to use App Engine Studio (AES) to easily create customized Catalog Items that users can access in Service Portal and on mobile devices.
Our next exercise will focus on taking the building blocks created to this point and making them actionable to drive automation and process optimization