Department Request Record Producer
Introduction
Now that we have a data model created and our workspace experience ready to go, let's create some record producers so we can start getting some data into those tables. You can think of a record producer as an end user facing form to collect all necessary data to complete a request, address an issue, or answer an inquiry.
Let's start
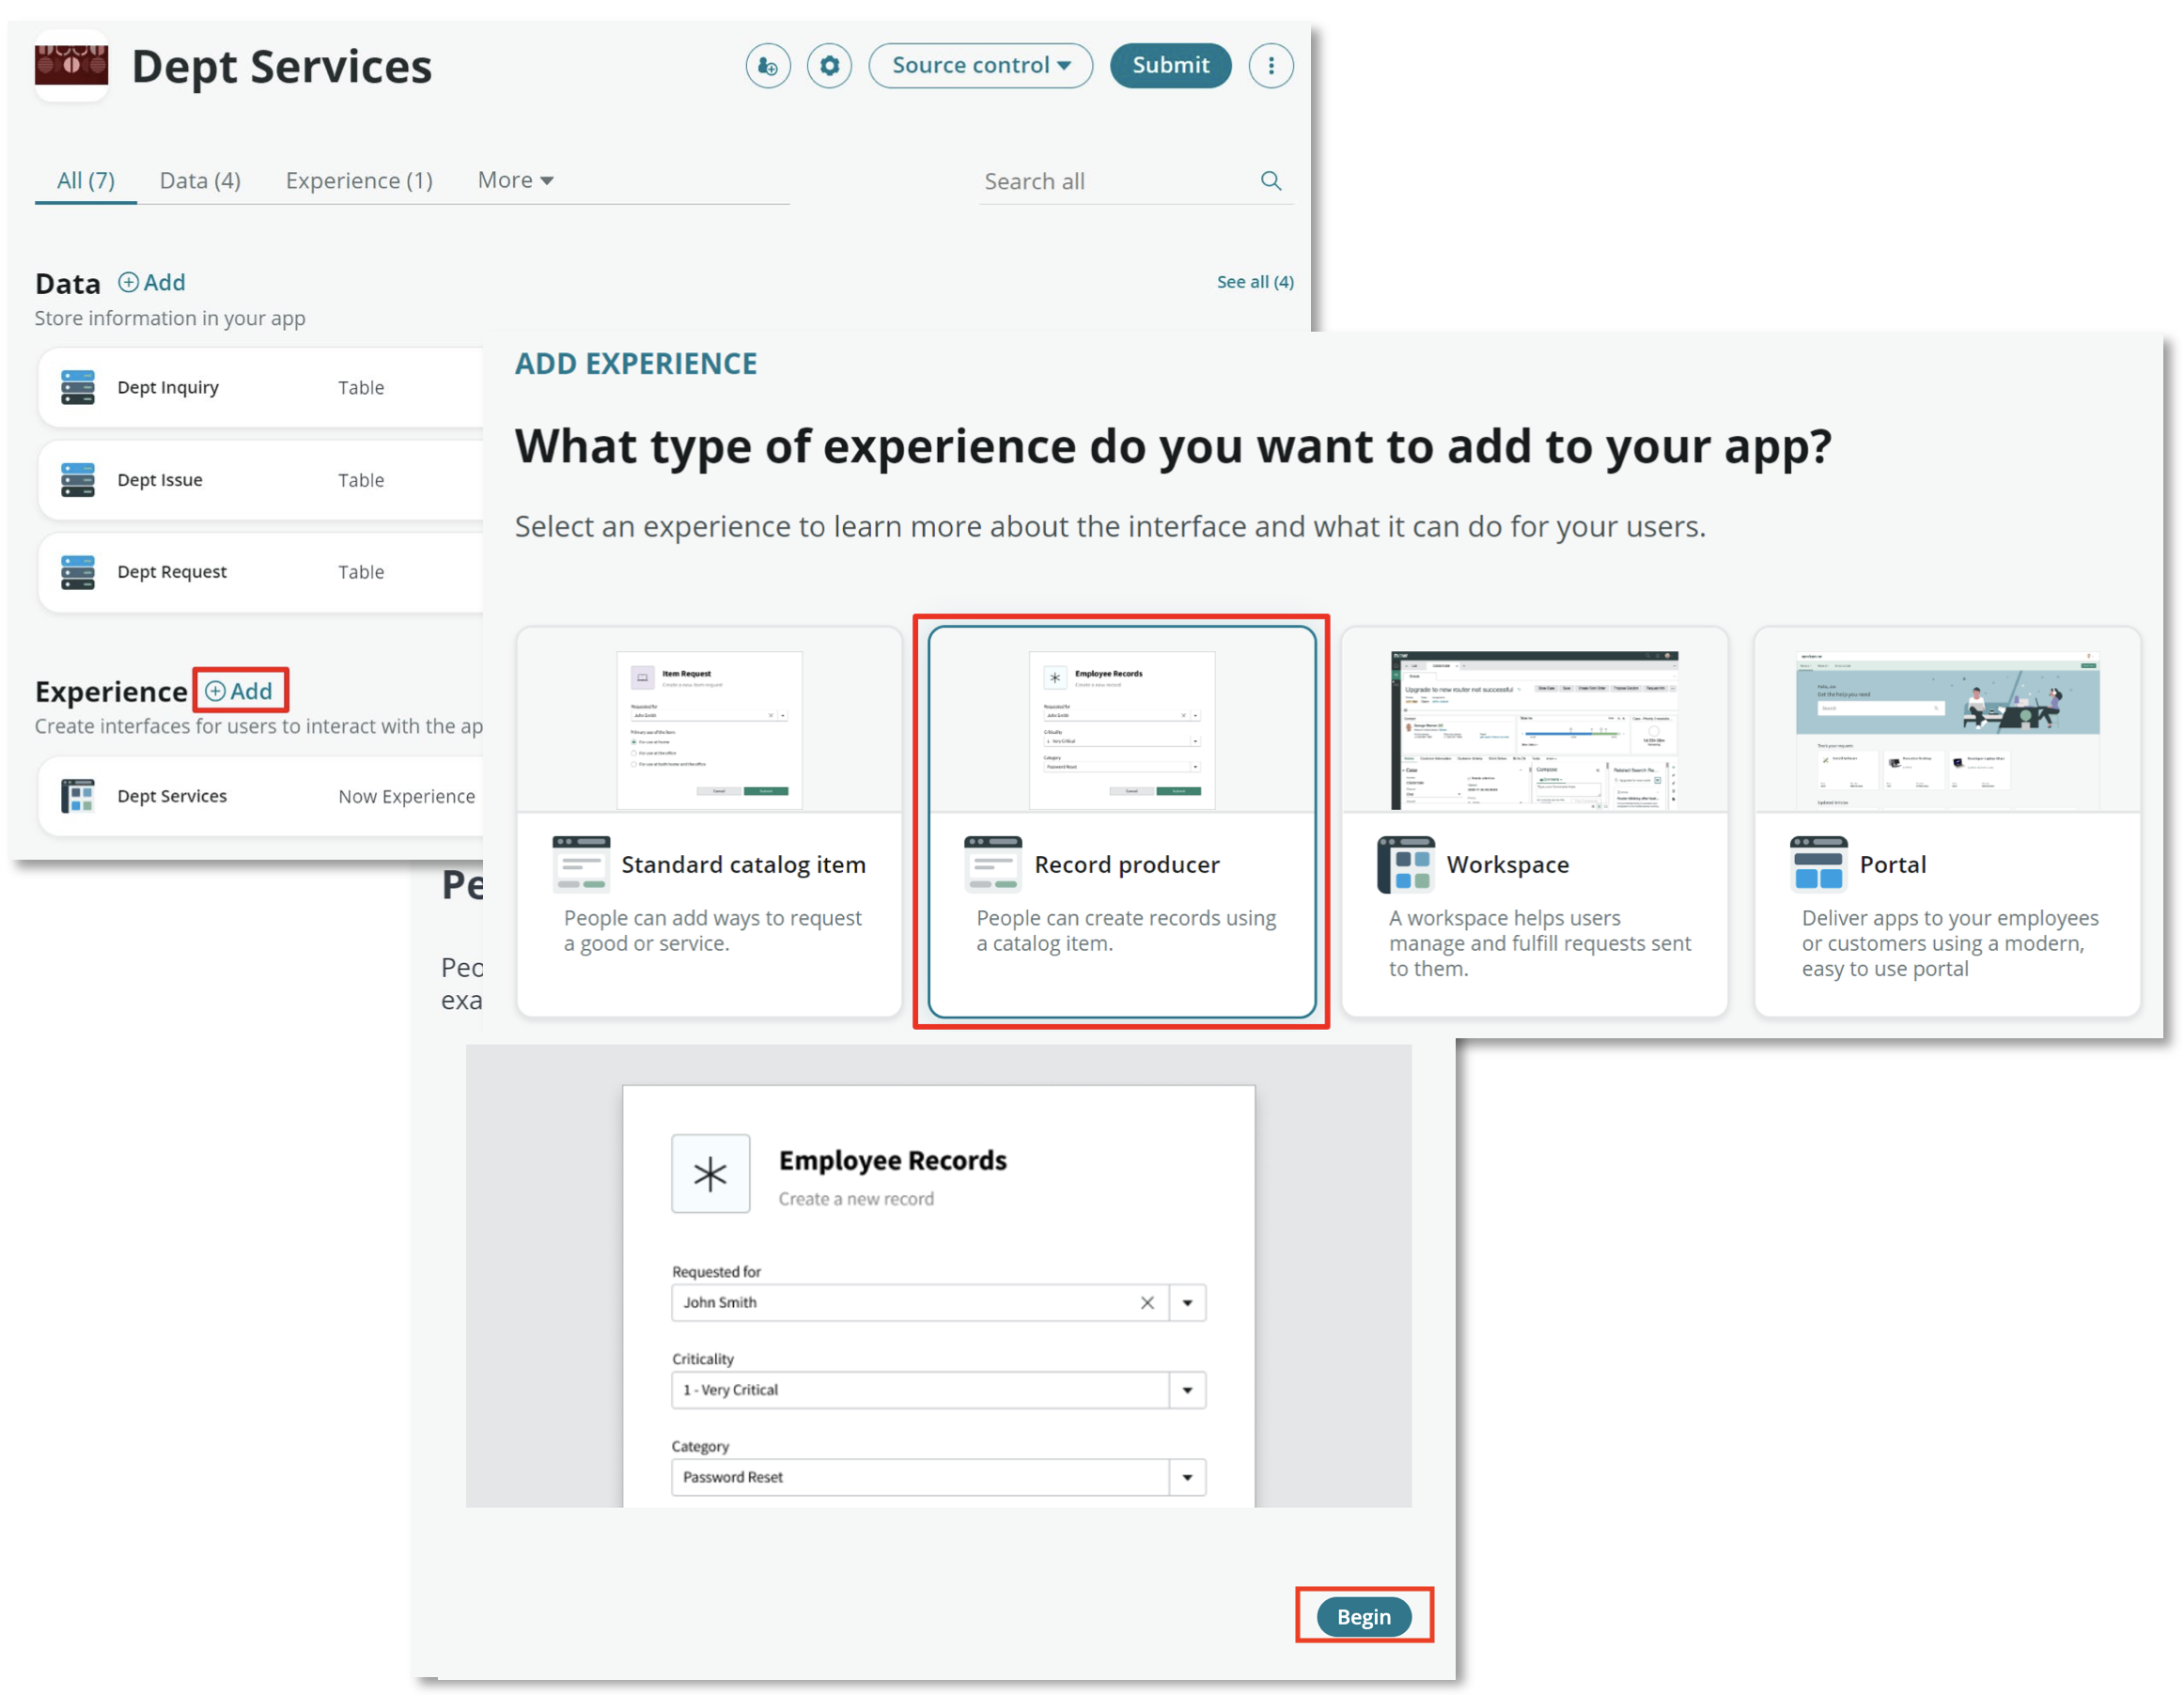
- Select the (+) Add link in the Experience Section Select the Record Producer experience Then select Begin on the confirmation screen
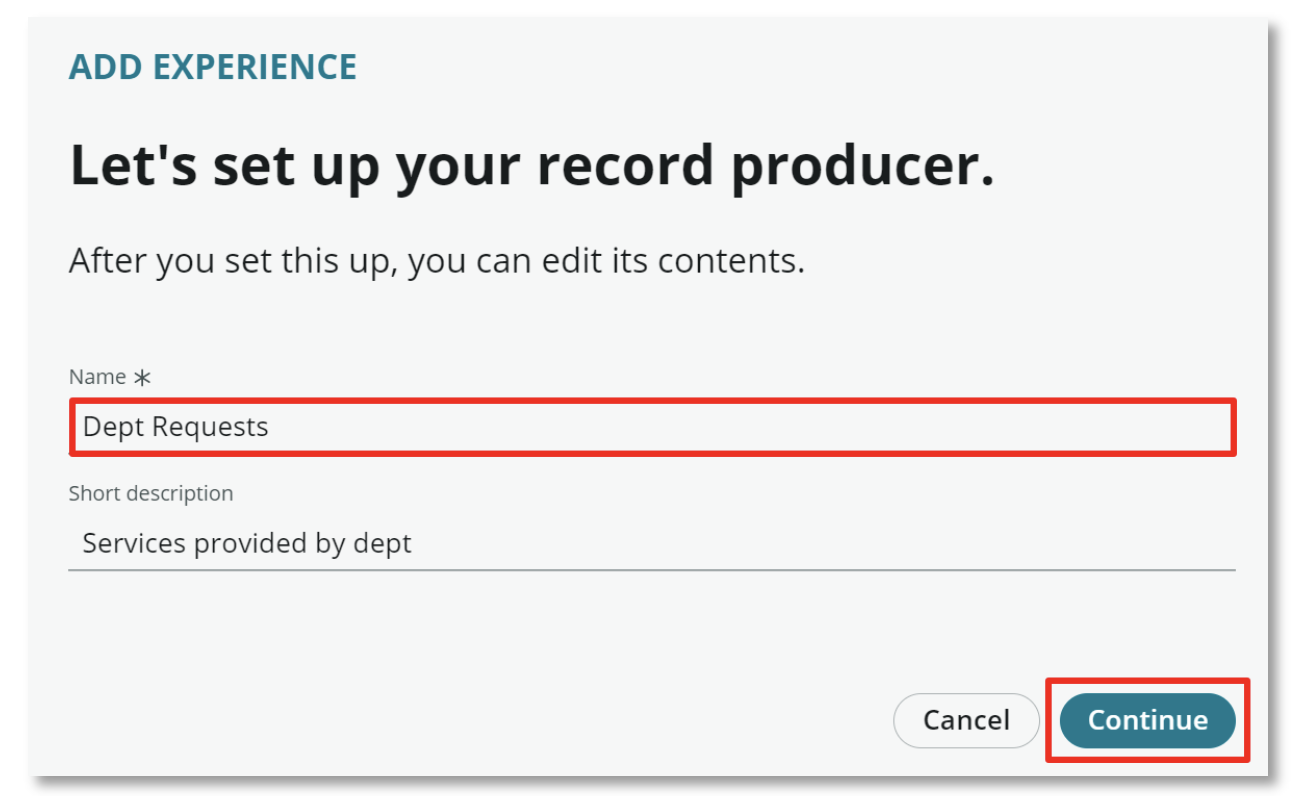
- Enter Dept Requests in the name field and provide a Short Description Select Continue
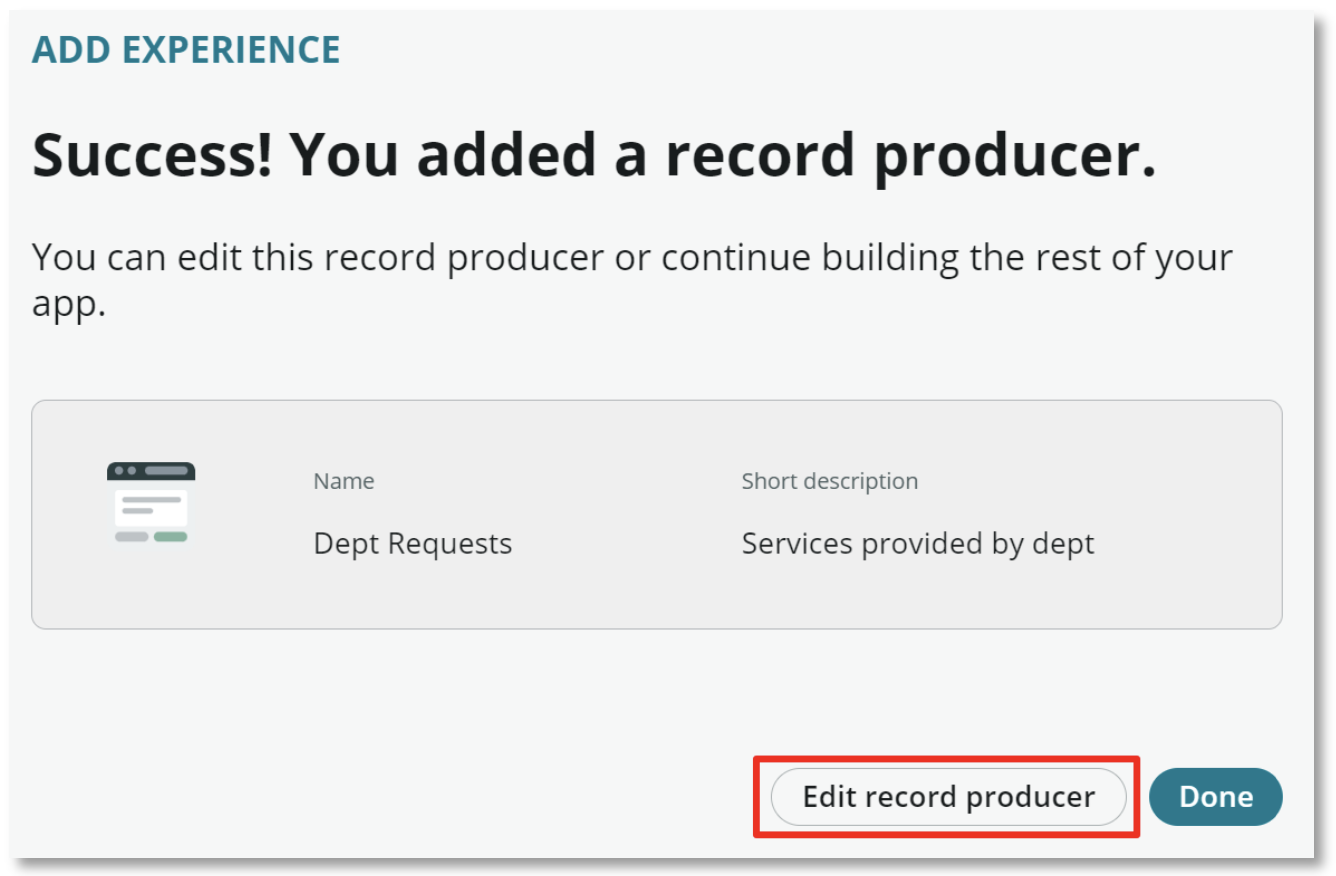
- Select Edit record producer
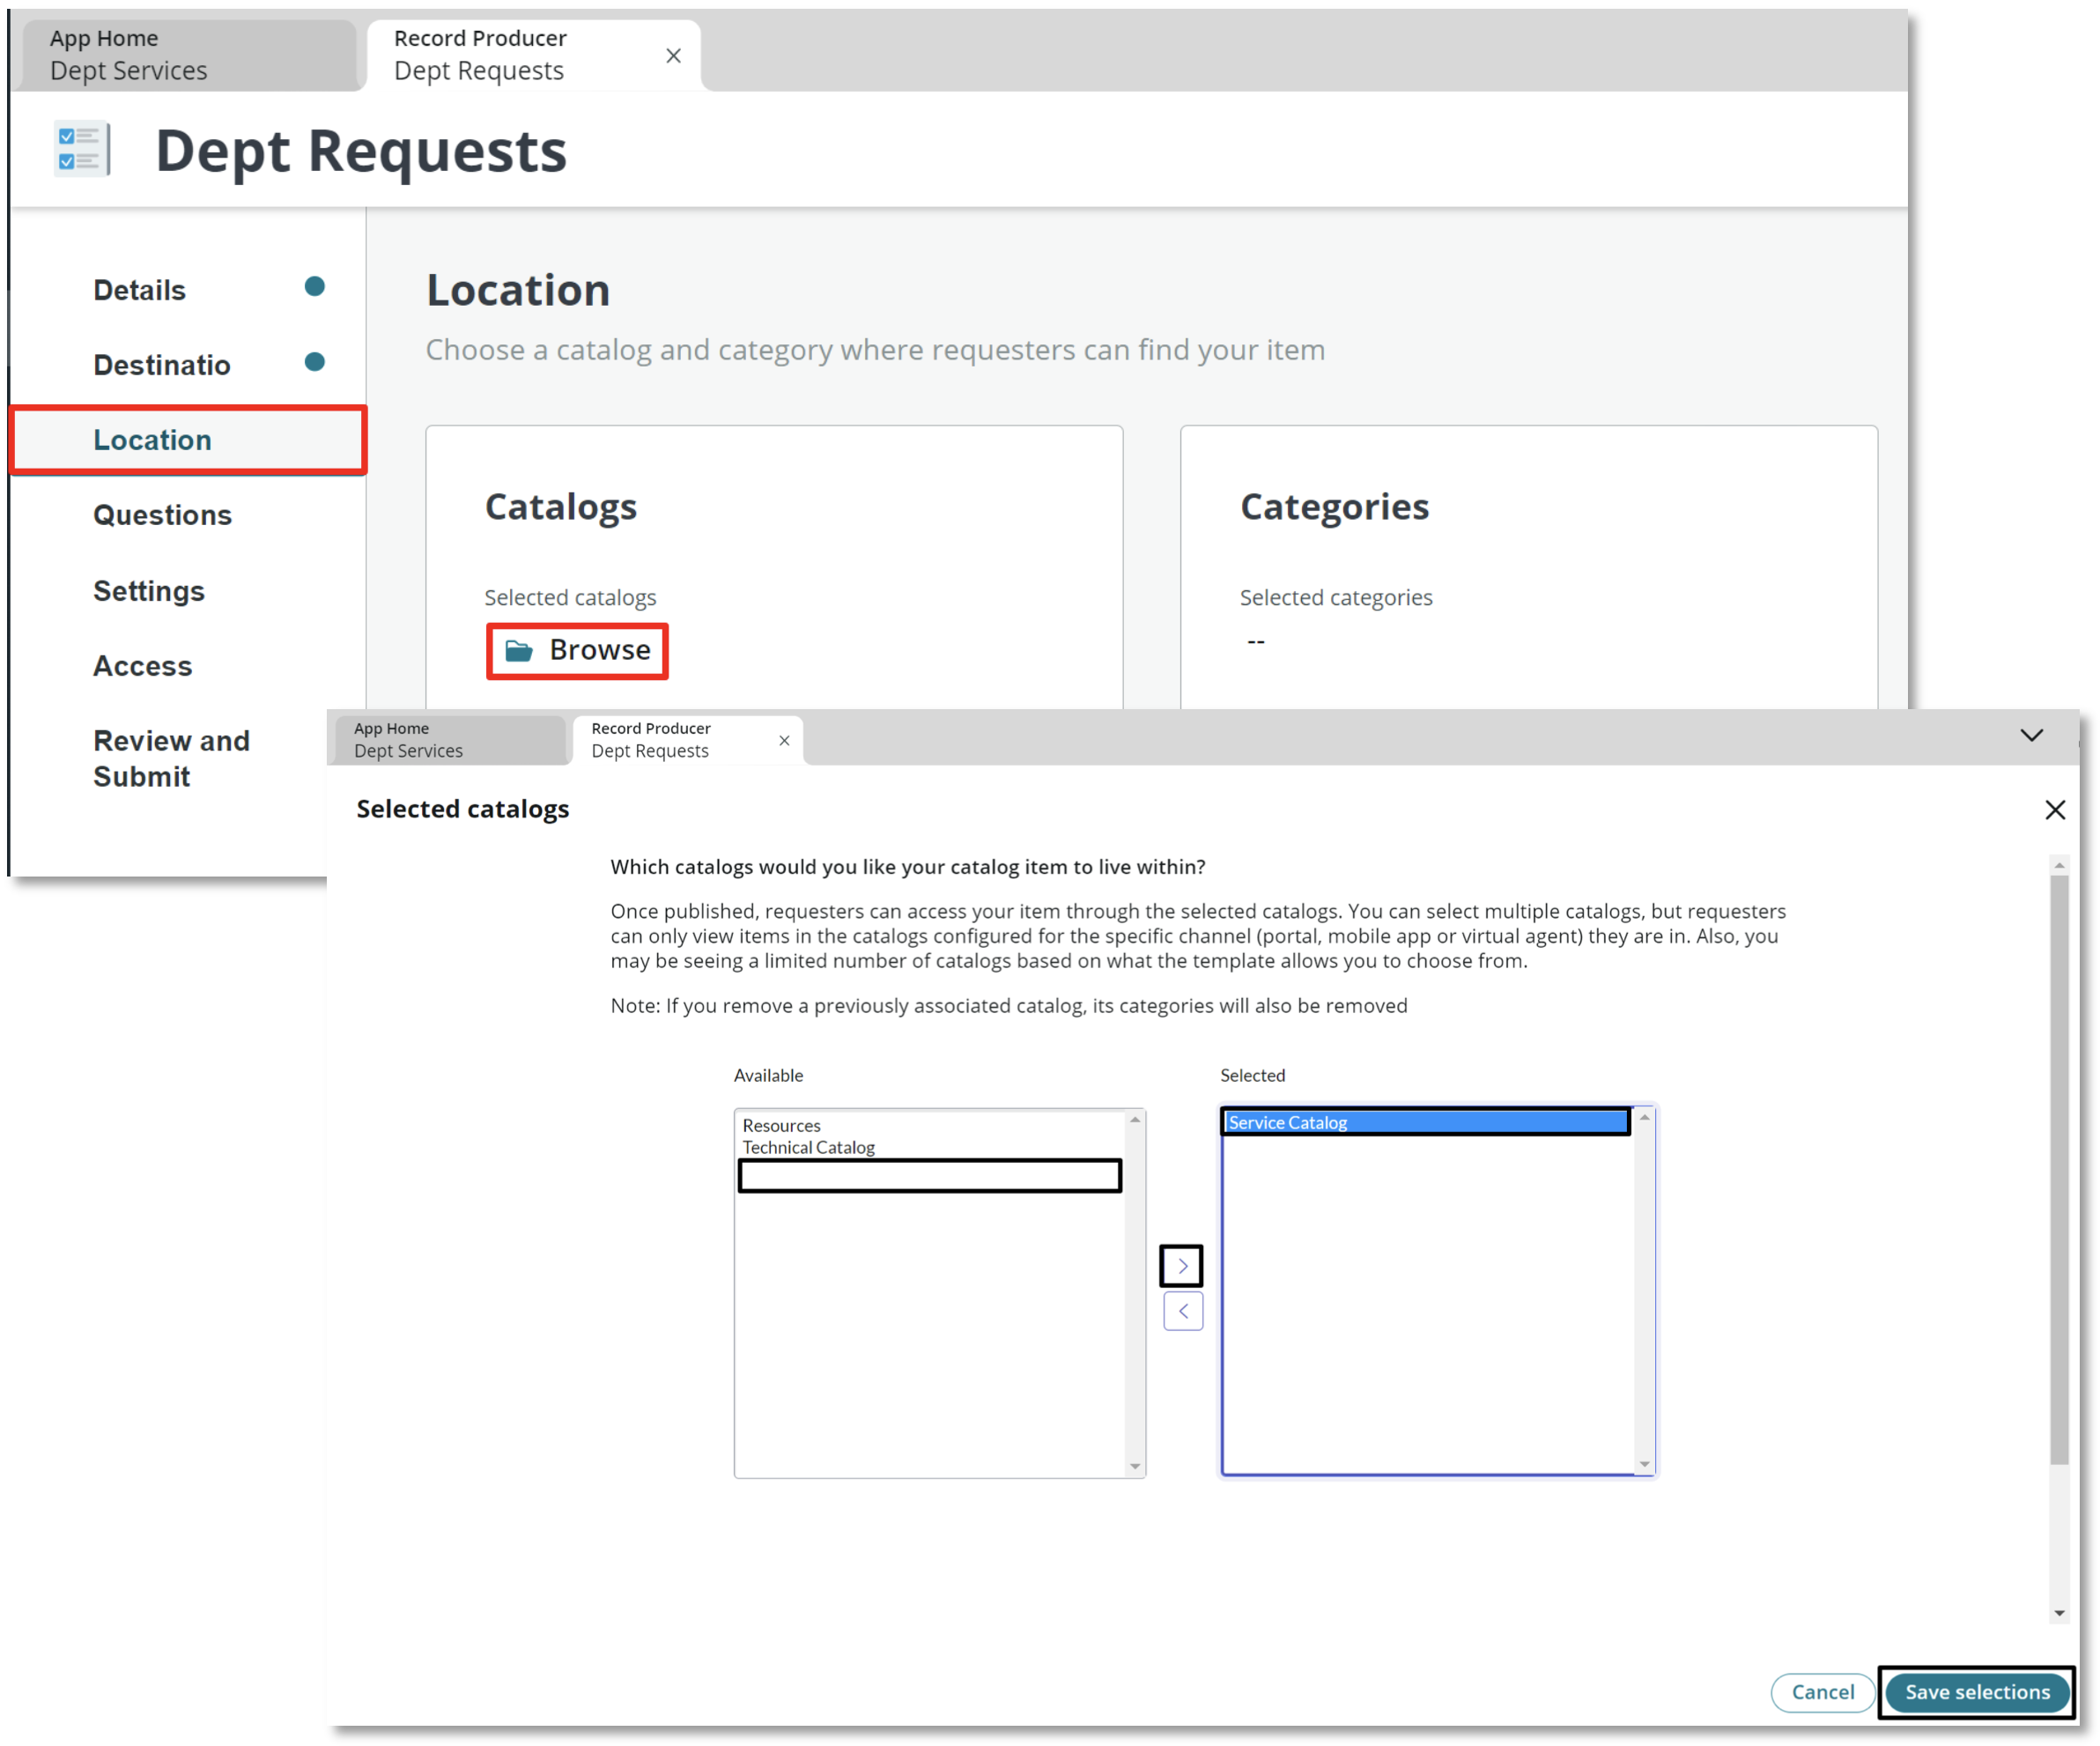
- Select Destination on the left. Set the Record submission table field to Dept Request

- Select the Location link on the left and then the Browse link\ Move Service Catalog from Available to Selected\ Select Save selections
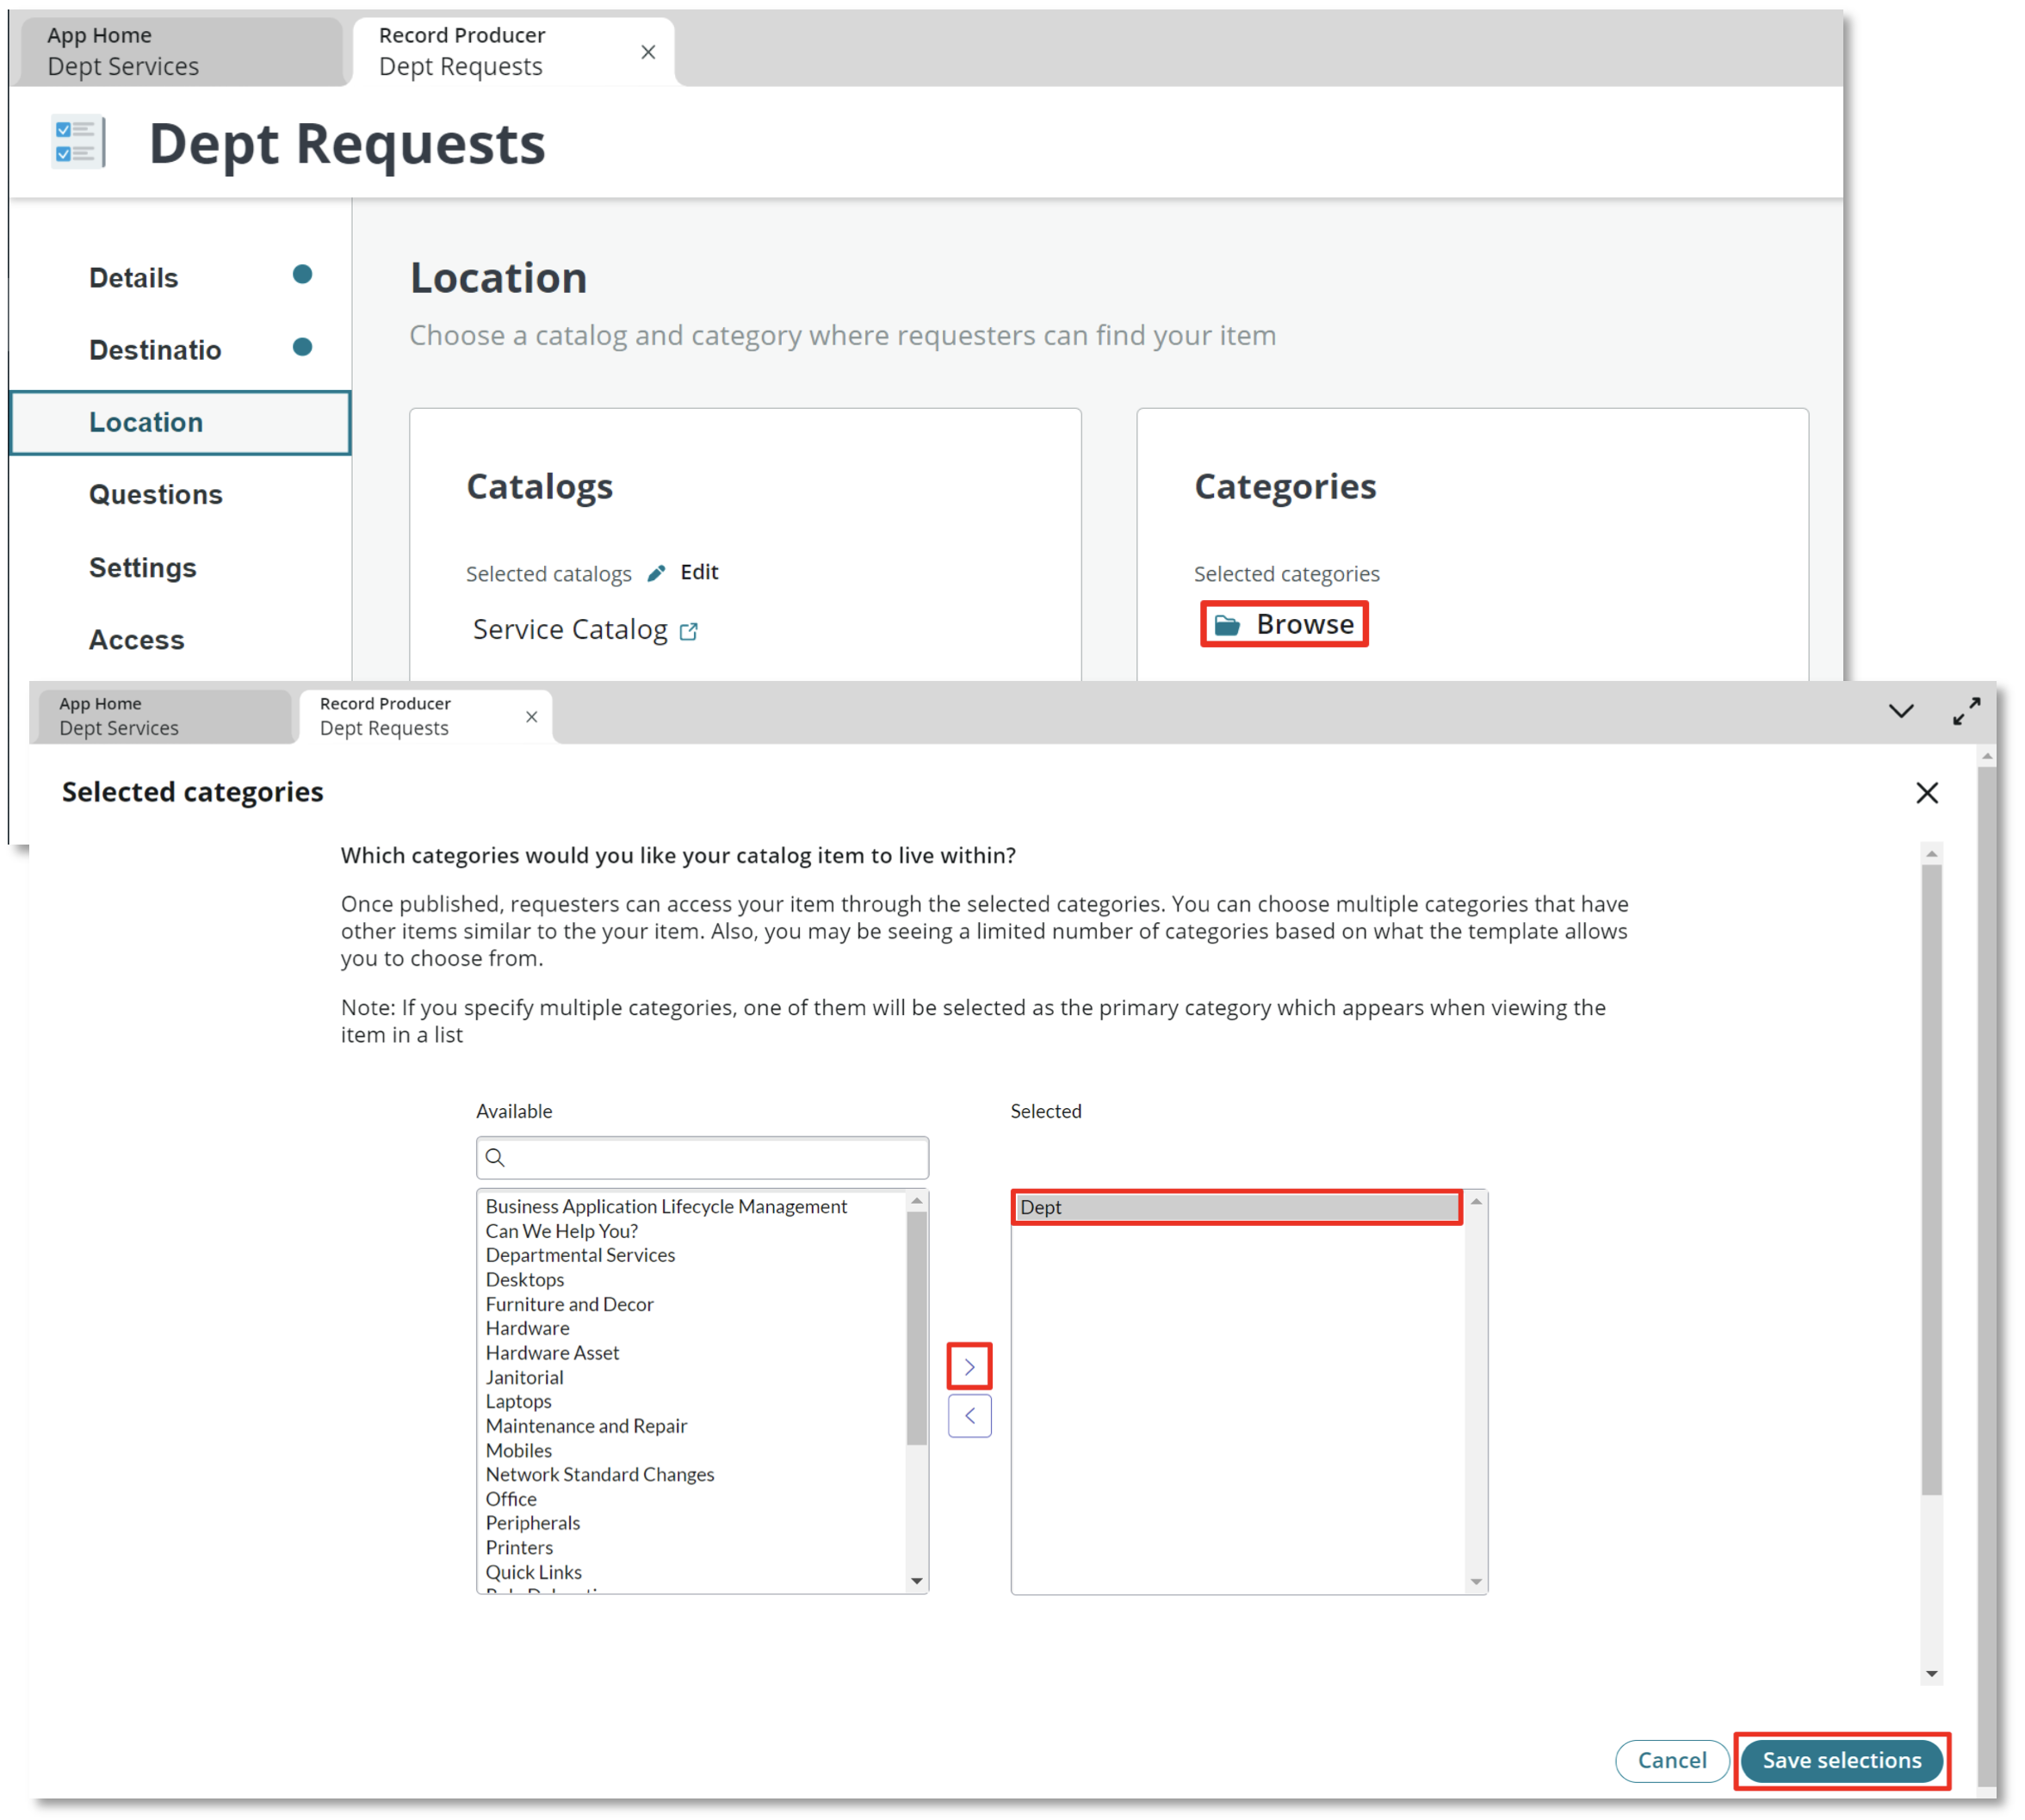
- Select Browse in the Categories section\ Move Dept from Available to Selected\ Select Save selections
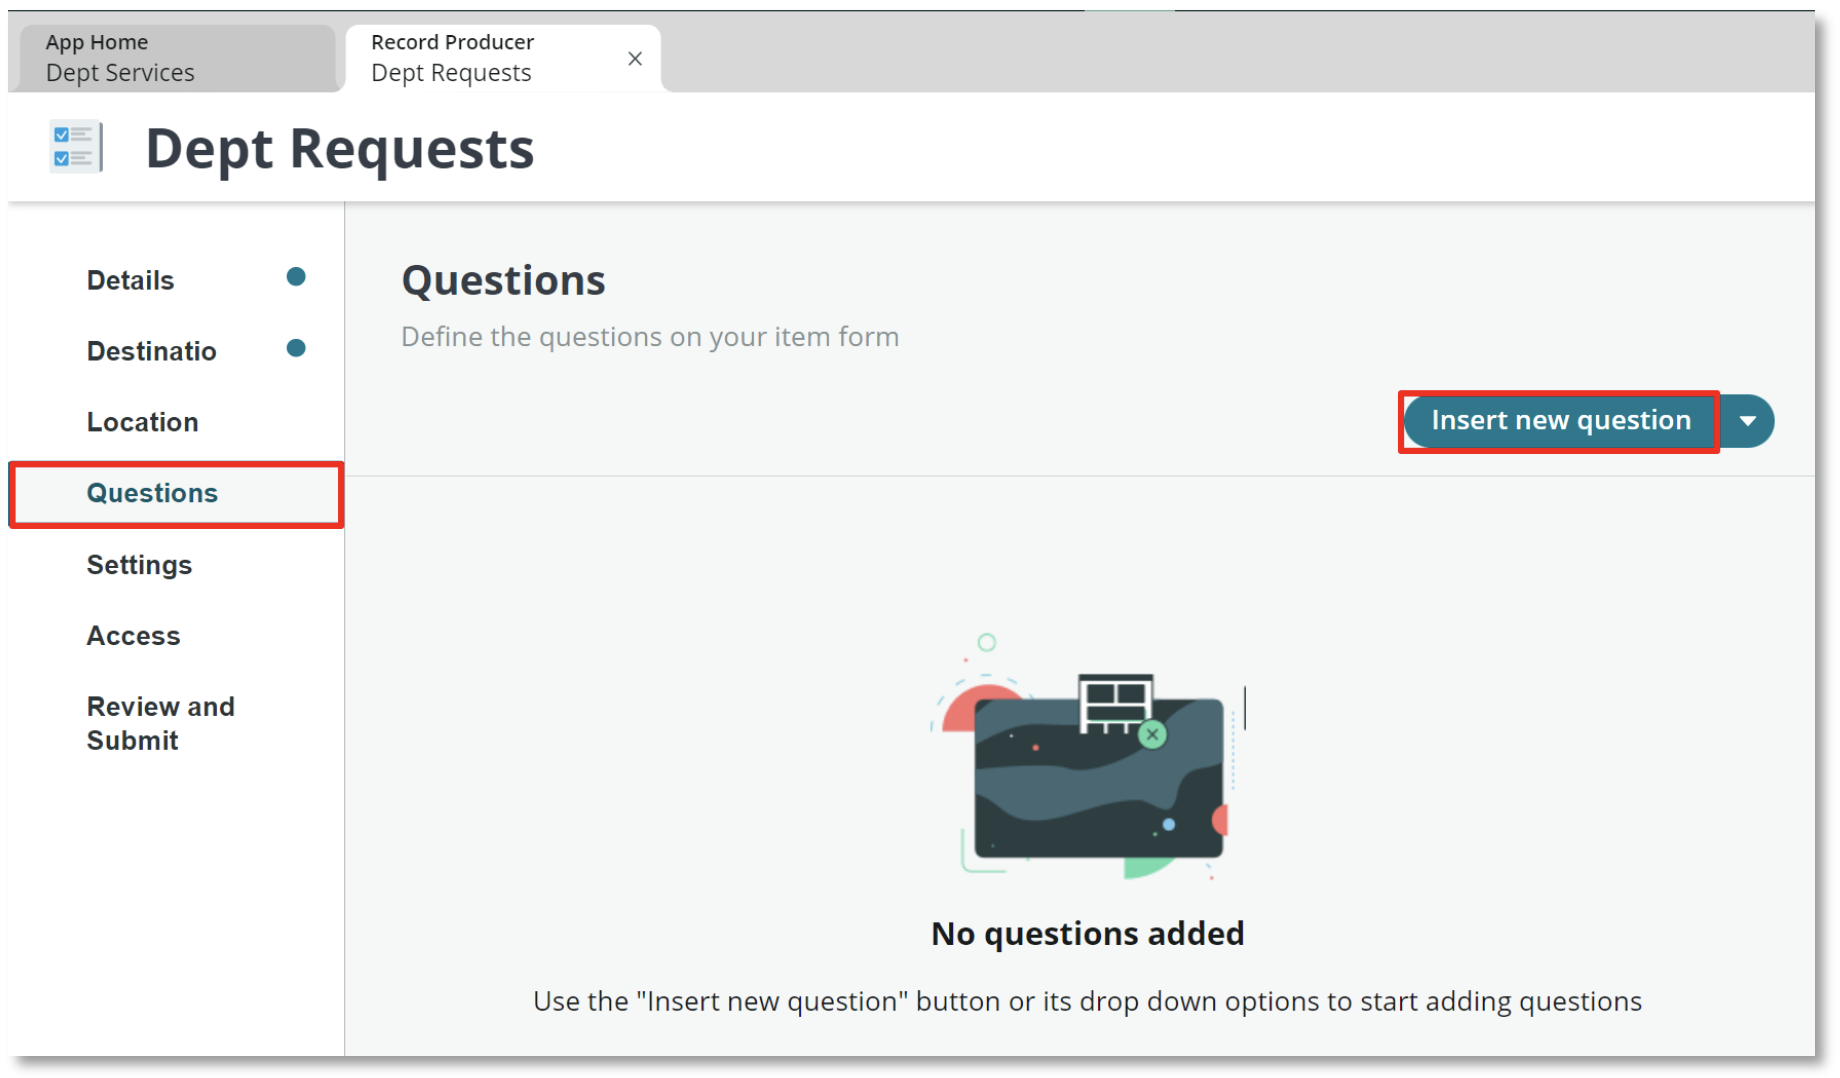
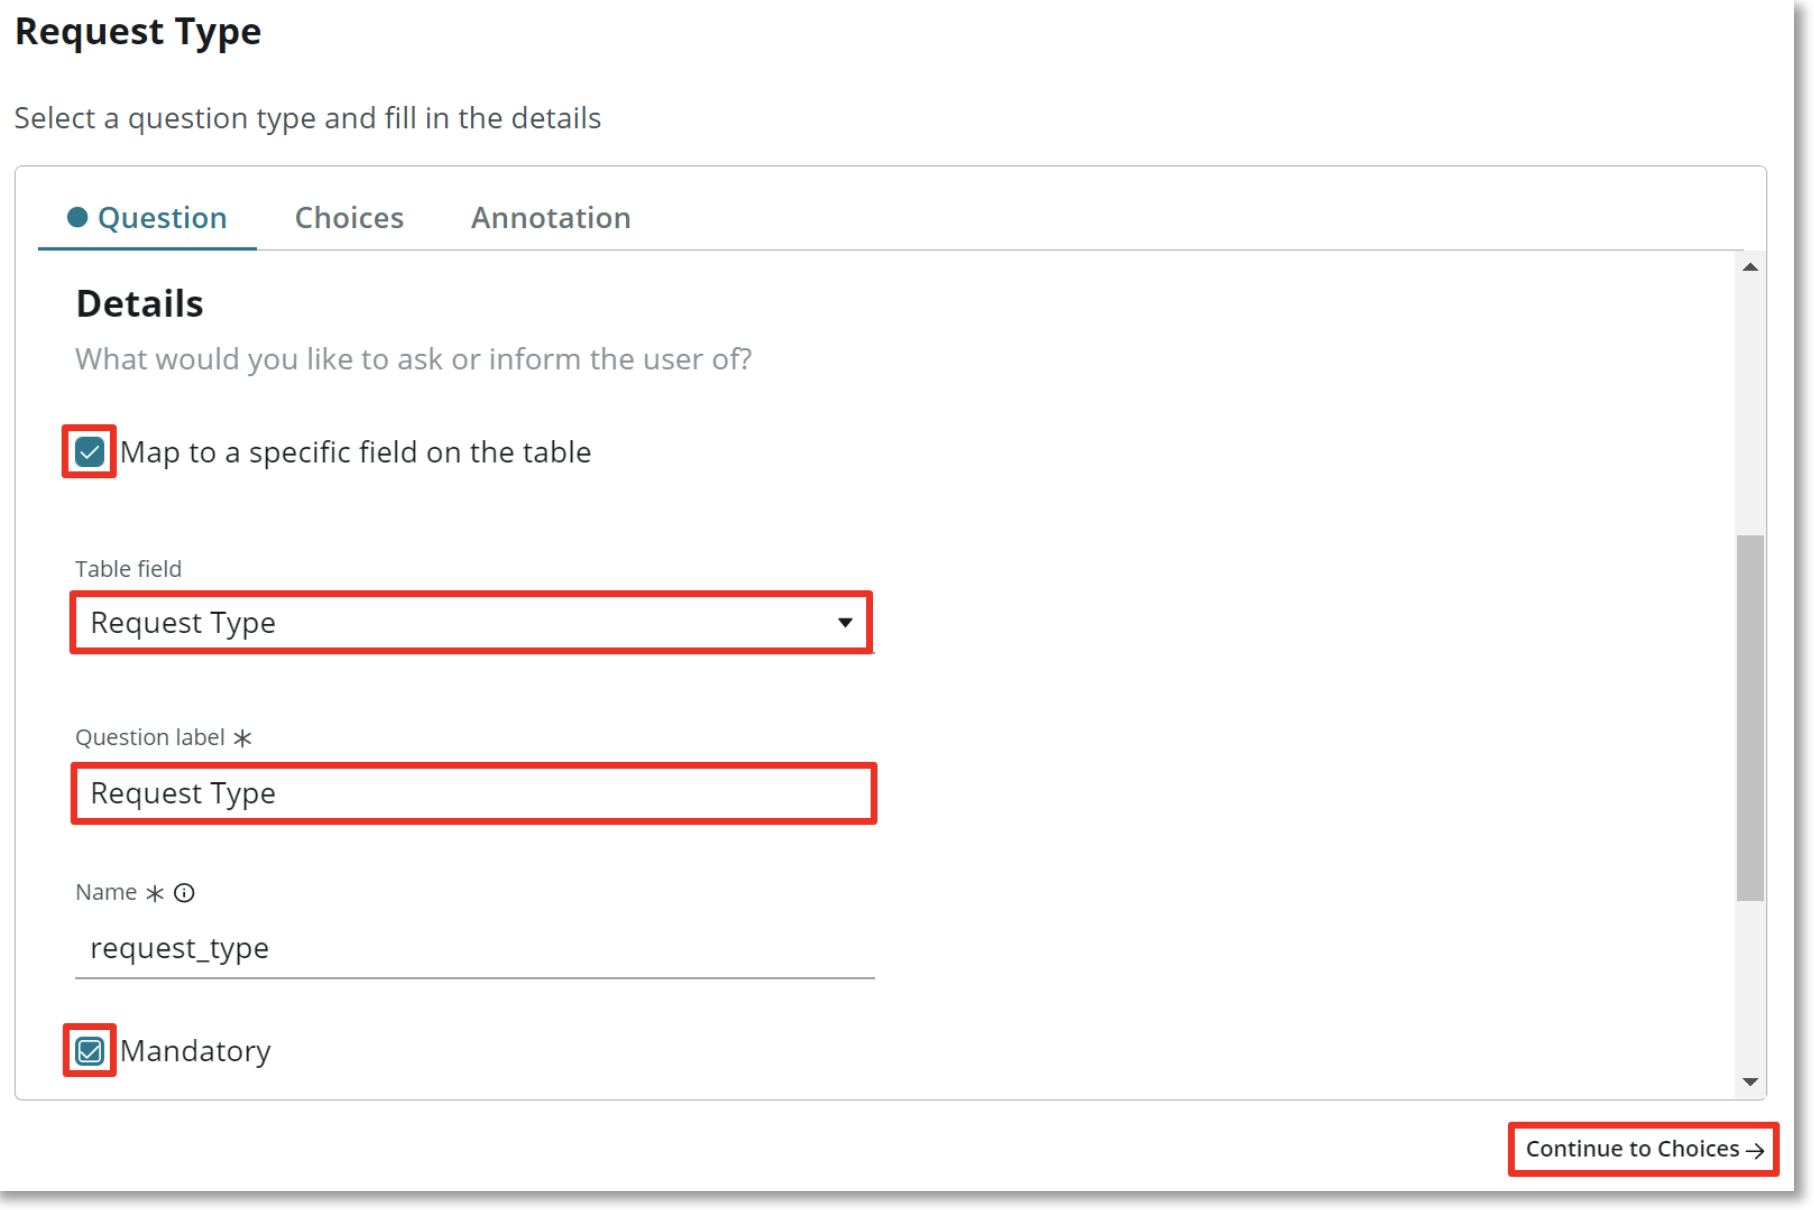
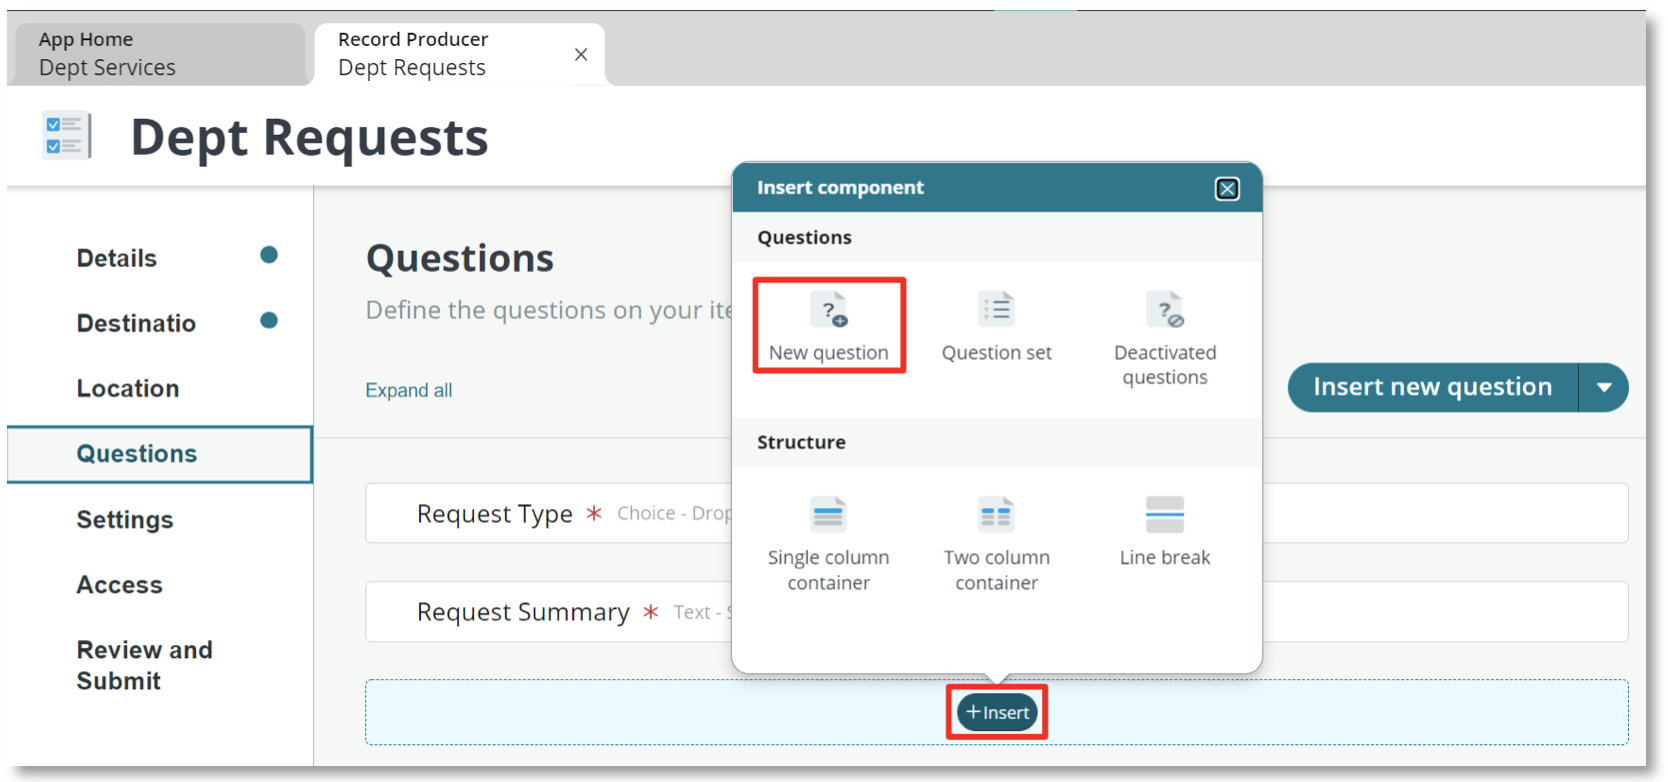
- Select the Questions link on the left\ Select Insert new question
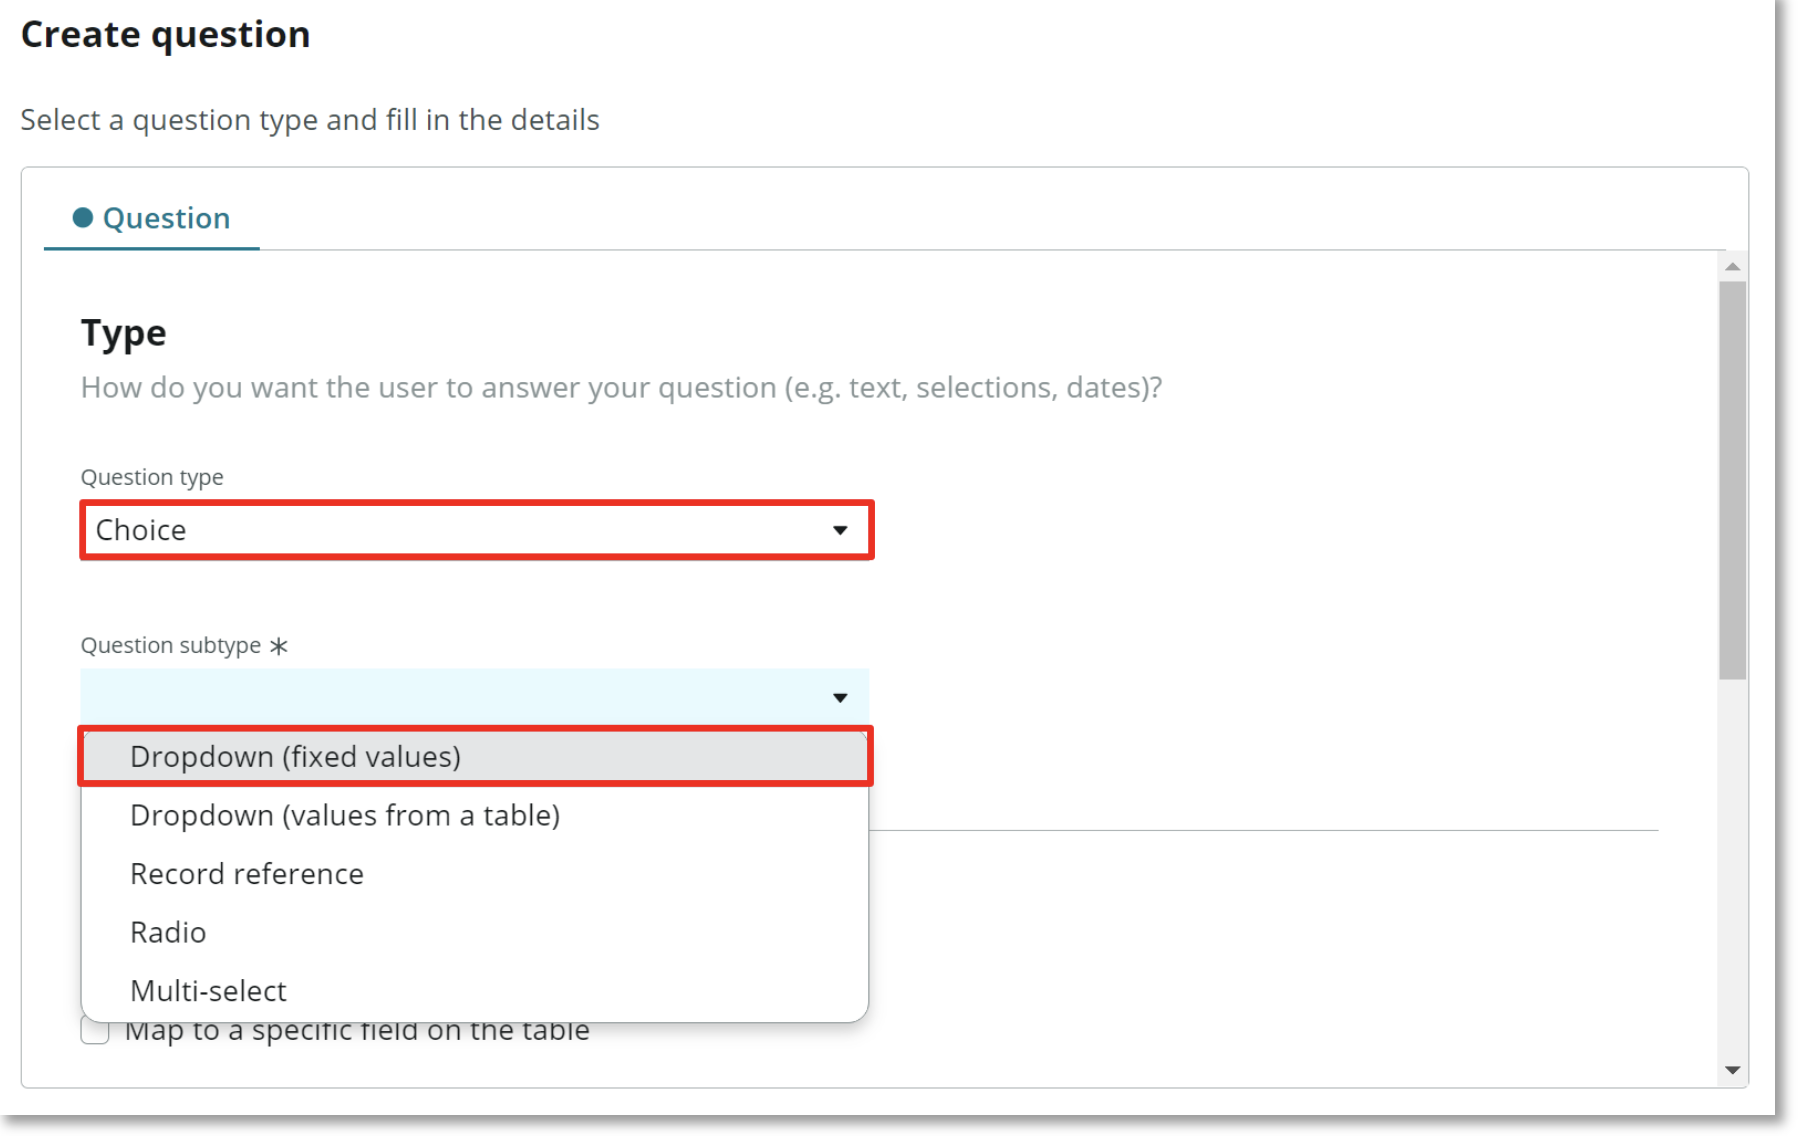
- Set the Question type to Choice\ Set the Question subtype to Dropdown (fixed values)
Check Map to a specific field on the table\ Choose Request type for the Table field\ Enter Request Type for the Question label\ Check Mandatory
You may need to scroll down to see all fields
Select Continue to Choices ->
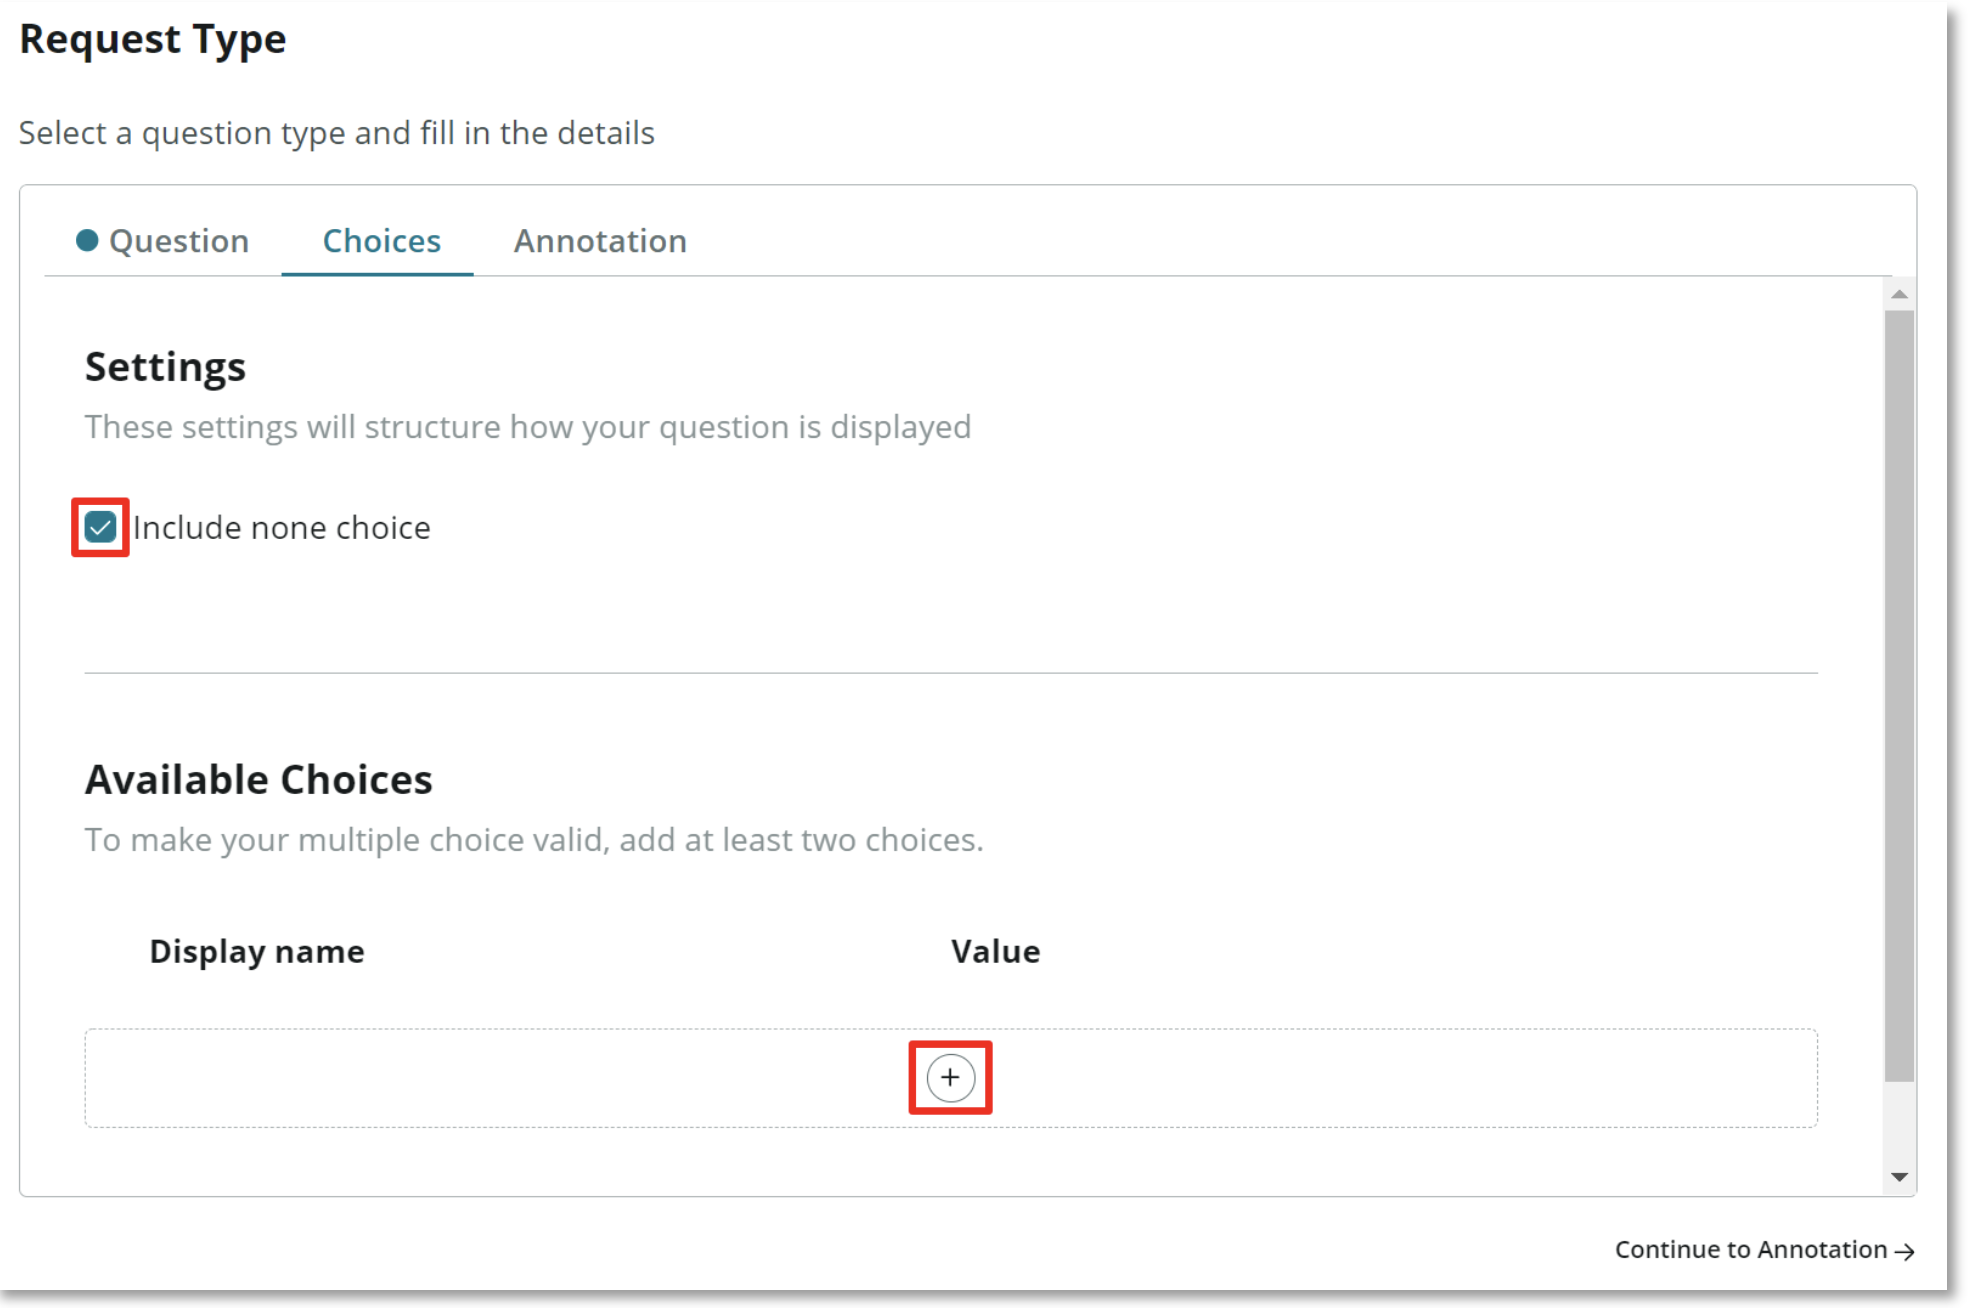
- Check the Include none choice Check (+) to start adding Choices
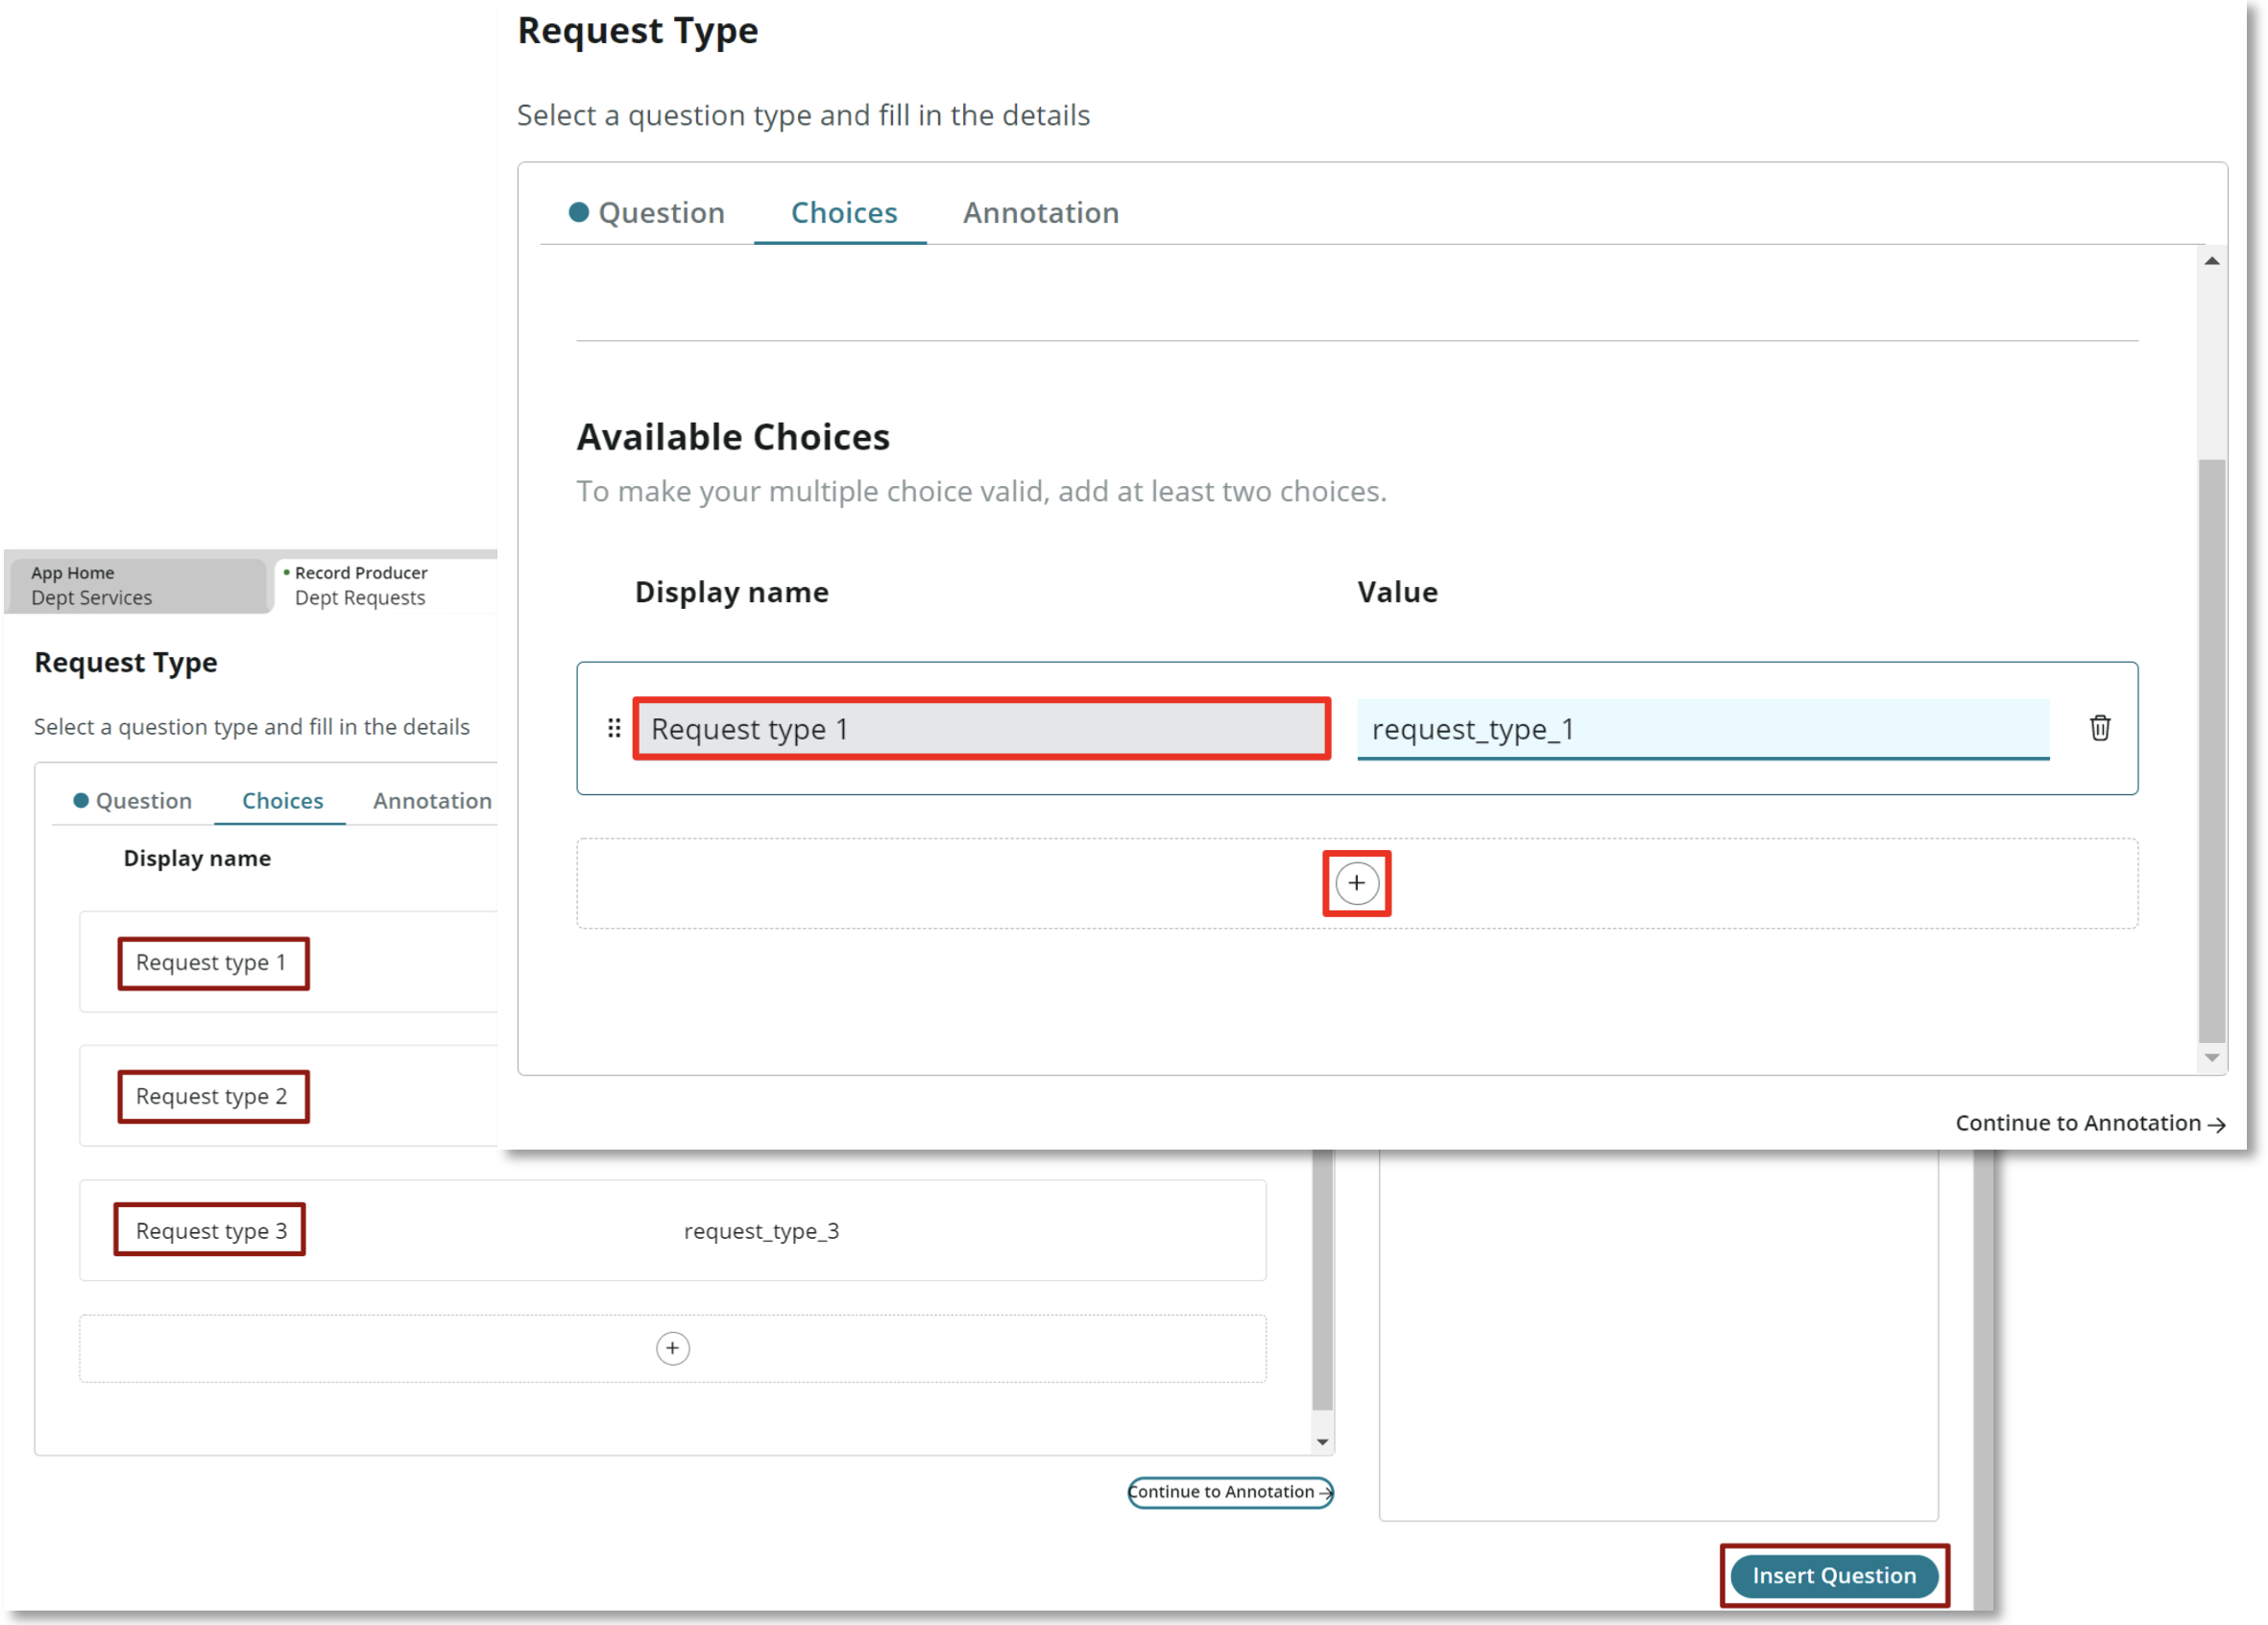
- Enter the Display name for each of Request Type choice that you added to the Dept Request table earlier\ Select Insert Question when all choices have been added
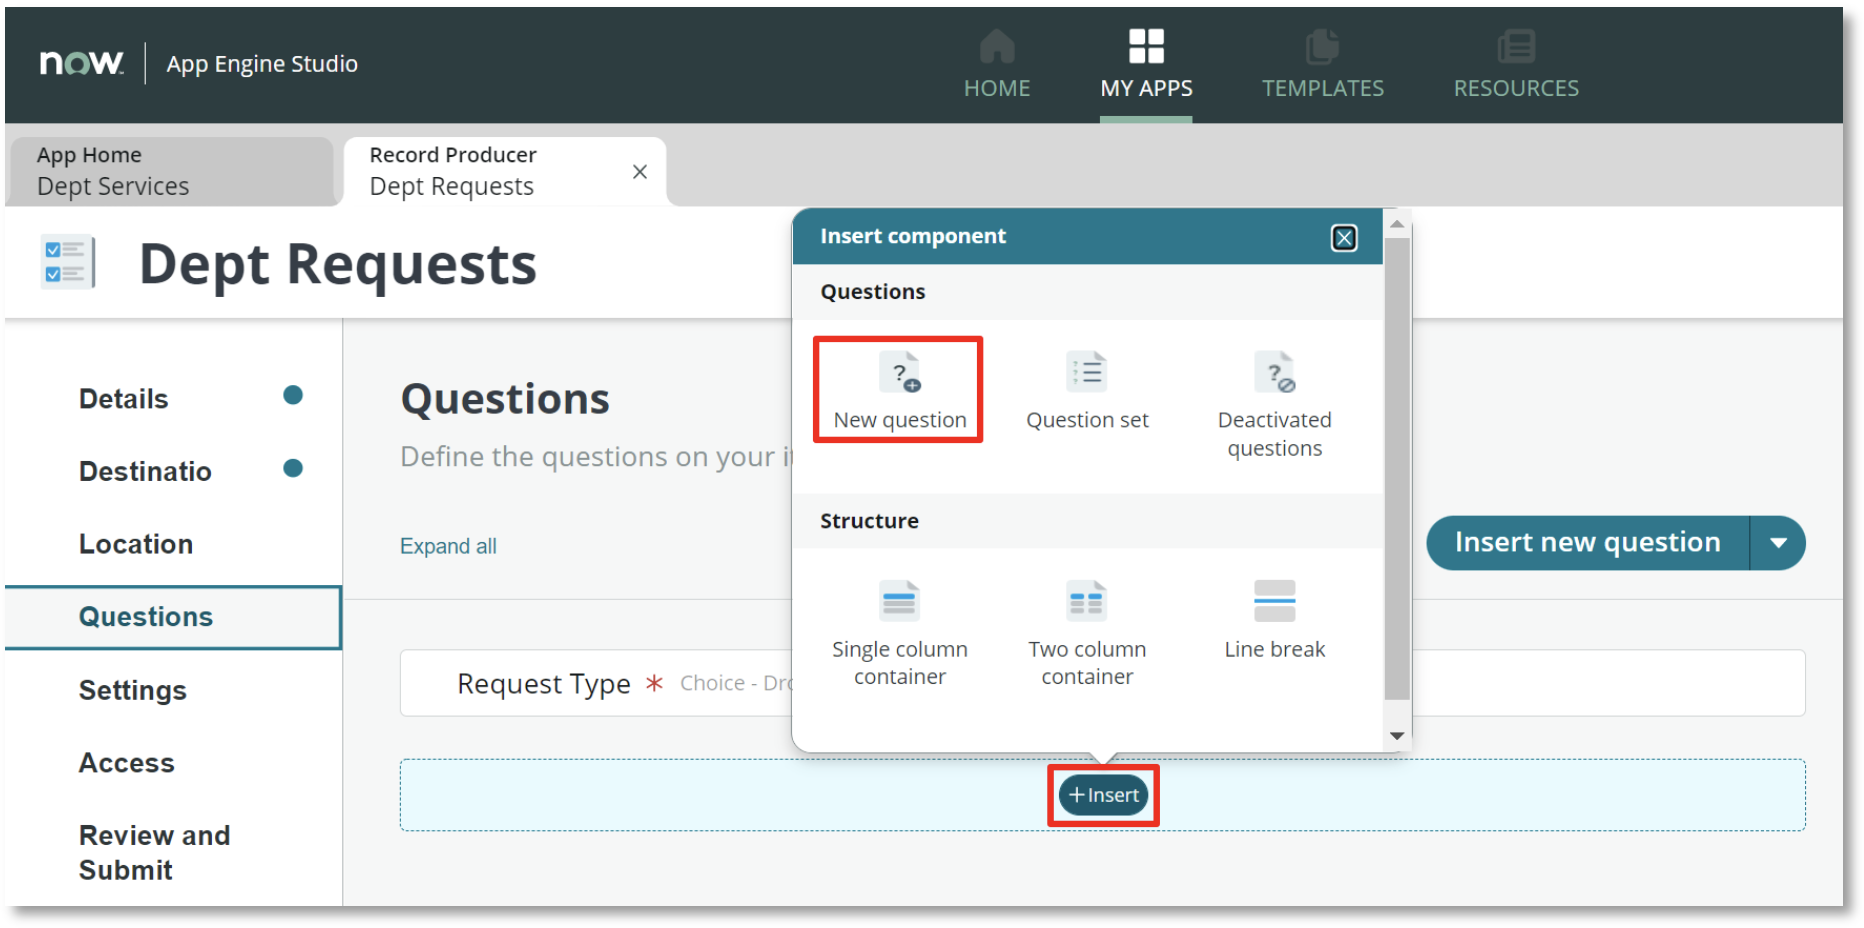
- Select + Insert\ Select New Question
- Set the Question type to Text\ Set the Question subtype to Single-line
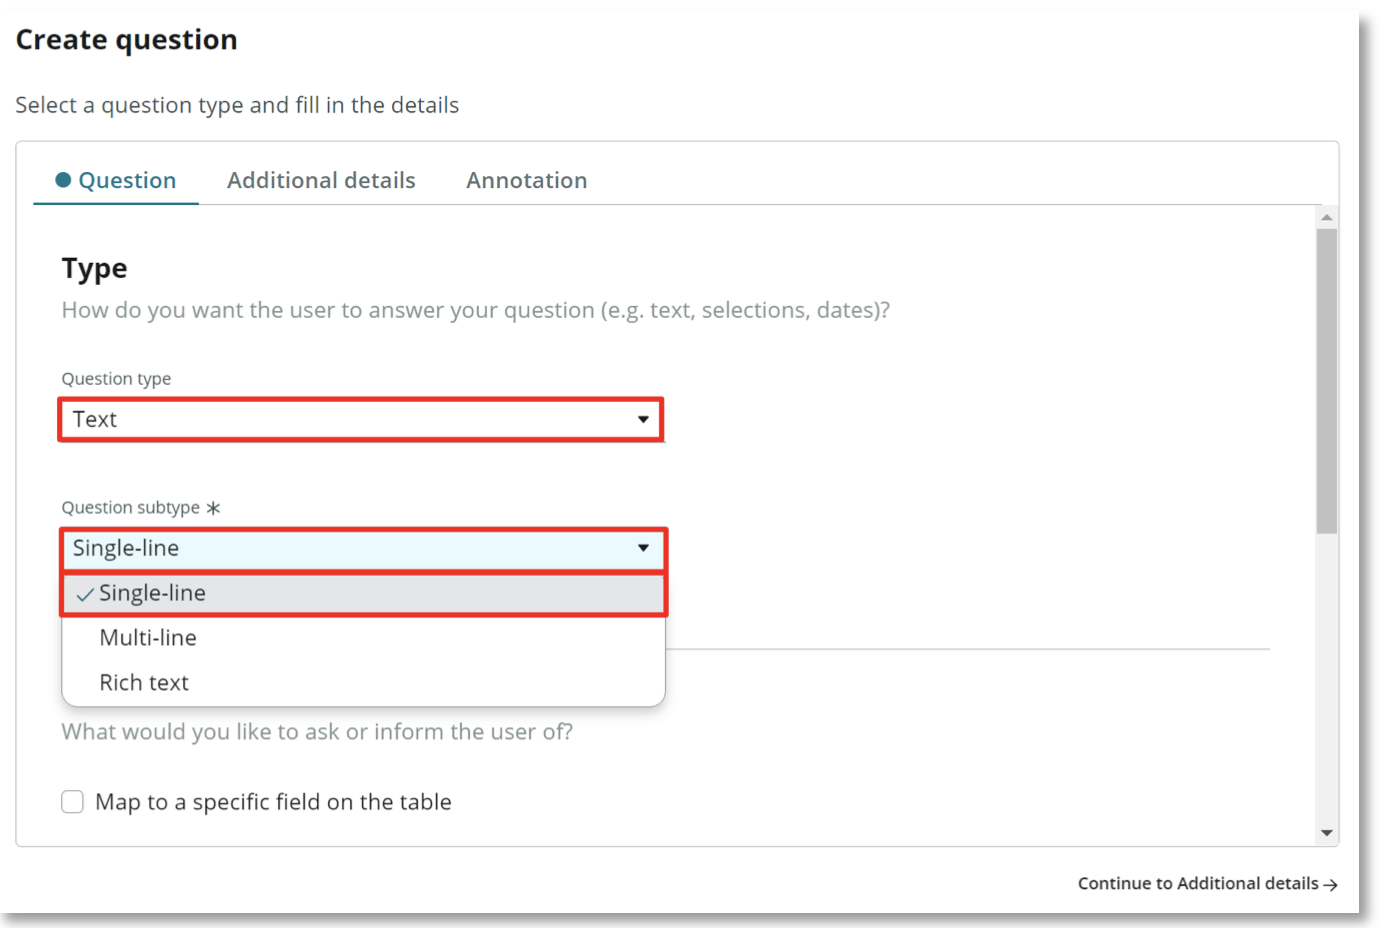
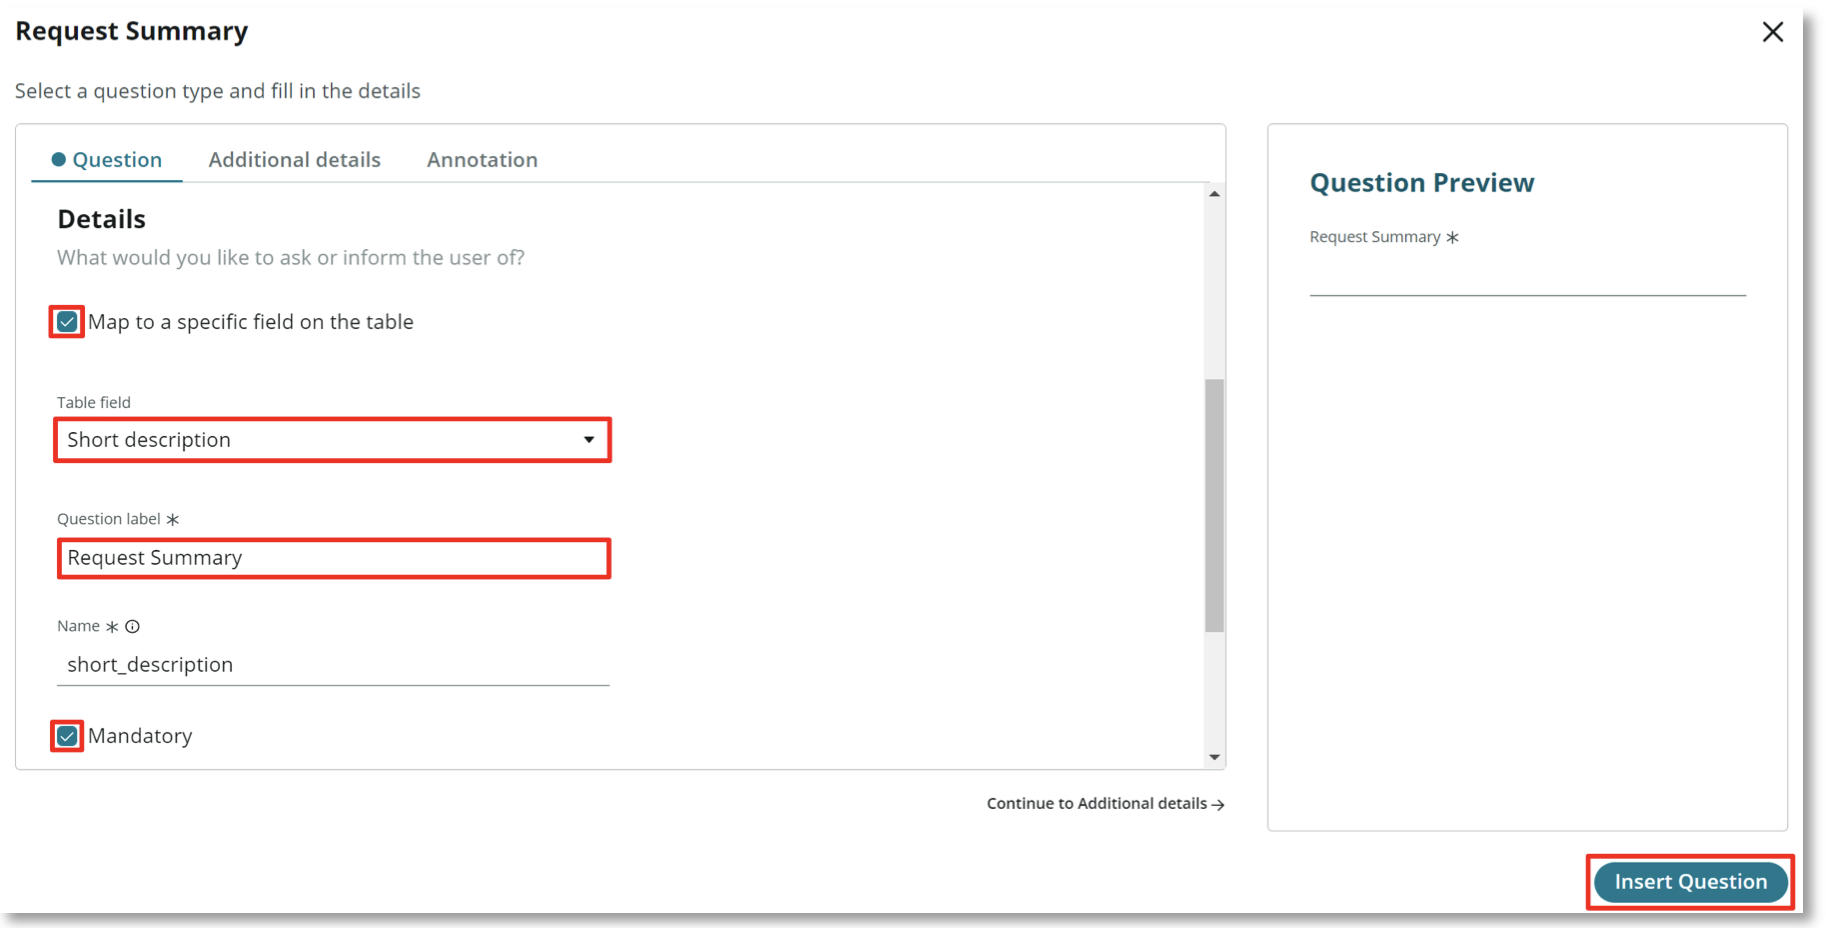
Check Map to a specific field on the table\ Choose Short Description for the Table field\ Enter Request Summary for the Question label\ Check Mandatory
You may need to scroll down to see all fields
Select Insert Question
- Select + Insert\ Select New question
- Choose Text for the Question Type\ Choose Multi-line for the Question subtype

- Check Map to a specific field on the table\ Set the Table field to Description\ Set the Question label to Request Details
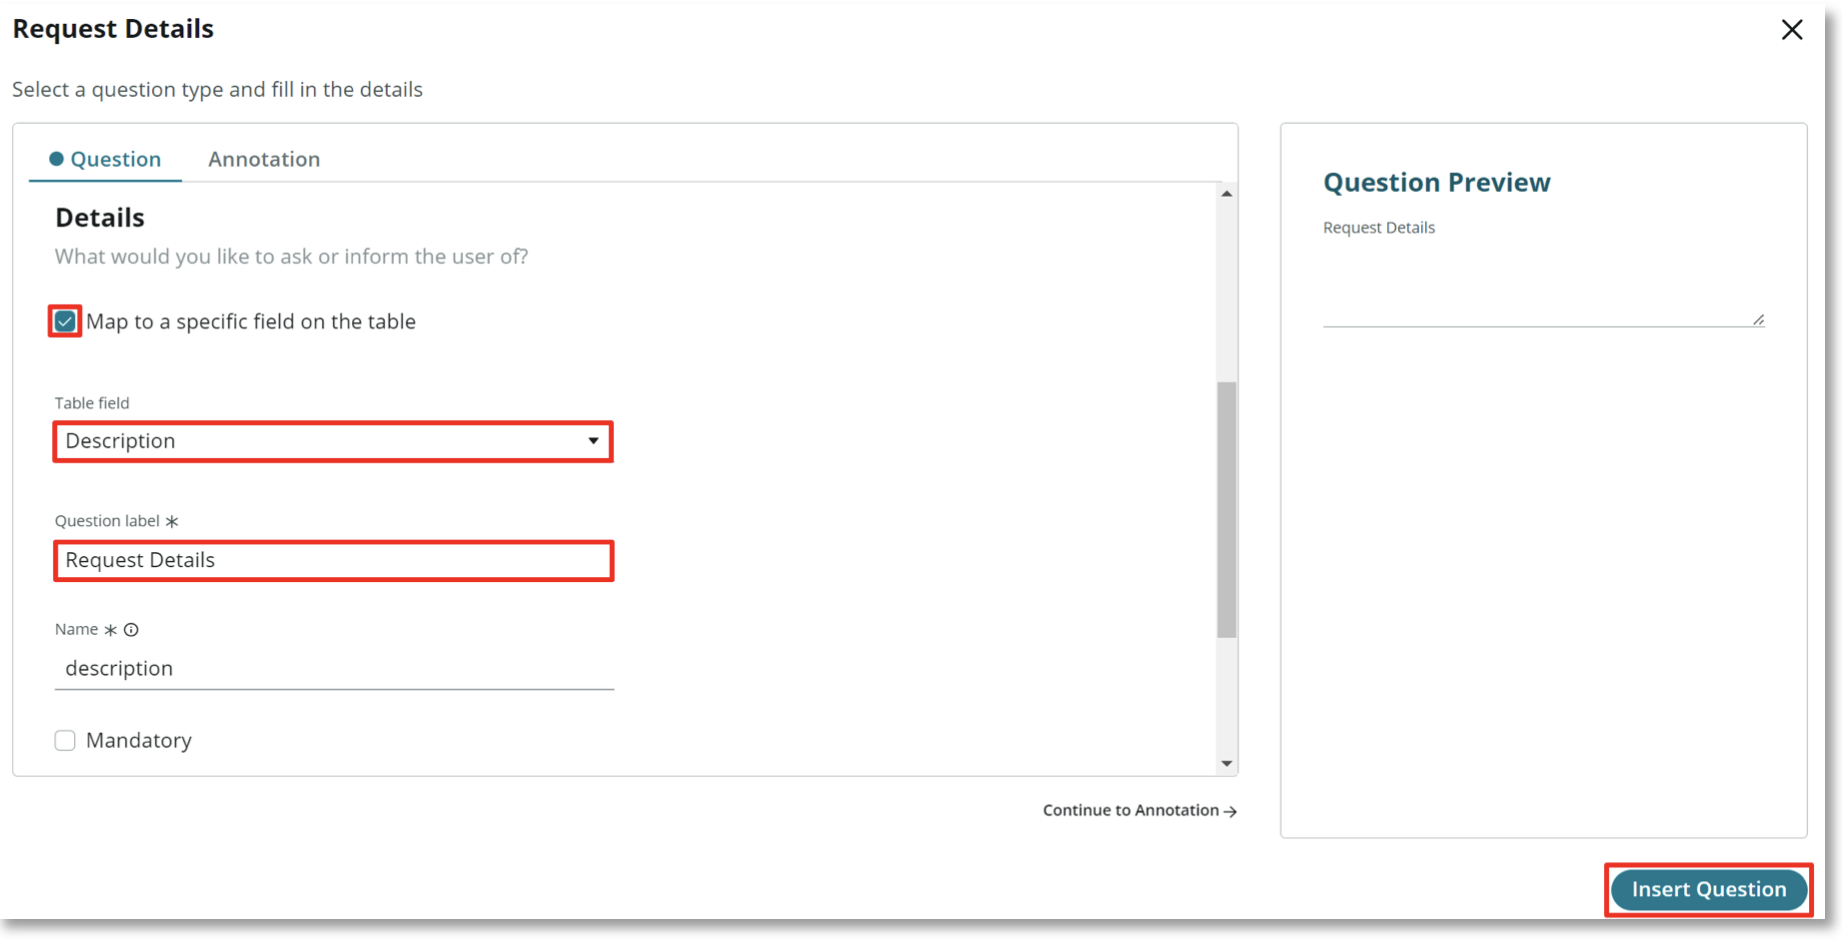
Select **Insert Question**
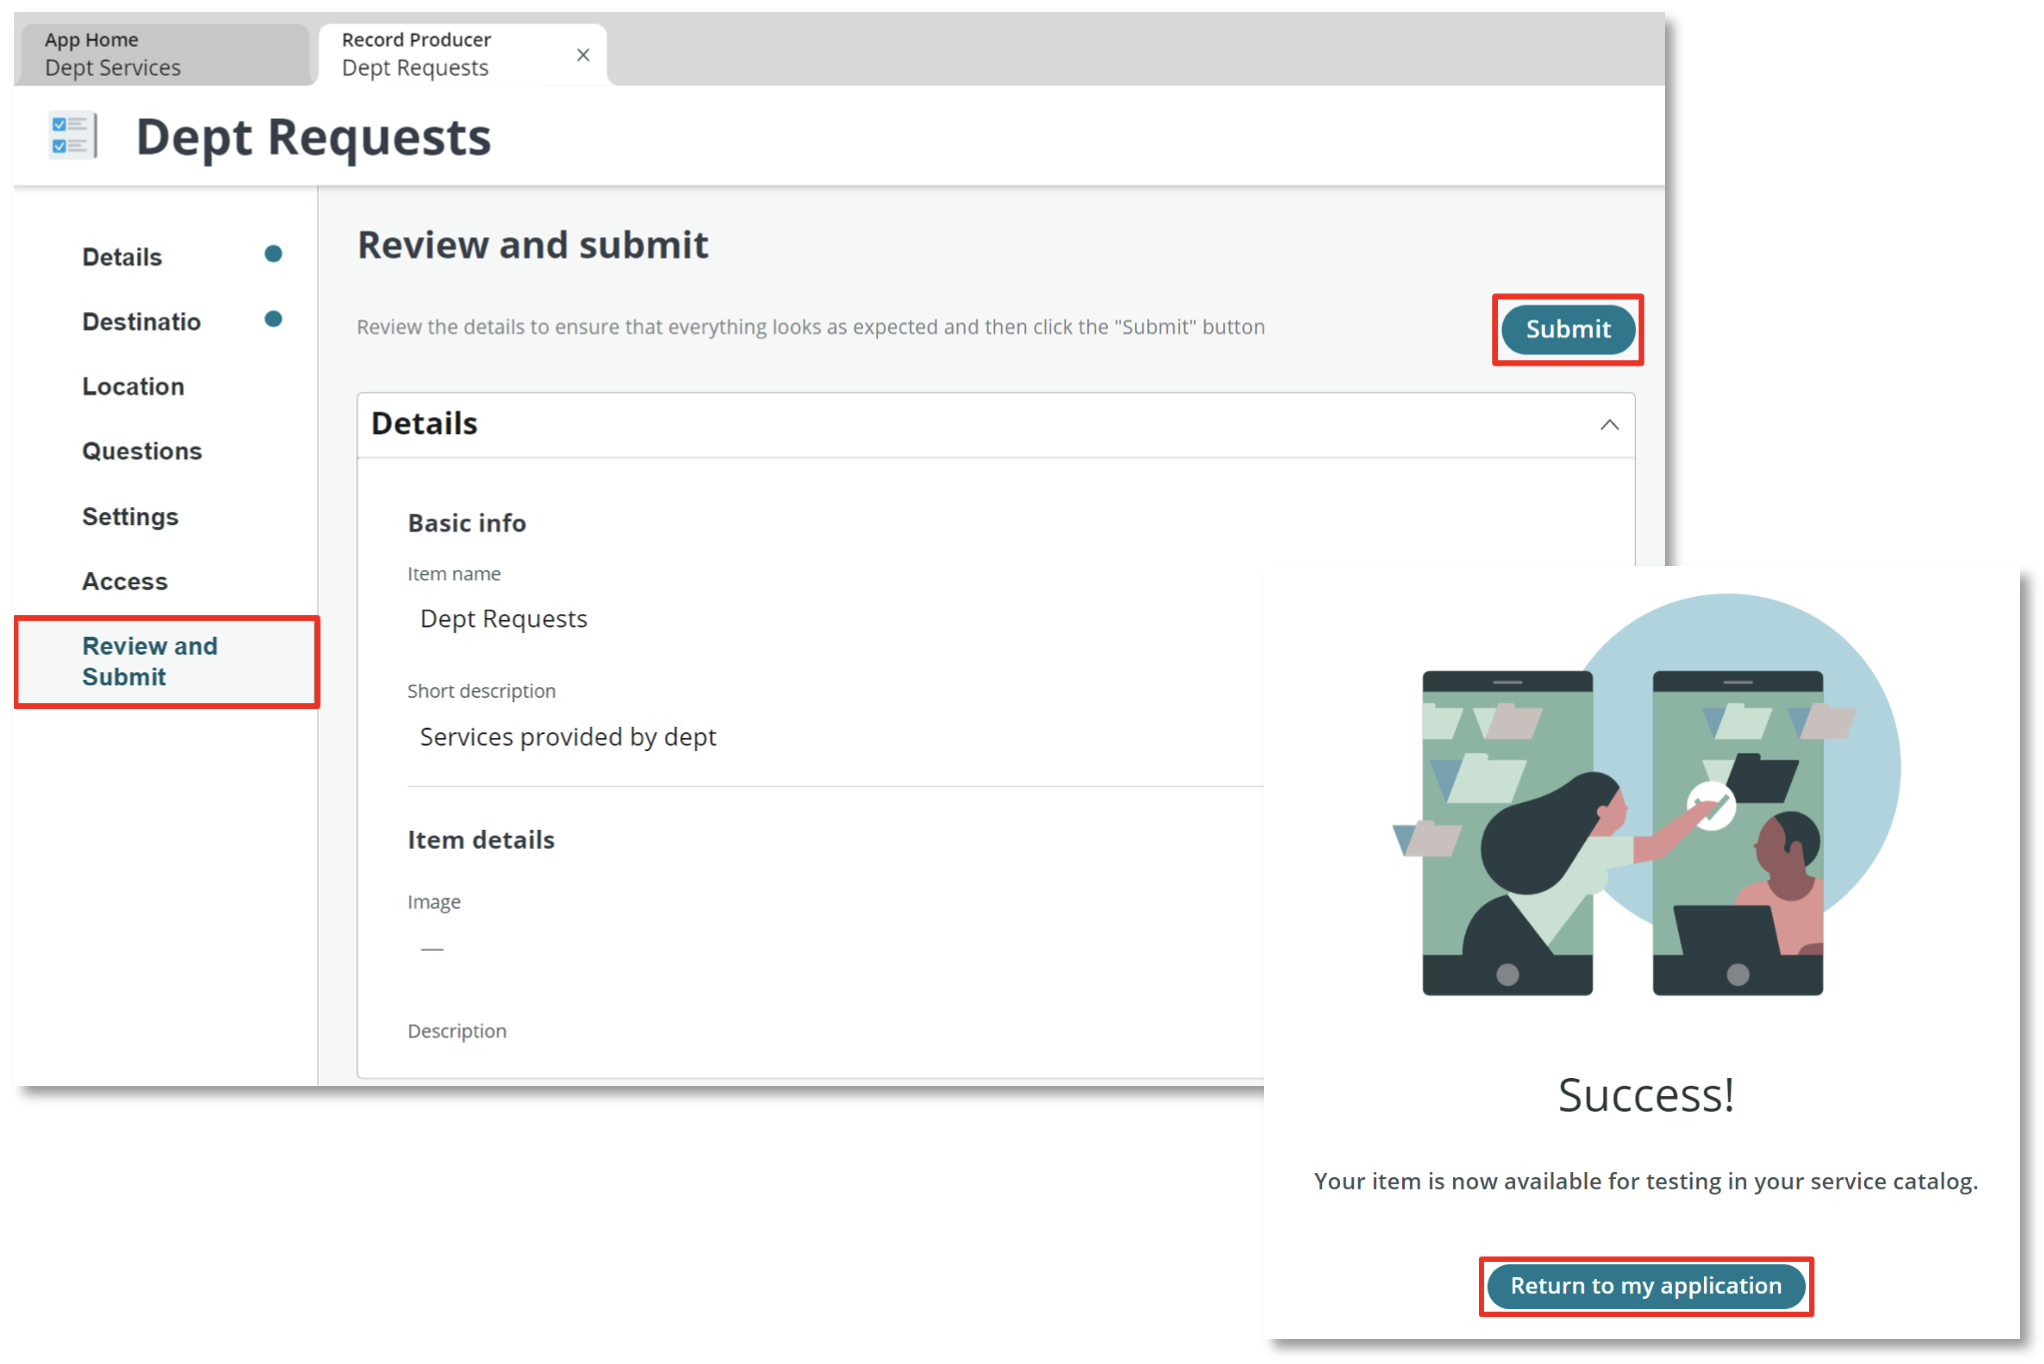
- Select the Review and Submit link on the left and then the Submit button on the right\ Select Return to my application