App Engine Innovation Workshop Lab Guide
Exercise 3: Configure List & Form Layout
Goal
In this exercise, you will design the list and forms for your new tables, so that they have a meaningful layout for later use.
This all can be done in very fast and easy way - without writing any single line of code.
You will configure the Activity List & Form.
Steps
Select the End time field (1) and use the Up and Down buttons (2) to adjust the order of the field to what is shown in the screenshot.
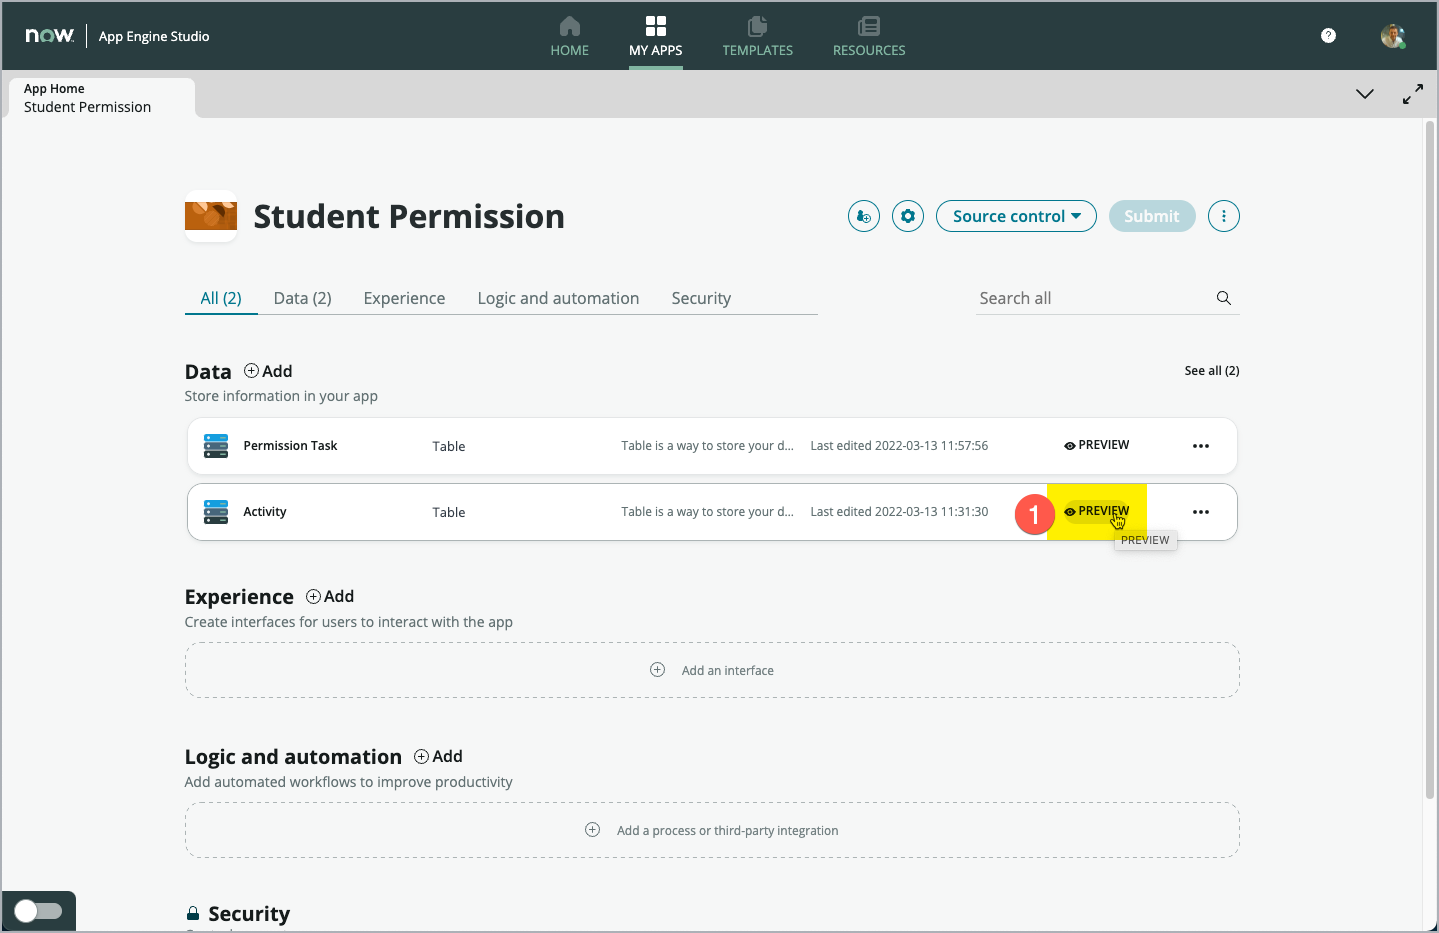
Start by going to your app’s App Dashboard.
Click Preview (1) on the Activity table (1).
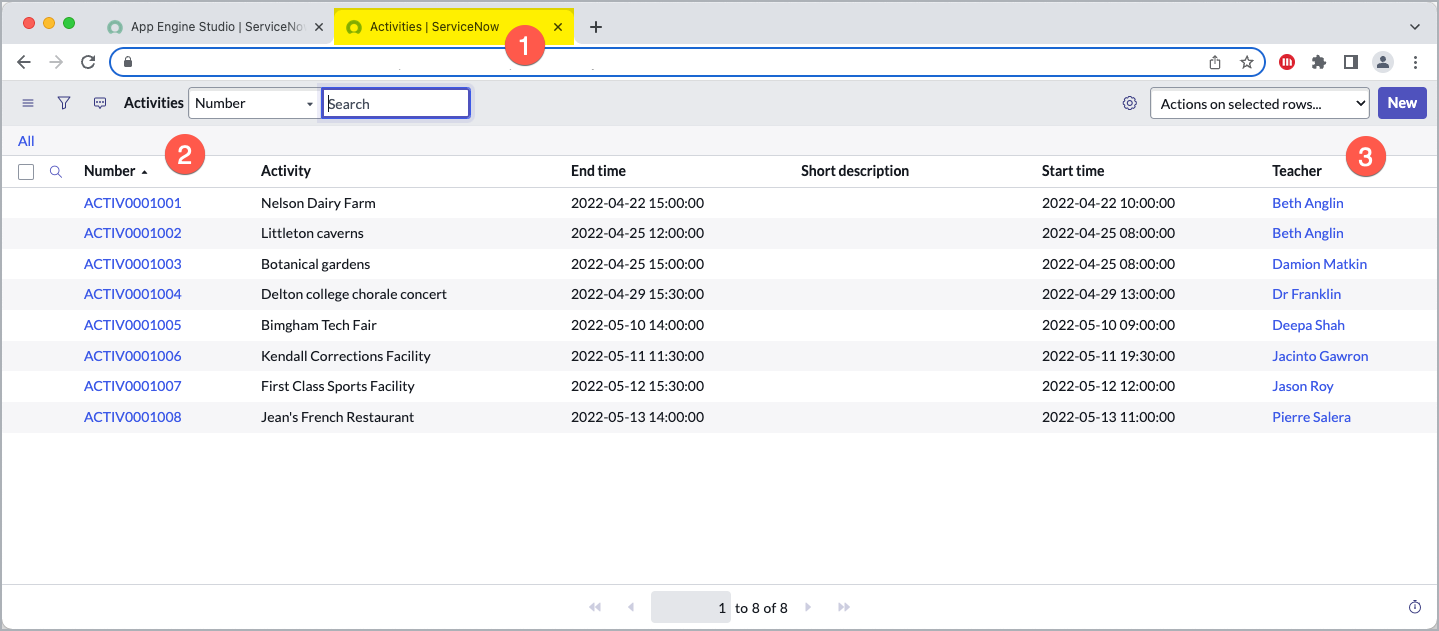
A new Web Browser tab (1) opens and the prebuilt list layout for the Activity table is displayed. How nice, you do not need to build a view from scratch. The system does this automatically for you at the same time the tables were created.
Note: You can see, that each record imported now has a unique Number (2) and that the Teacher column (3) is now a reference field (in blue letters, shown like a hyperlink). Instead of just using the name of the given teacher in that column, it refers to a specific user record in the User [sys_user] table, which we specified during the import.
The User table is another important base table. It’s where all users are stored. You can leverage it for your new app and do not need to create a separate user table for each app.
Now it’s time to adjust the list layout a bit. We’ll order the fields from left to right.
Move your mouse over the header of the Number column (1) so that the three vertical dots (1) appear and click on the three-dot button to open the Column Context-menu*.
In the menu that opens, select Configure (2) and in the sub-menu select List Layout (3).
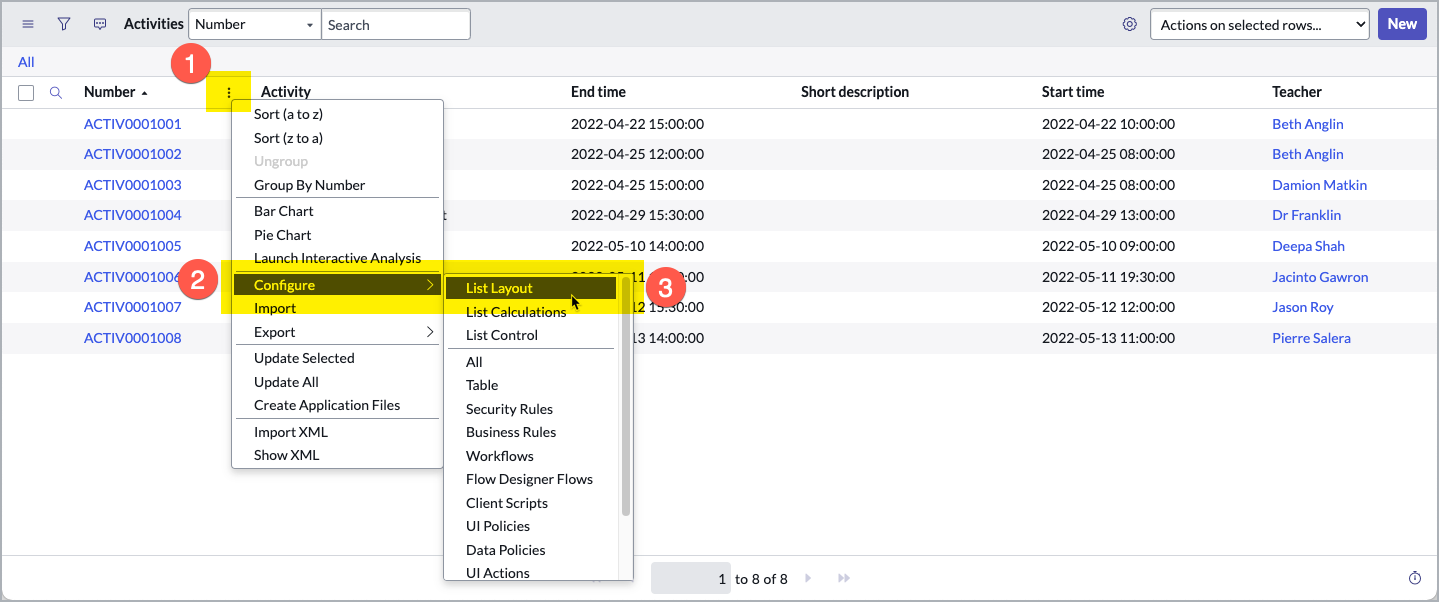
Select the End time field (1) and use the Up and Down buttons (2) to adjust the order of the field to what is shown in the screenshot.
Note: You can configure the List according to your preferences. For this Lab, just make sure, that the Number field (3) will remain the first field in the List.
When you have finished adjusting the List fields, click Save (4).

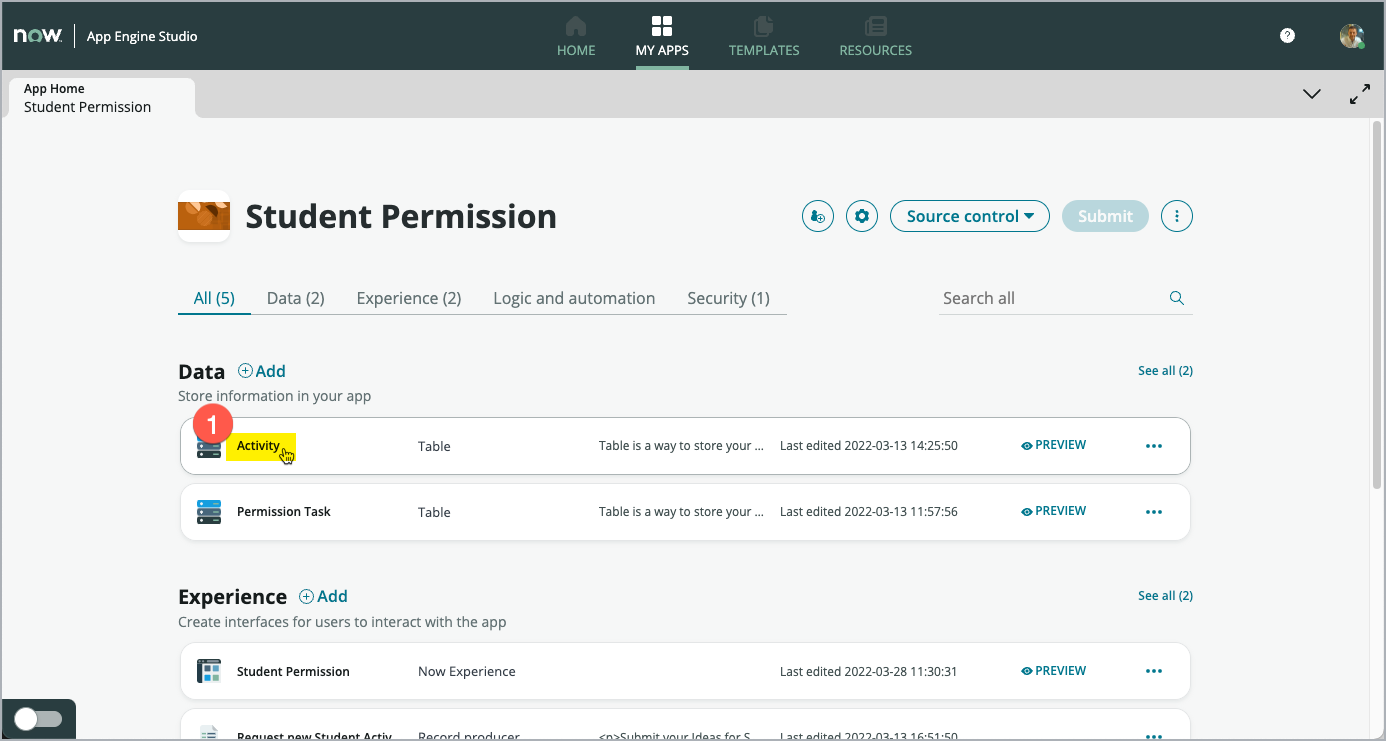
The Fields are now arranged in the List in the way you just set them up.
Now let’s review and configure the Form of the Activity table.
From the your App Dashboard, click the Activity table name (1).
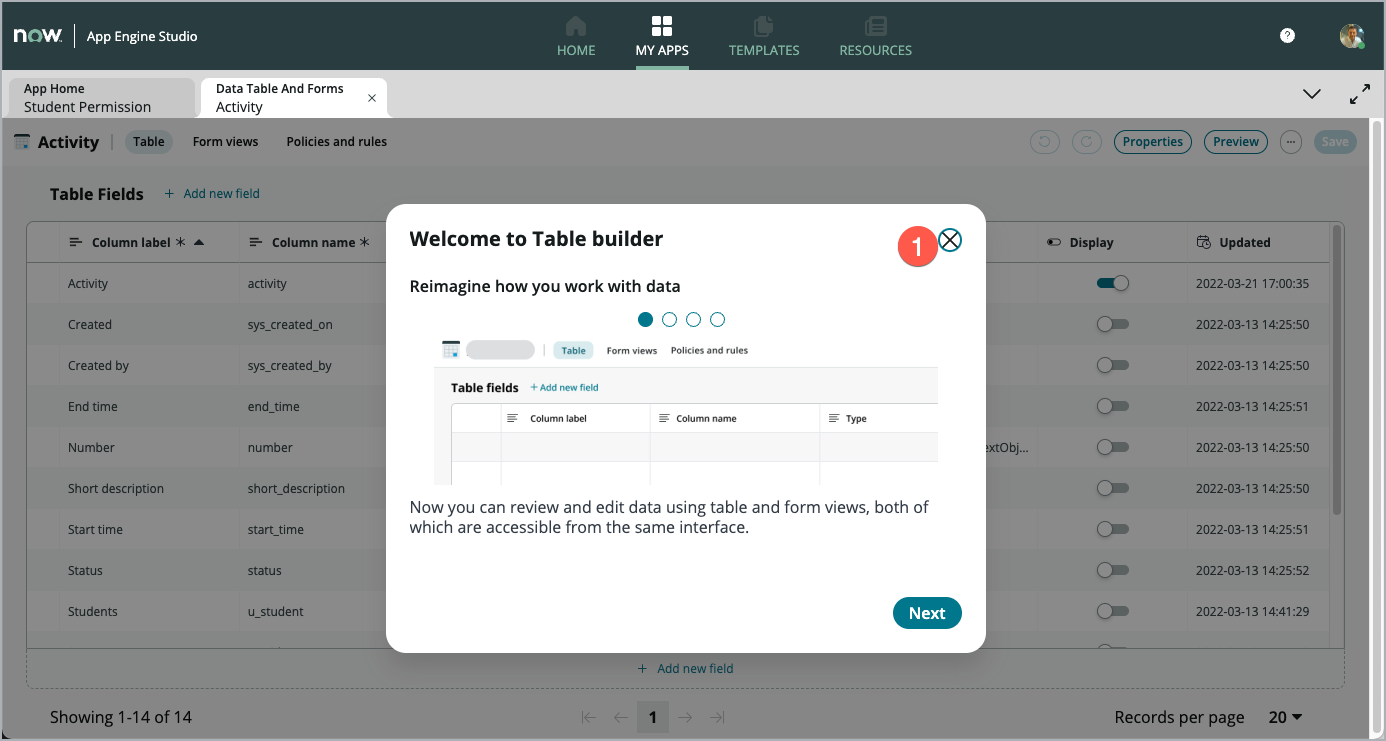
The table builder opens and a splash screen appears.
Click the X in the upper-right corner of the popup to close the Welcome screen.
Click Form views (1) to open Form Builder. Form Builder enables you to design the layout of the form for this table.
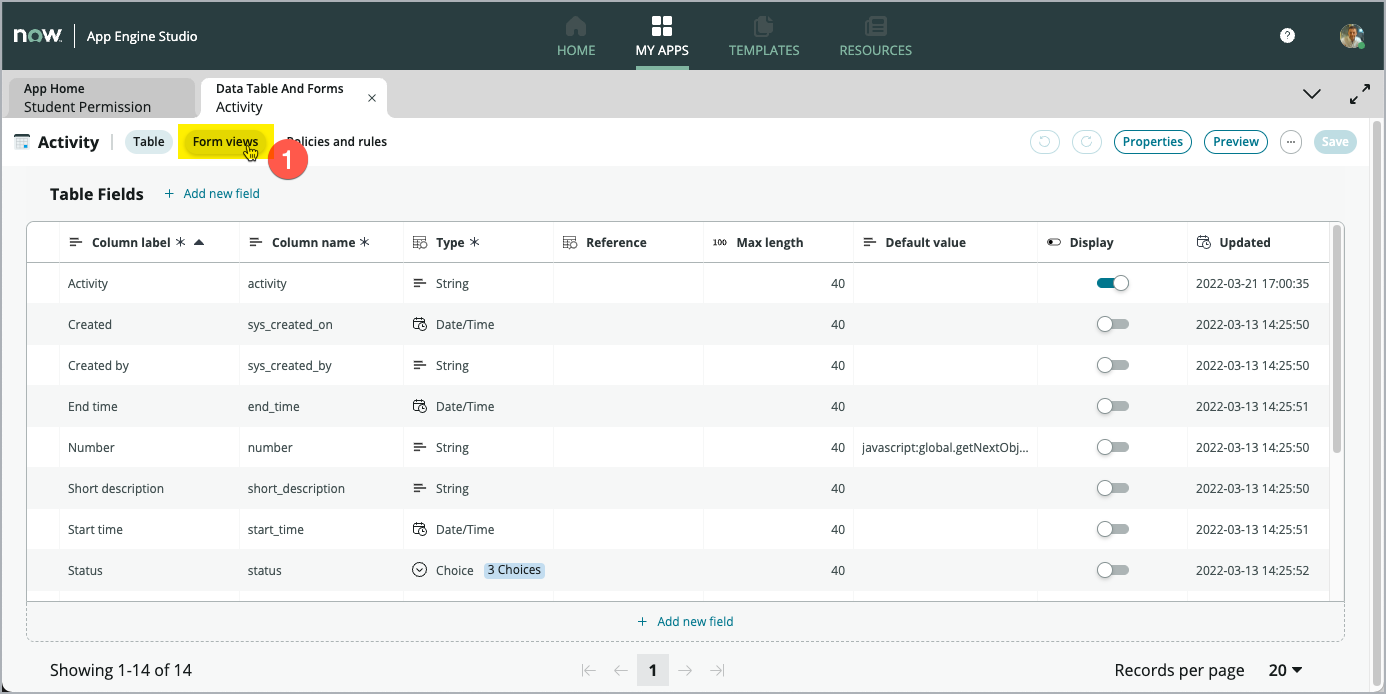
Form Builder is more than a graphical user interface for optimizing your form Layout. Form Builder also allows to add new fields to your form, which instantly become new fields on your table.
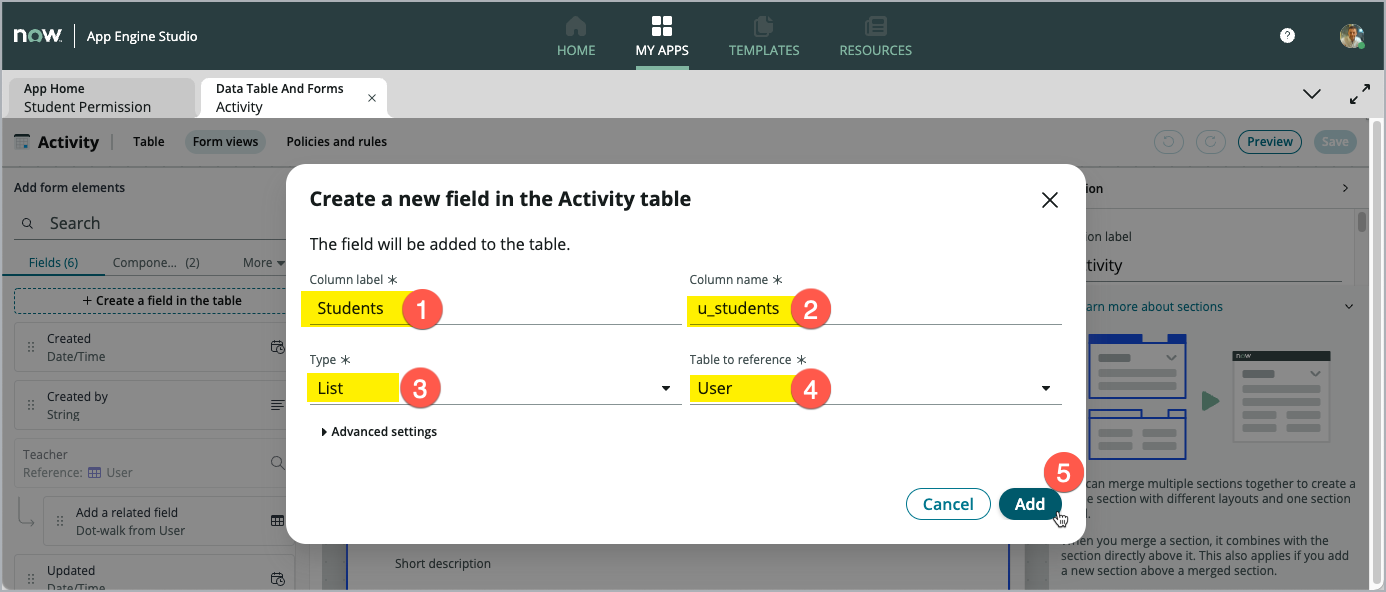
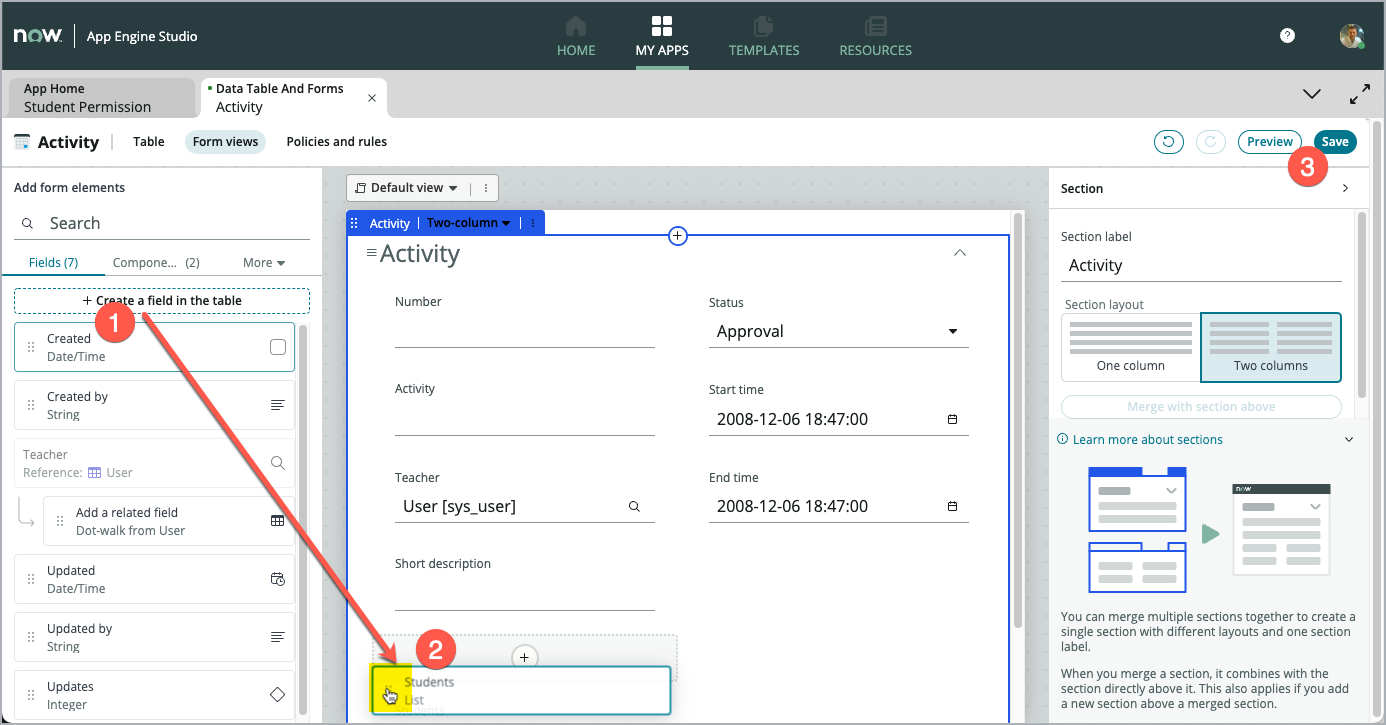
Click Create a field in the table to open a popup window to create a new field.

Next, we’ll add a new field of type List. This type of field allows to collect a number of references in one field (instead of only referencing ONE record).
In the Column label (1) field type Students and in Column name (2) type u_students.
Set the *Type (3)** field to List and the Table to reference (4) field to User [sys_user] table.
Click Add to add this new field to the table.
Click Done to close the dialog window.
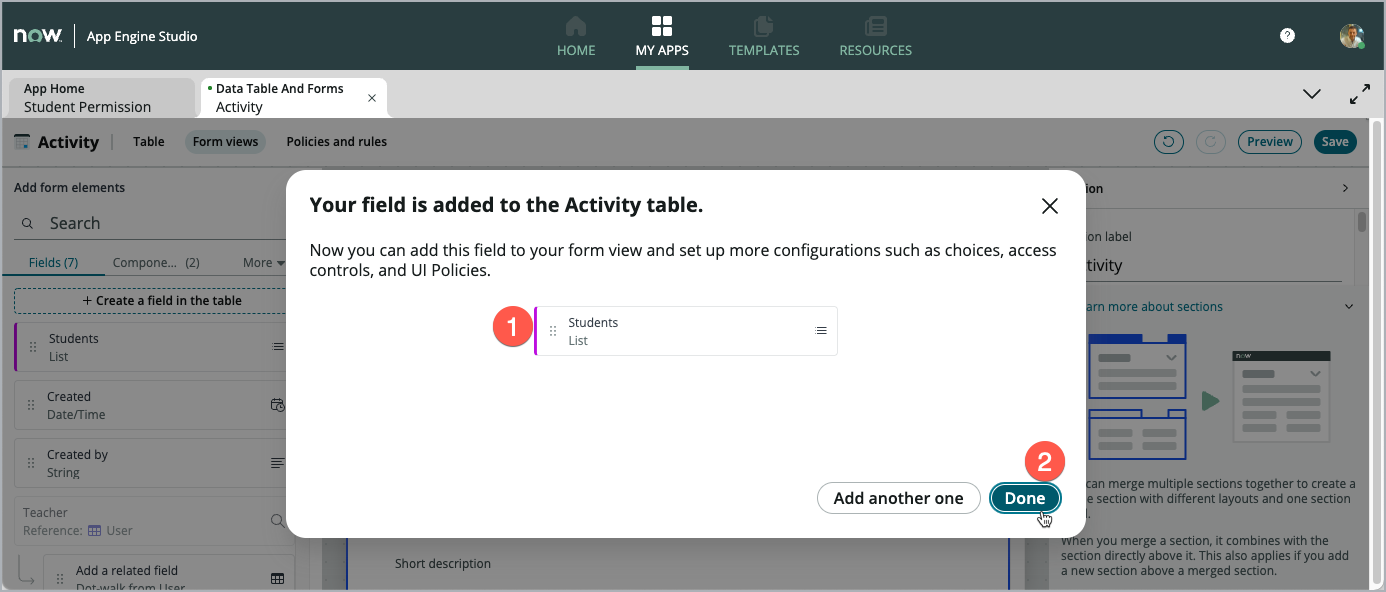
Finally, drag the new field Students from the left-hand side pannel (1) onto the form canvas (2).
Click Save to make the changes permanent.
Note: You can enhance your form layout by adding Sections and choose from one or two column format. The fields can easily be arranged by drag-and-drop to make the form fit best to your need. Pay attention to other forms in the system to ensure consistency (e.g. placement of the number field in the upper left.) All this adds up to a much better user experience.
Click Preview to open a new tab. The system opens a new App Engine Studio tab showing the Form layout
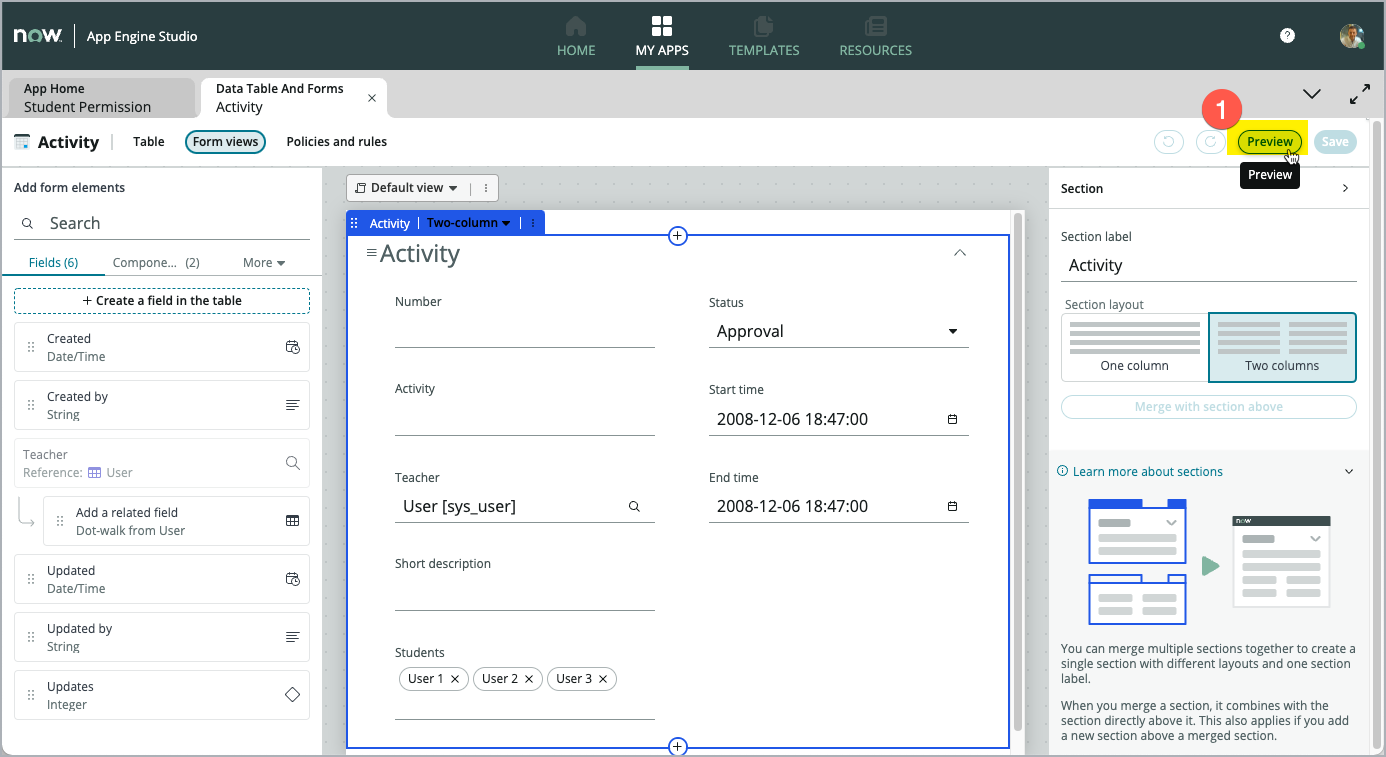
The form shown on the new tab (1) looks like the layout used in Workspaces.
The new Students (2) field, that we just added in the steps above, is already shown on the form.
You can also show the layout shown when using the same Form in the Plaform UI.
Click Open form in Platform (3) to open another Tab in App Engine Studio.
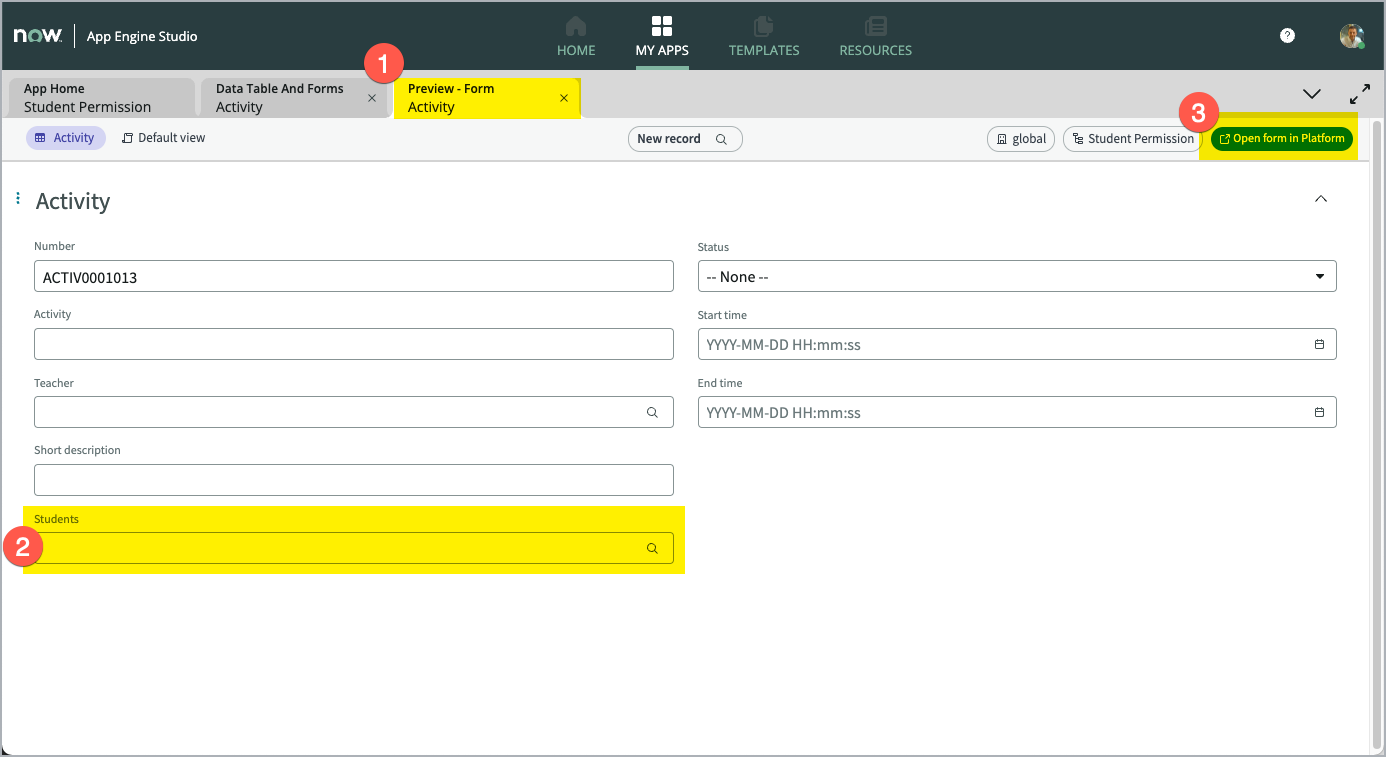
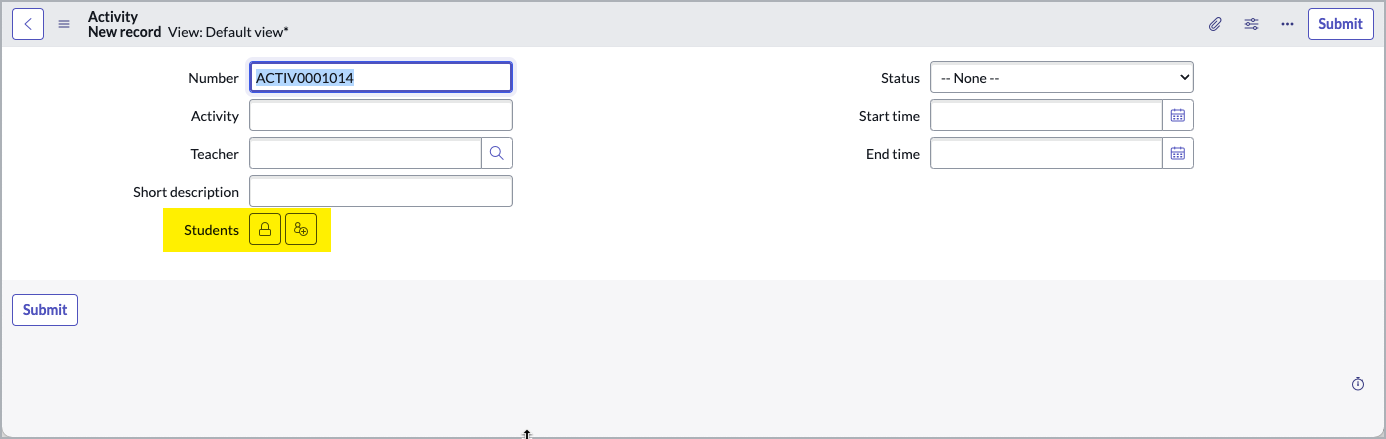
You can see the layout in the Platform UI looks different, especially for the new list field Students. However, the functionality is the same for either UI.
CONGRATULATIONS! You just achieved to set up your list and form for future use.