Create Flow in Flow Designer
In this exercise, we'll tie our investigation process together with the Complaints Management module in CSM so we can wave bye-bye to those spreadsheets!
- If you haven't done so already, close your workspace and go back to your App Engine Studio window. In the Logic and Automation section, click on Add
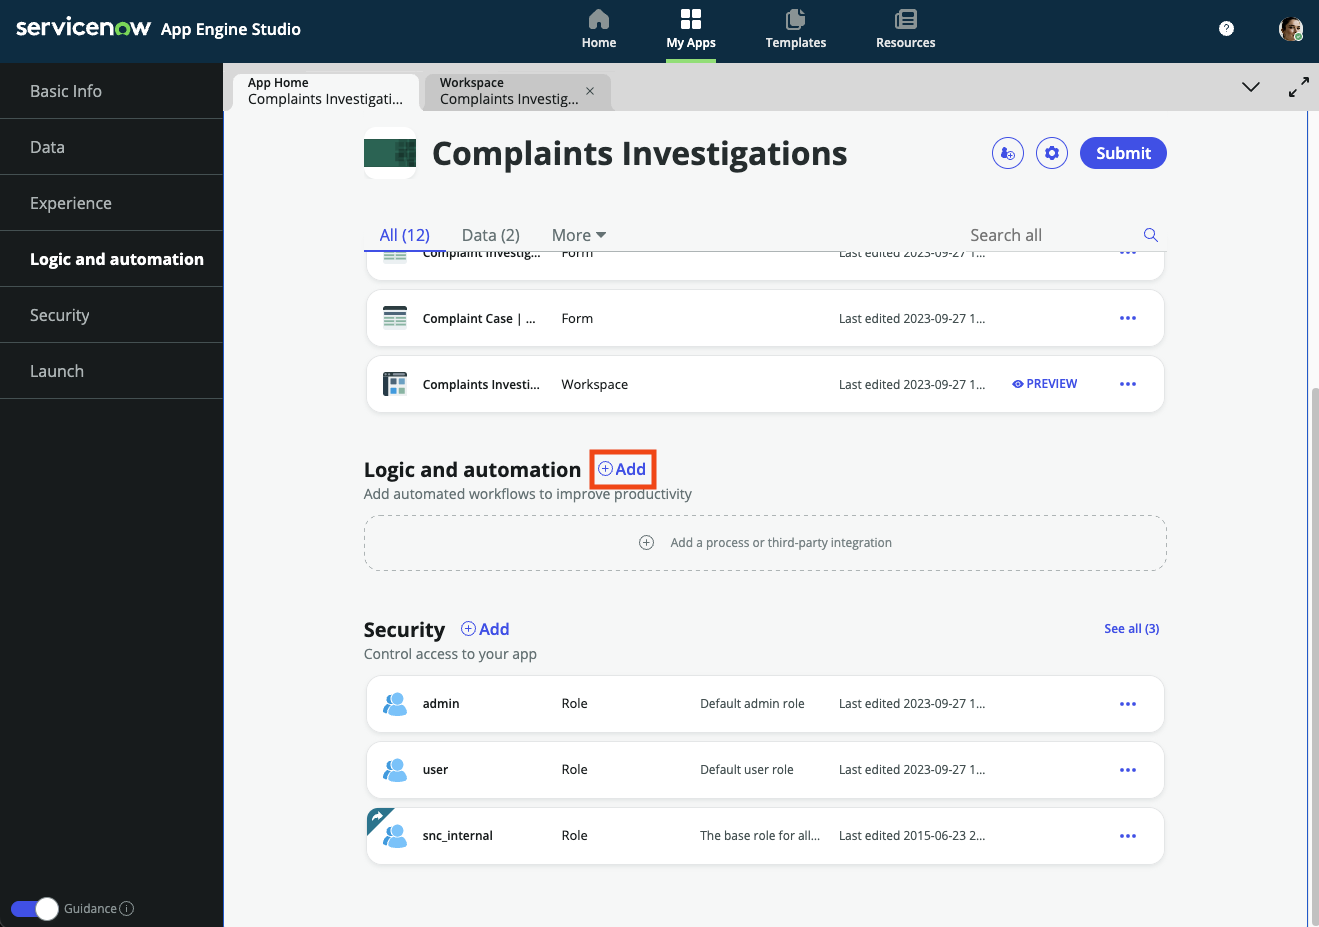
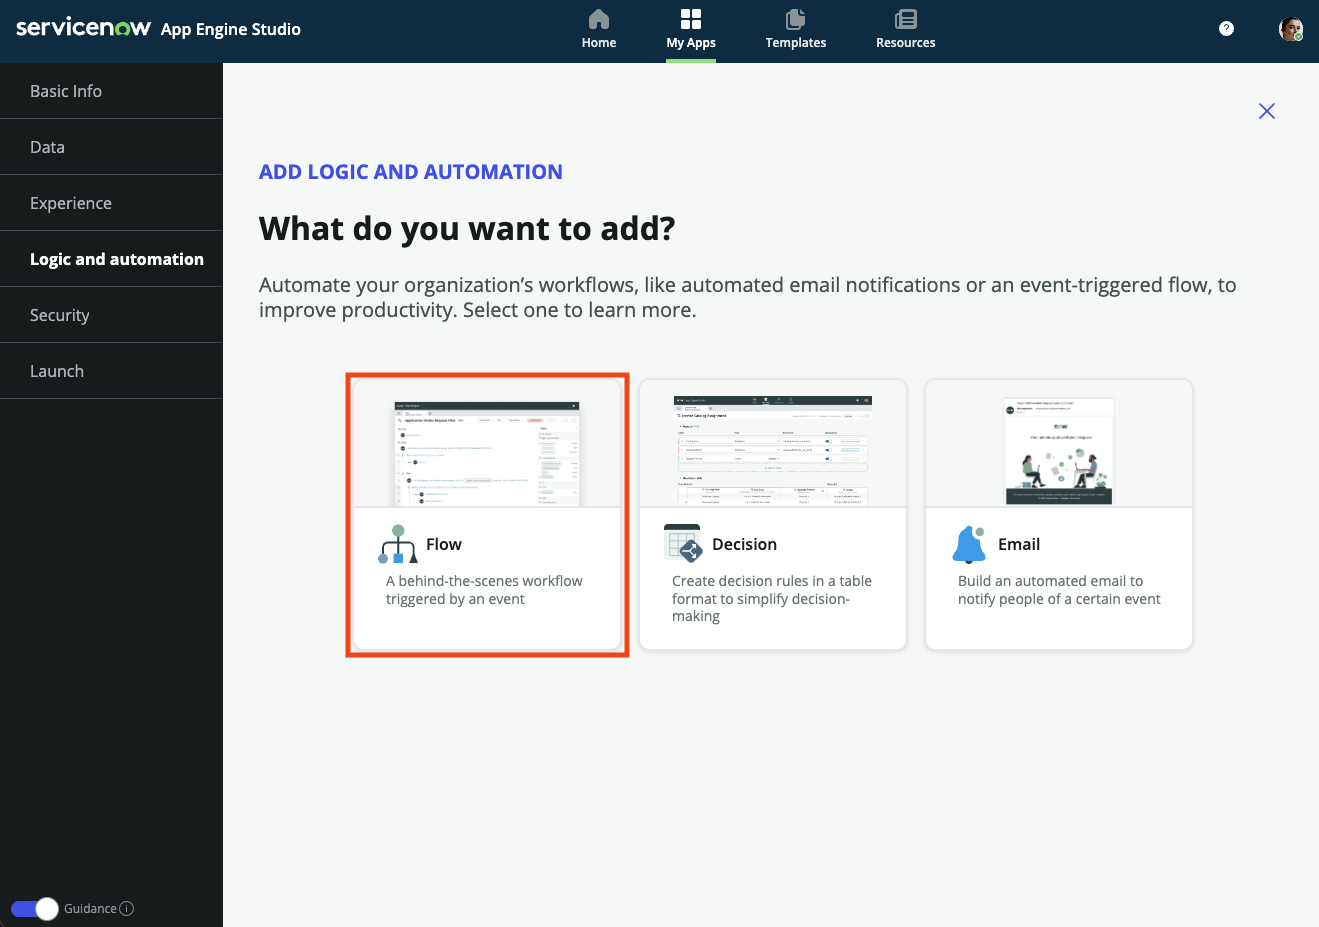
- There are several options for automation when building an app as a low code developer on the ServiceNow platform, but today we will be focusing on workflow. So on this screen, choose Flow from the options
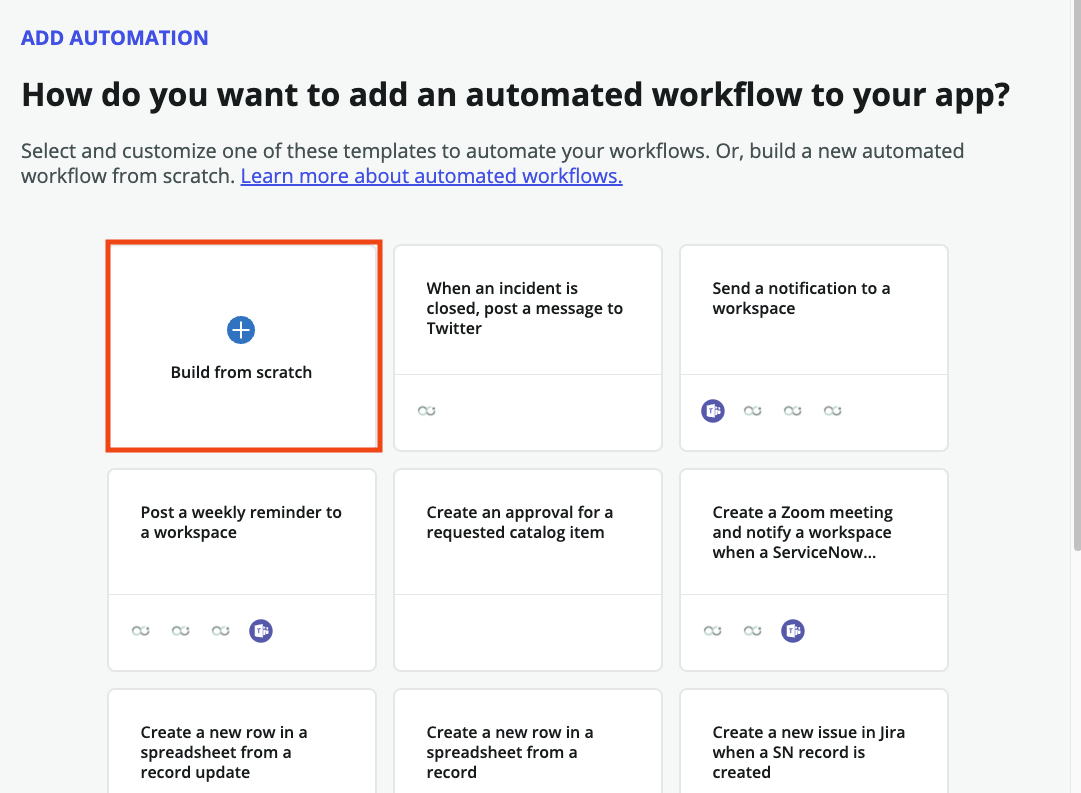
- To help you get started quickly, we've provided a set of common flows we see our customers building. In addition to that, we've built these flows with pre-existing integrations to collboration tools like Teams. We, however, will be starting from scratch. Click on Build from scratch
Set the following values for your new flow and click Continue:
Name:
Complaint Investigation FlowDescription:
Workflow that gets triggered when a new complaint is received and requires investigation.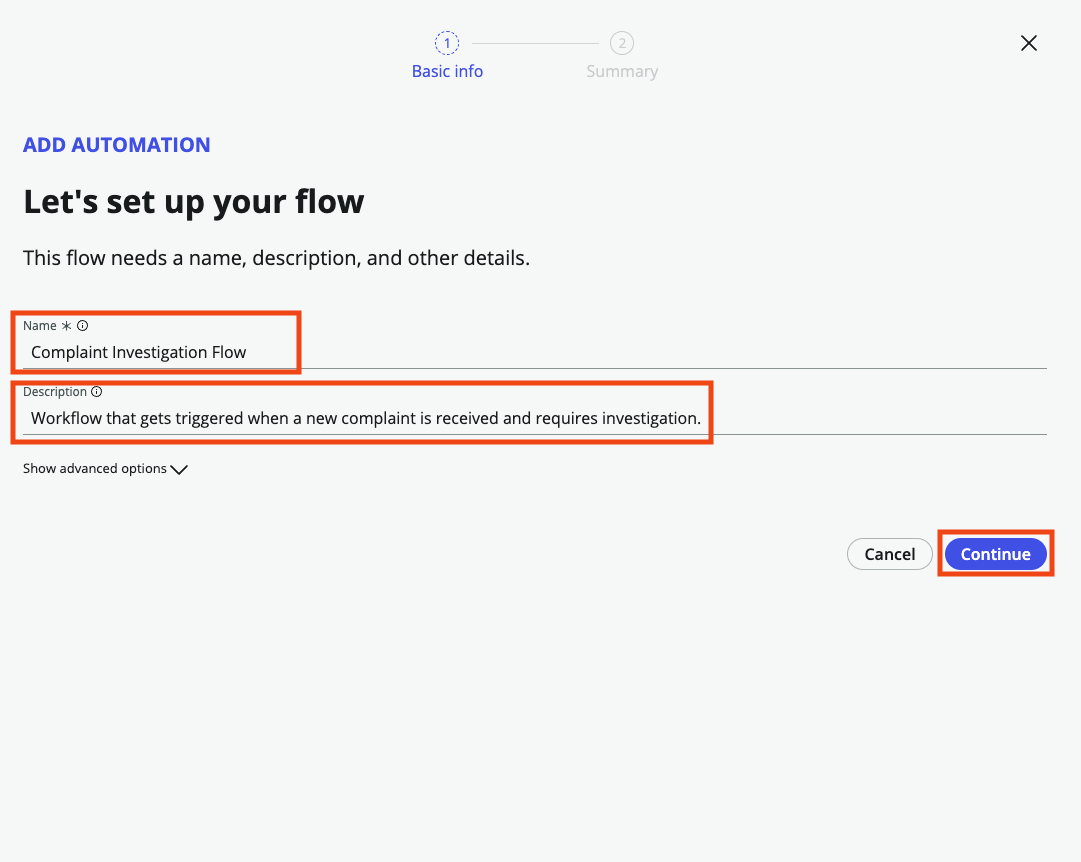
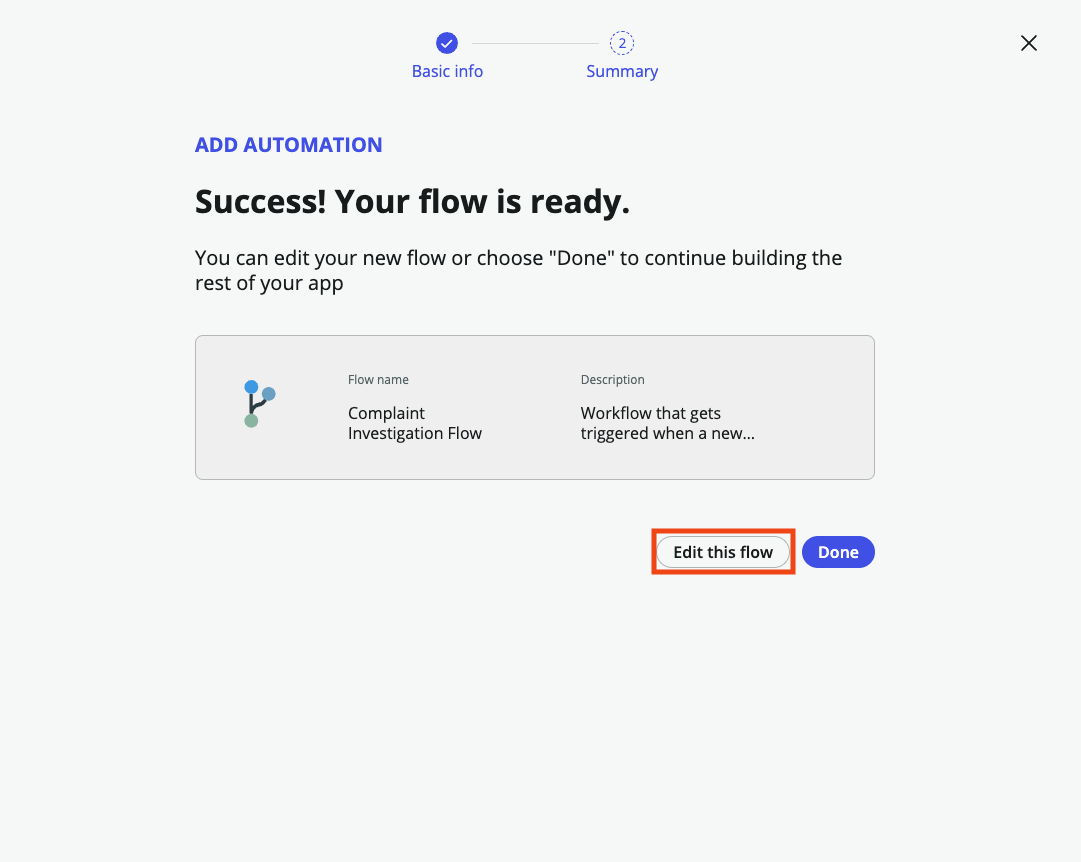
- On the Success! Your flow is ready screen, click Edit this flow
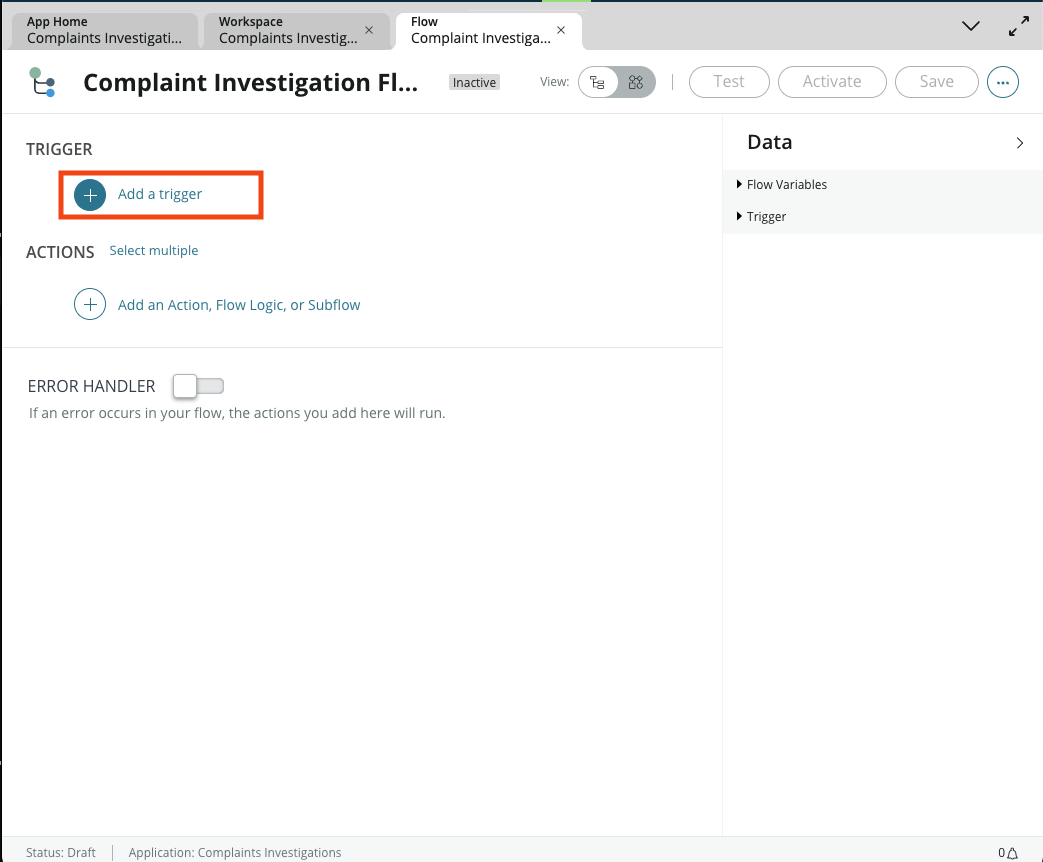
- This will open Flow Designer where we can define our trigger and our resultant actions in our workflow. Click Add a trigger
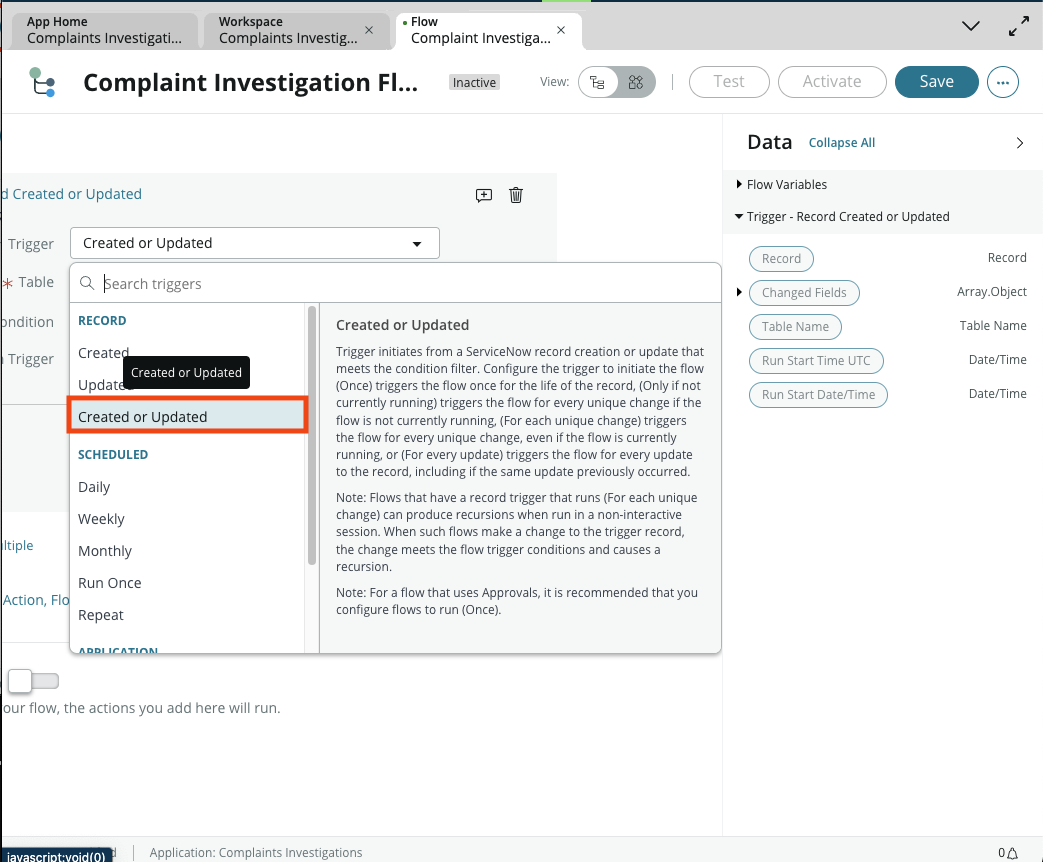
- Choose Created or Updated in the dropdown.
To complete the trigger confguration, set the following values and click Done:
Field Name Value Table Complaint Case [sn_complaint_case] Condition Requires Investigation is True 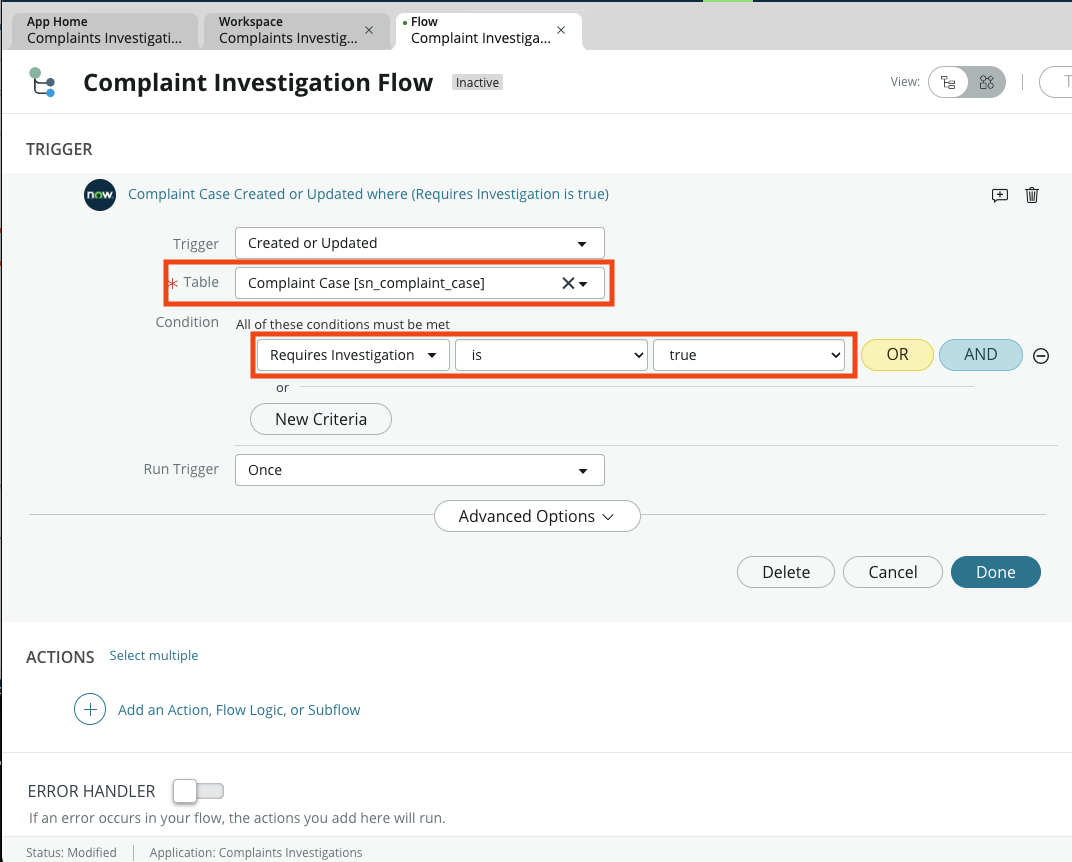
- Now that we know when our flow is going to execute, let's tell it what we want it to do. Under Actions click the + Add an Action, Flow Logic, or Subflow then click Action
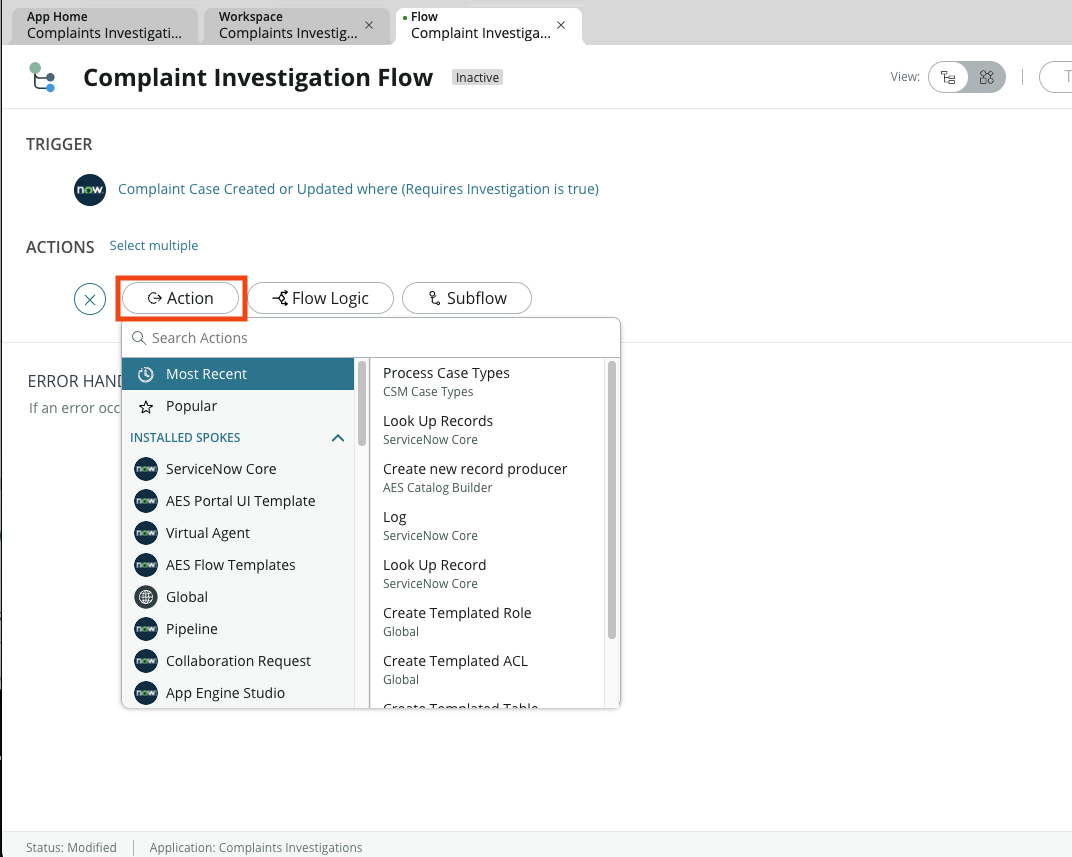
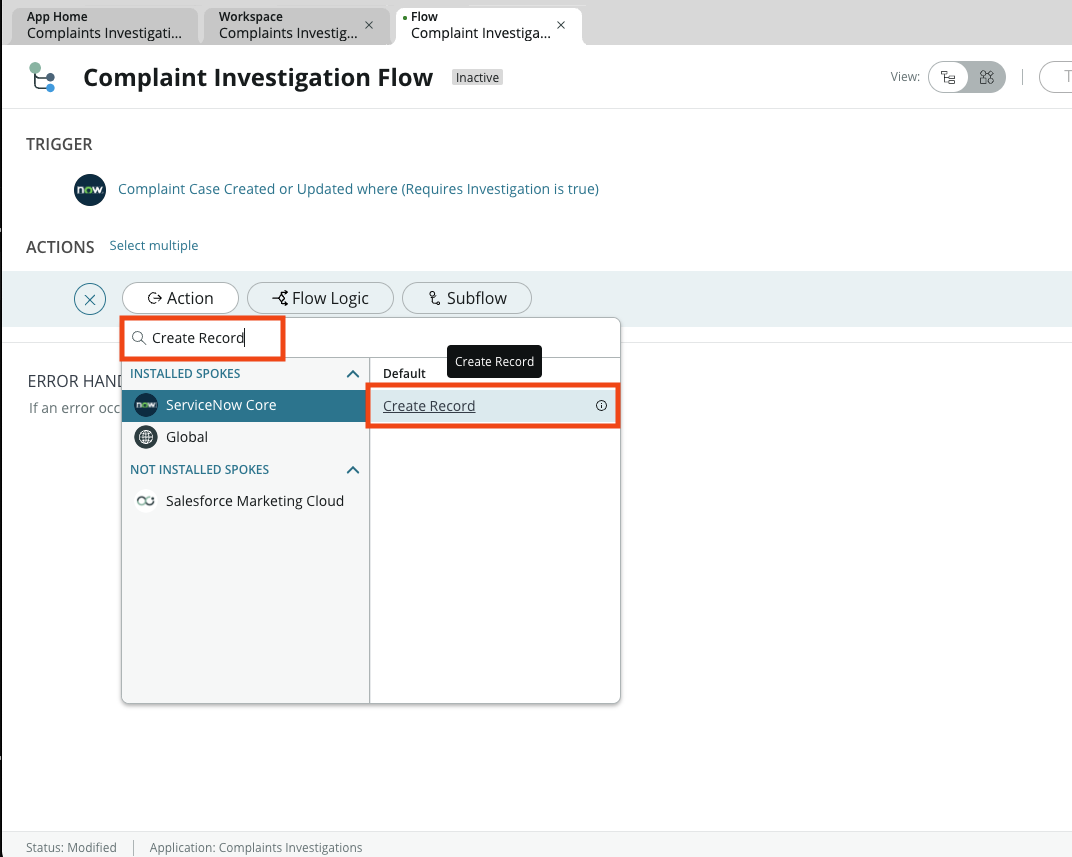
- In the Search Actions field, type Create Record and choose the Create Record option listed in the right column
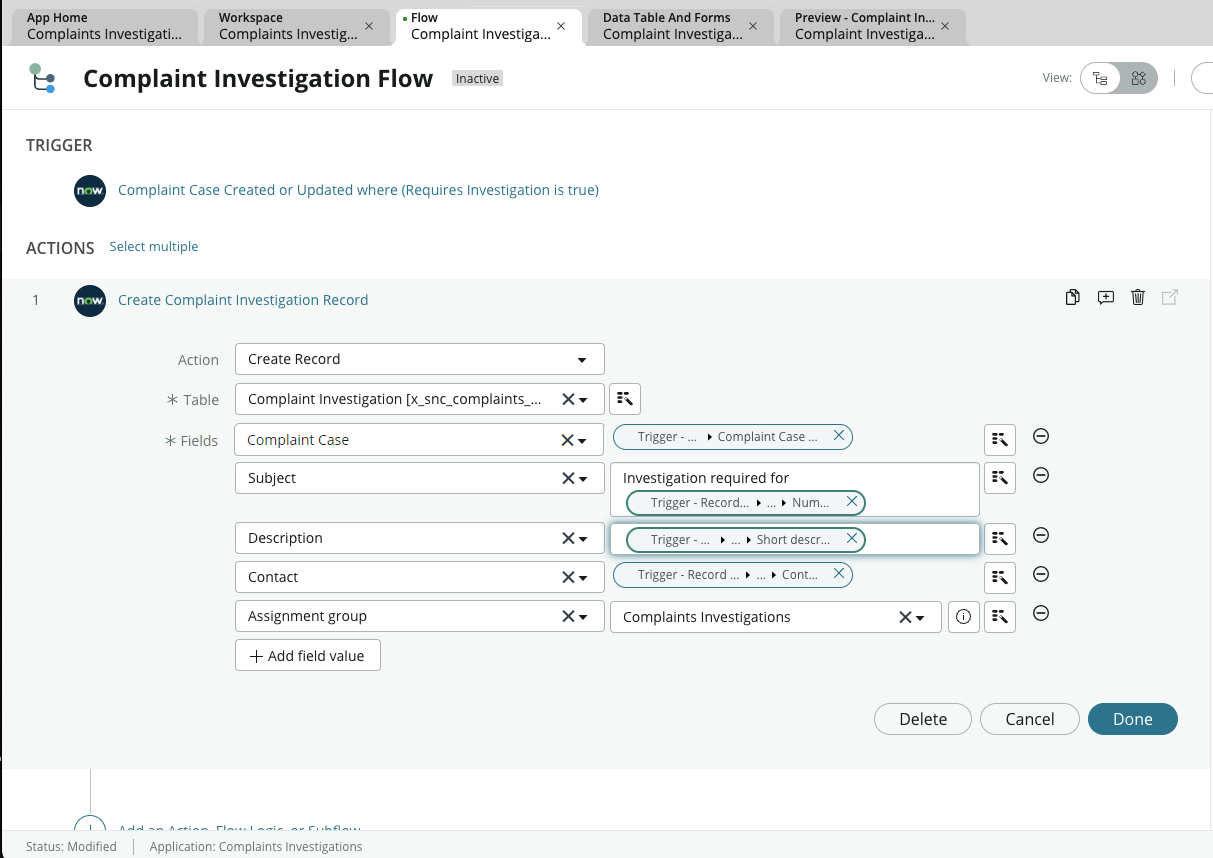
Set the Table field to our Complaint Investigation table we created in our first exercise in App Engine Studio. Then set the Fields as shown below then click Done when complete:
noteValues highlighted in bold below indicate we are dot walking to the fields we need in our workflow
Field Name Value Complaint Case Trigger - Record Created or Updated - Complaint Case Record Subject Investigation required for Trigger - Record Created or Updated - Complaint Case Record - Number Description Trigger - Record Created or Updated - Complaint Case Record - Short Description Contact Trigger - Record Created or Updated - Complaint Case Record - Contact Assignment Group Complaints Investigation When you're finished, your action should look similar to this:
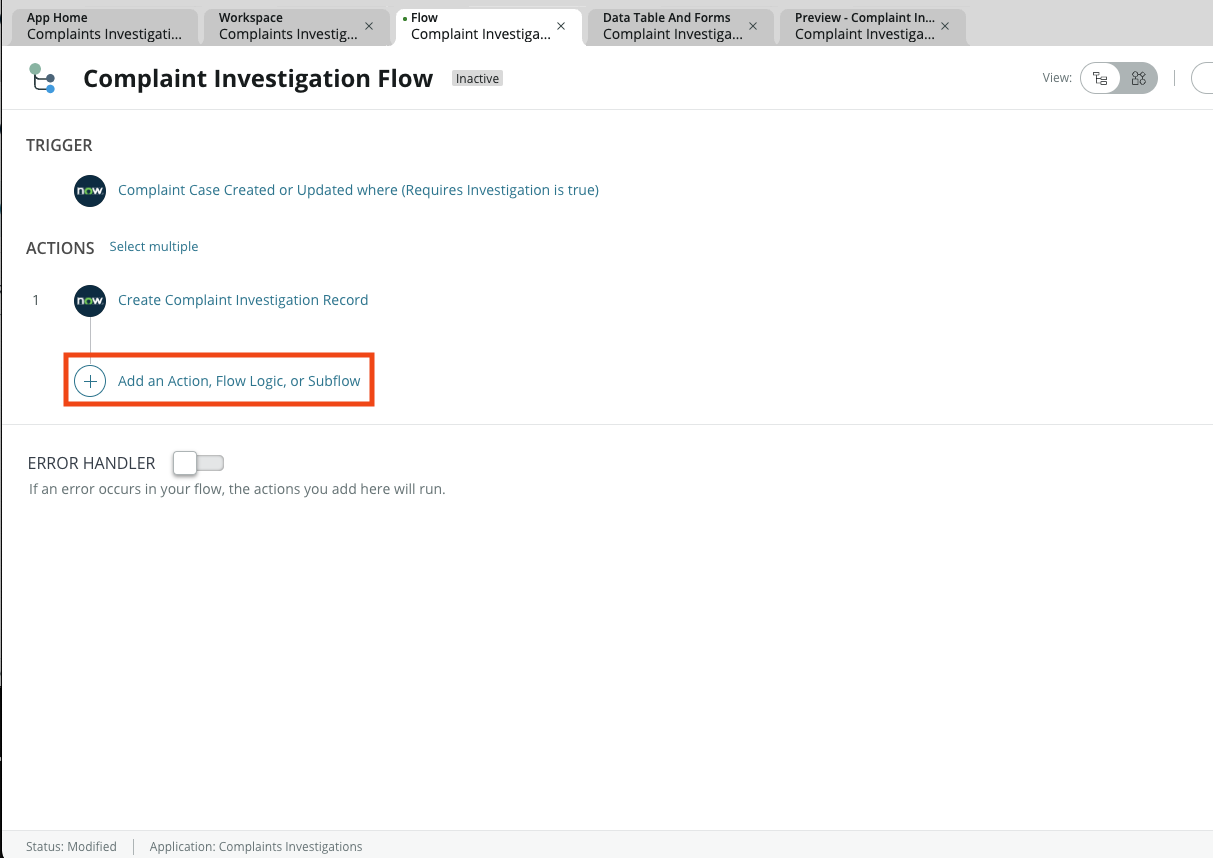
- Next, we want to make sure we indicate in the complaint case record that we have automatically created this investigation. This will ensure that anyone who looks at the case later will know we've taken action. Let's add a new action by clicking the + Add an Action, Flow Logic, or Subflow button under the action we just created then click Action
- This time we're looking for the Add Comment To Task action. In the Search field, type Add comment and select the option that appears under the Customer Service spoke
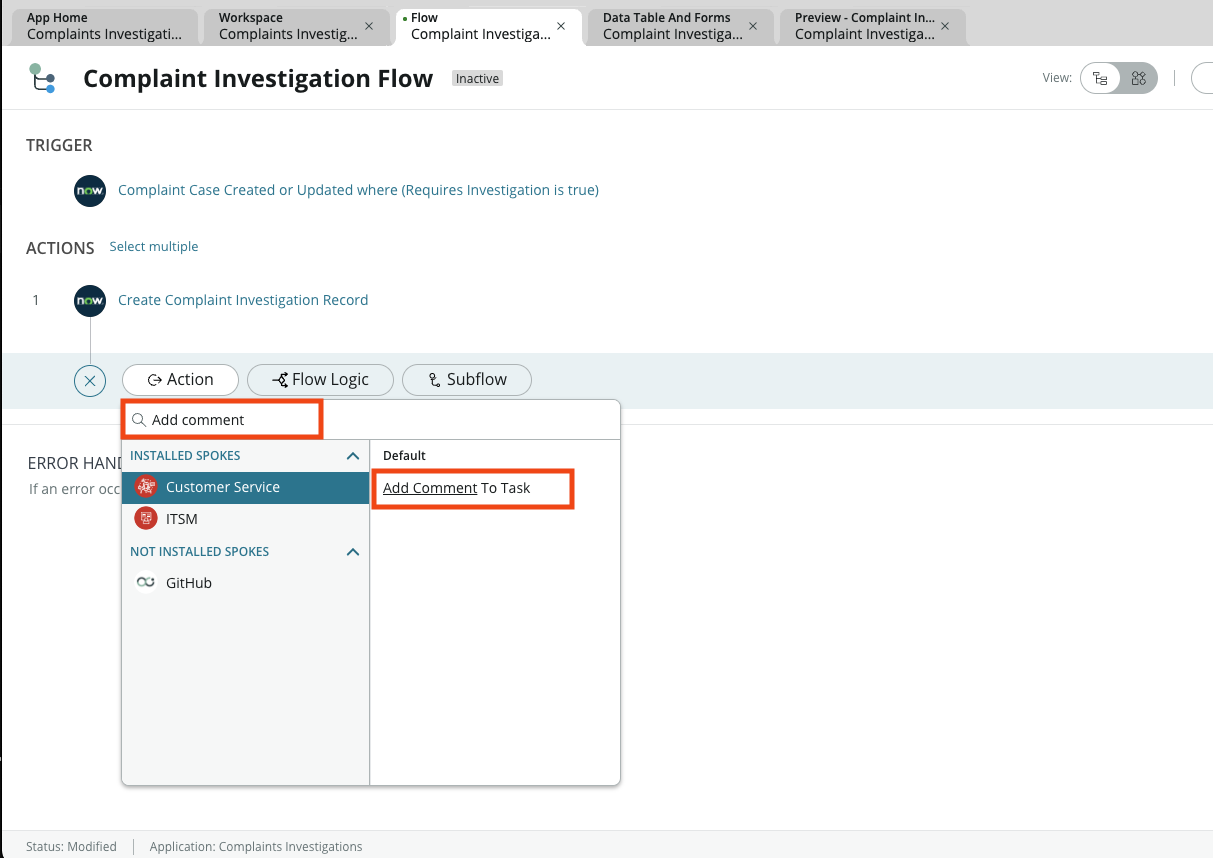
- Complete the action with the following values then click Done:note
Values highlighted in bold below indicate we are dot walking to the fields we need in our workflow
When you're finished, your action should look similar to this:Field Name Value Task [task] Trigger - Record Created or Updated - Complaint Case Record Comment Created investigation task: 1 - Create Record - Complaint Investigation Record - Number 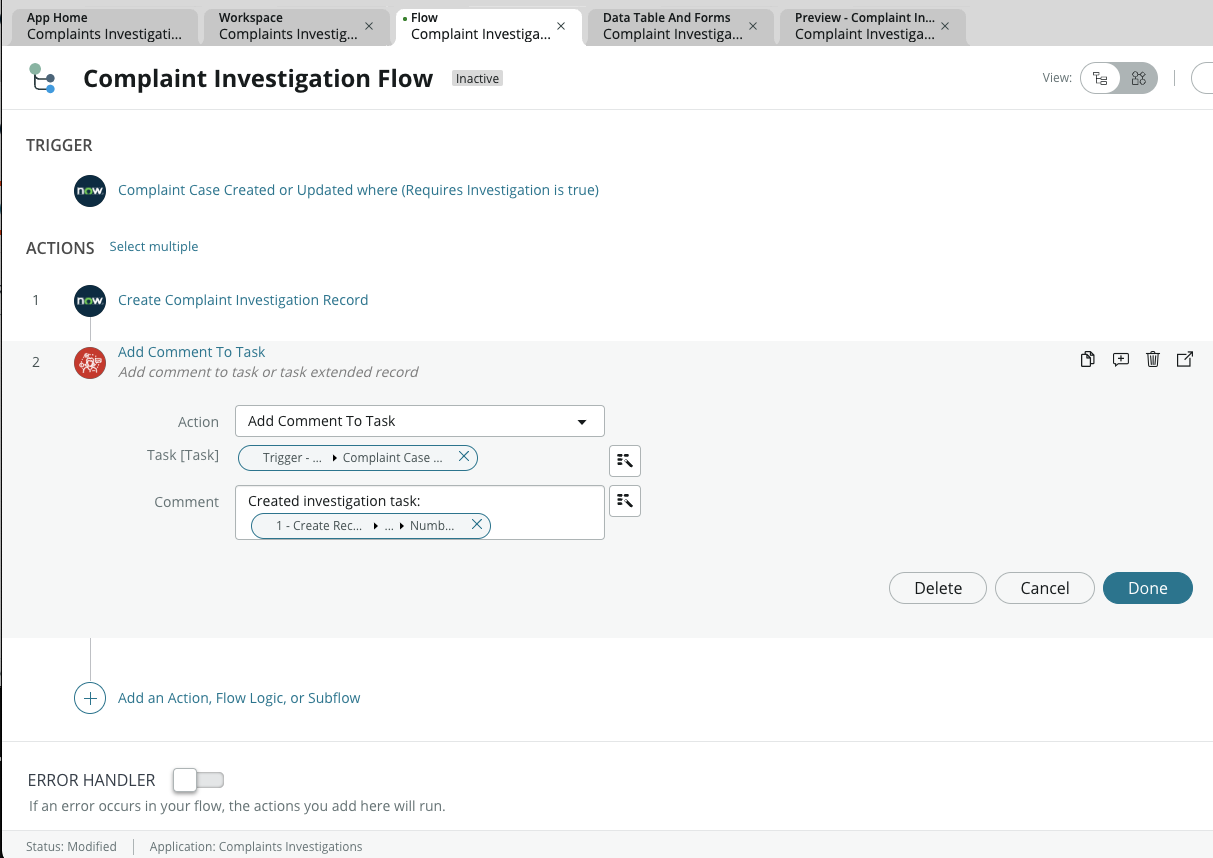
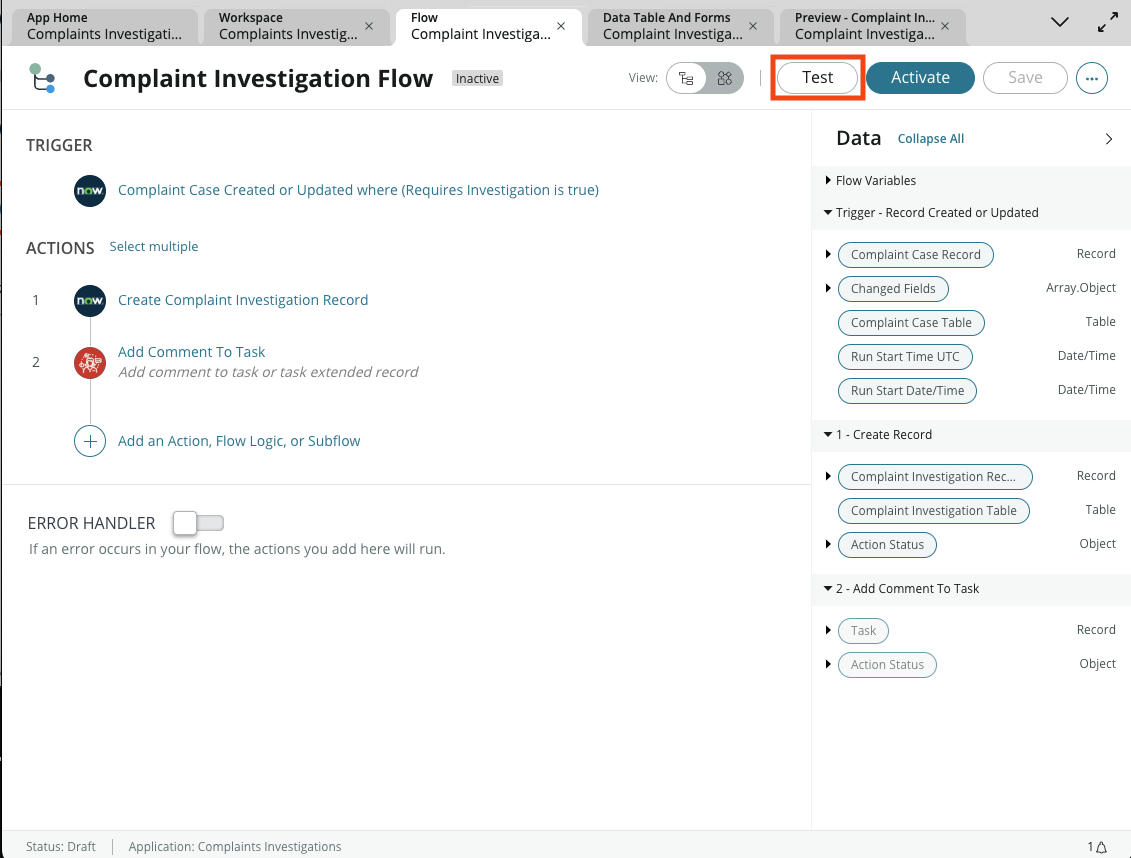
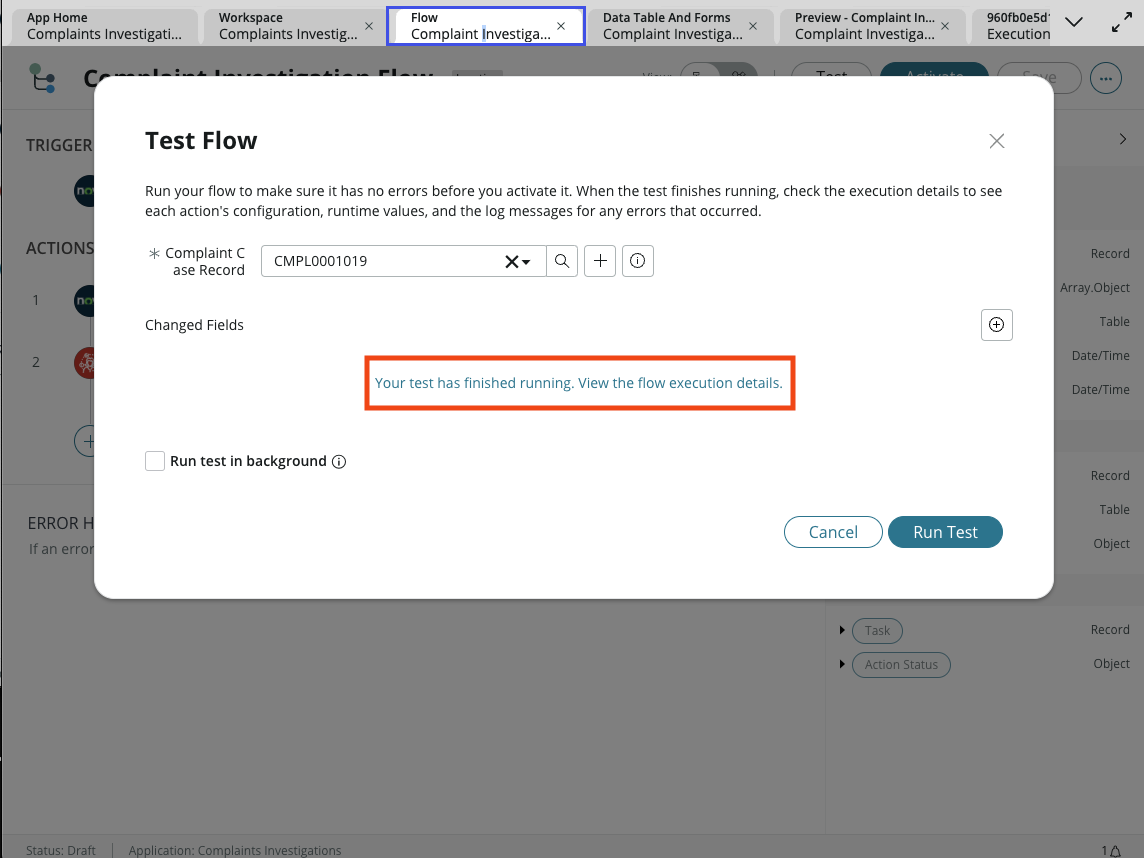
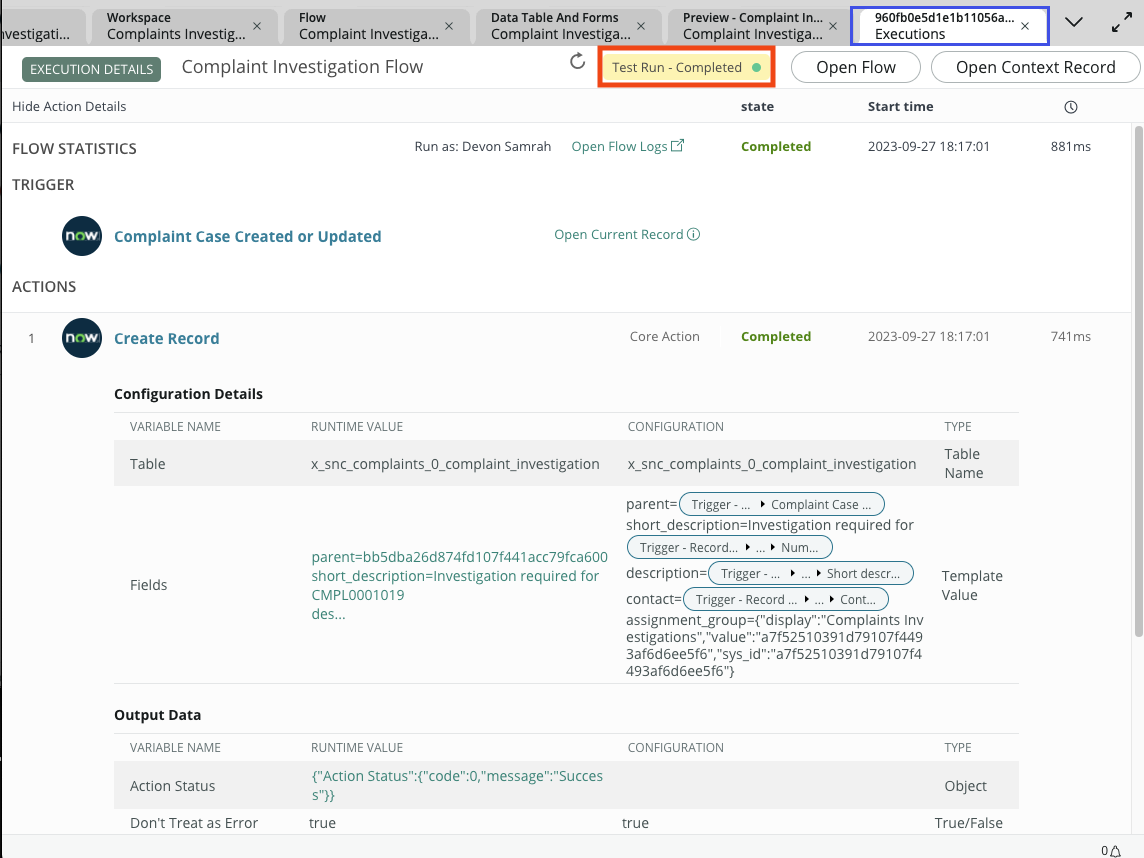
- Time to test! Save your flow and click the Test button at the top of the screen. When prompted, choose the complaint case we created earlier in our labnote
Your complaint number may vary from the one reflected in the lab guide.
- To view your test results, click the link on the pop-up
- Here you will be able to view any errors or resultant records that are created as part of your workflow. If you received errors, go back and take a look at your flow to ensure everything has been completed correctly. If it was successful, you should see Test Run - Completed at the top of your screen
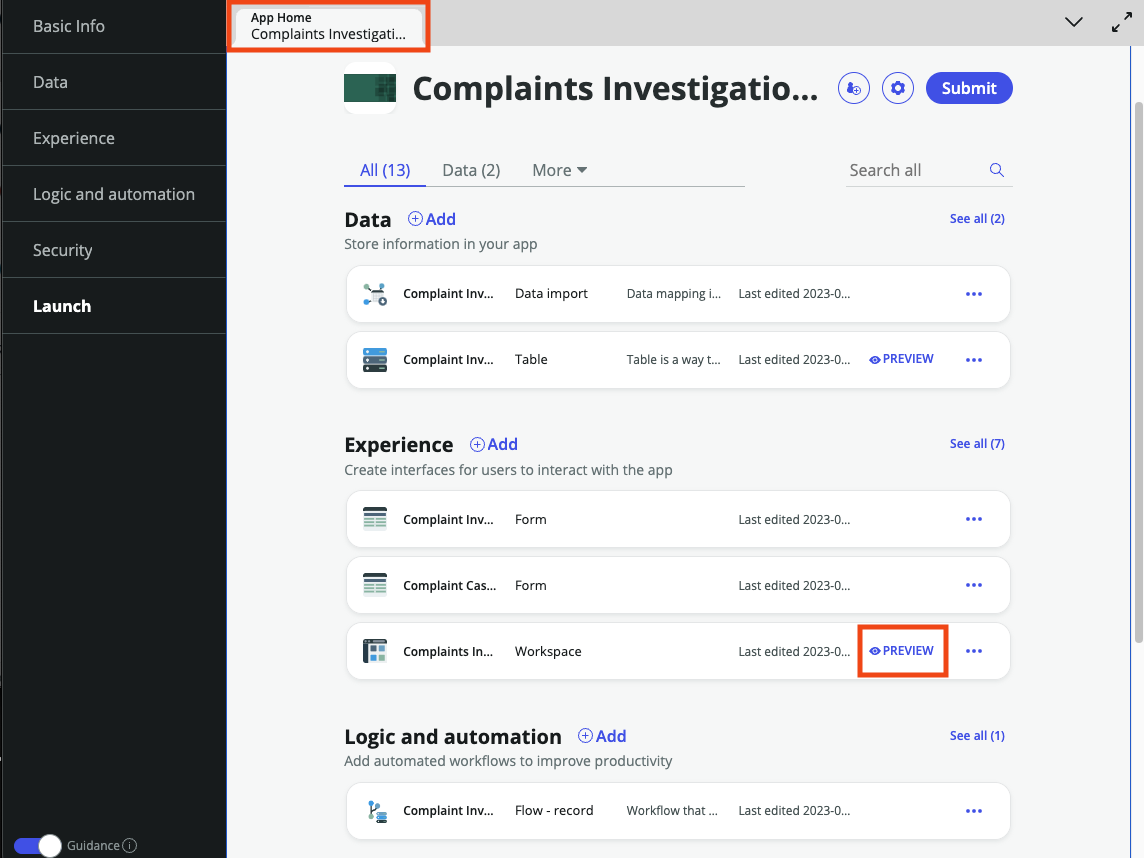
- Finally, let's see what this looks like for Devon in her new Workspace. Go back to App Home and Preview the Workspace again.
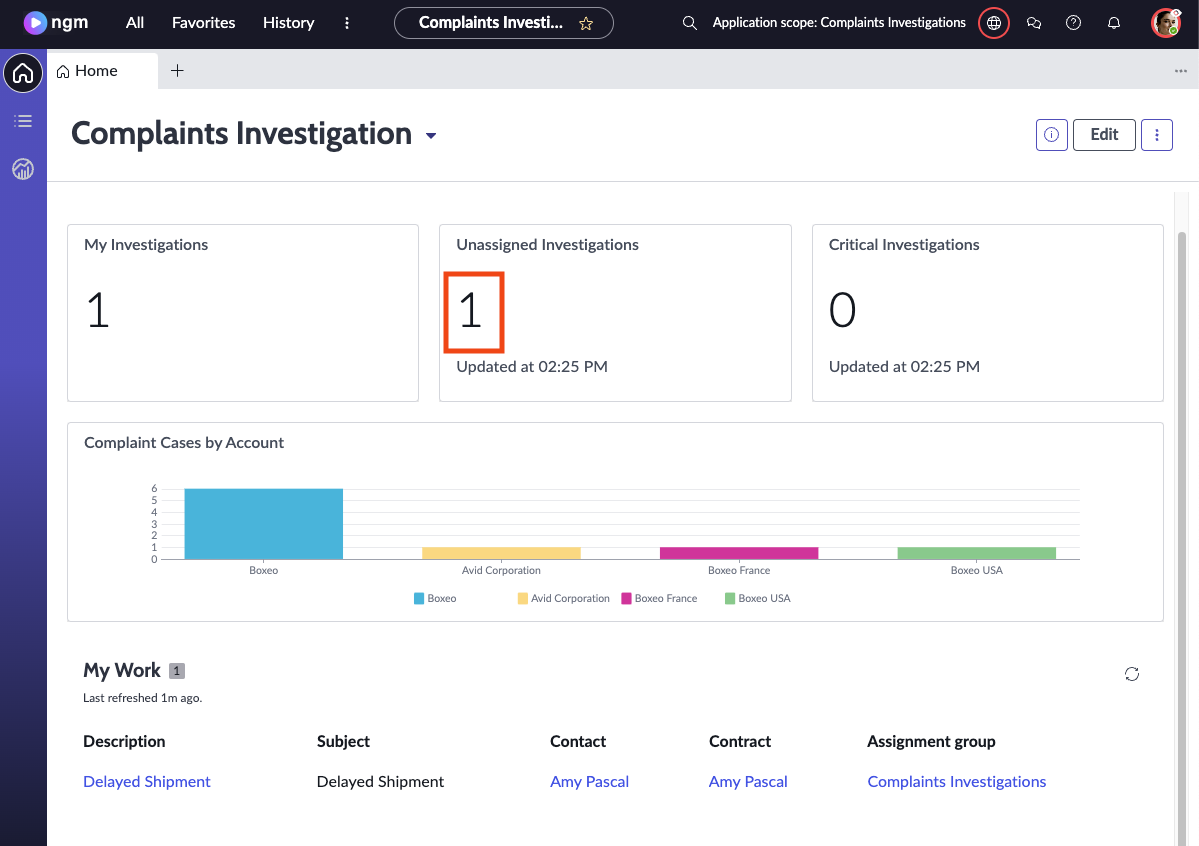
- Notice there is now an unassigned Investigation for Devon awaiting her on the workspace homepage. Click on the 1 under Unassigned Investigations to view the list of investigations that are unnassigned
- Click on the record that appears in the list to view the newly created investigation record. Your screen should look very much like the screen below!
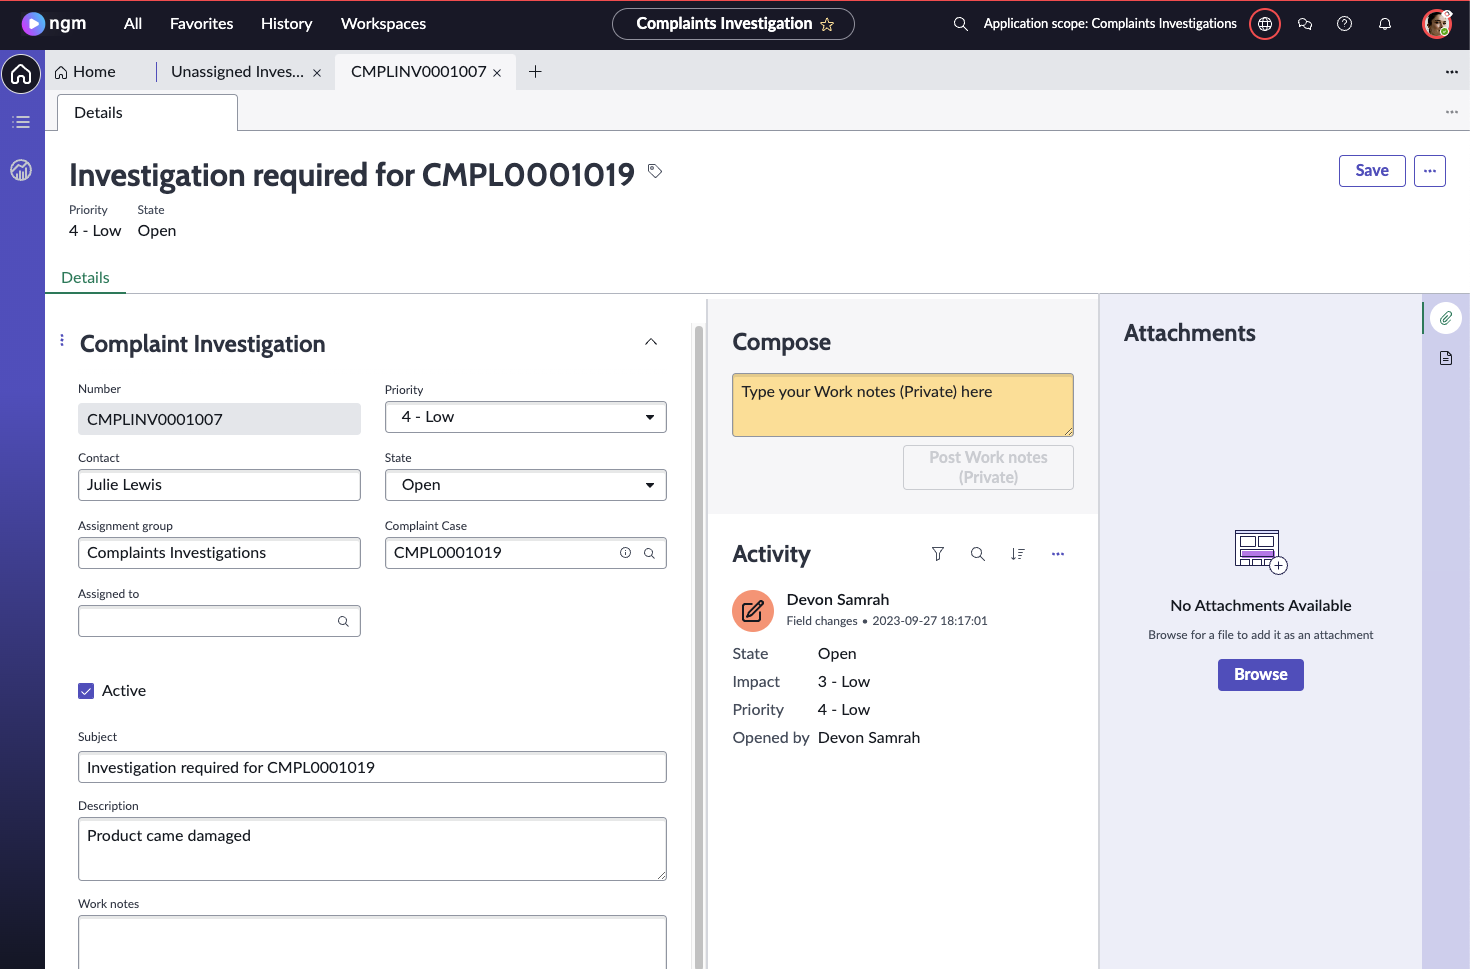
That's it! You've successfully created automation necessary to create a new investigation when a complaint case requires investigation.
Next Steps for Devon:
In the real world, once Devon is happy with her app, she would submit the app for review and approval by the App Engine Administrators.
For the purposes of our lab today, we will not cover those steps, however if you are interested in learning more about how we govern all aspects of application development in ServiceNow, please reach out to your Creator Workflows team.