Create Application Data Model
In this exercise will start building out the tables needed to support out application. We'll import a spreadsheet to quickly populate the table with existing data. This is a very common way customers are building tables in App Engine Studio for processes that are currently being administered in Excel and email.
Data can also be imported from other third-party sources like a database or web service/API.
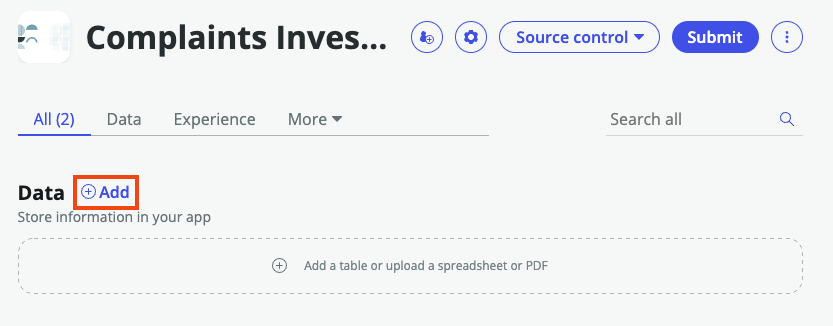
- On the app homepage, click on +Add next to Data.
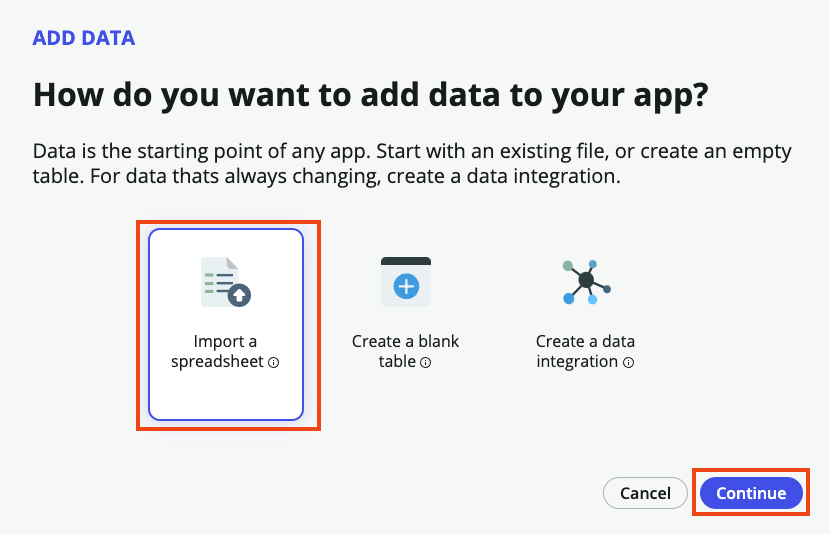
- Select Import a spreadsheet and then the Continue on the next screen
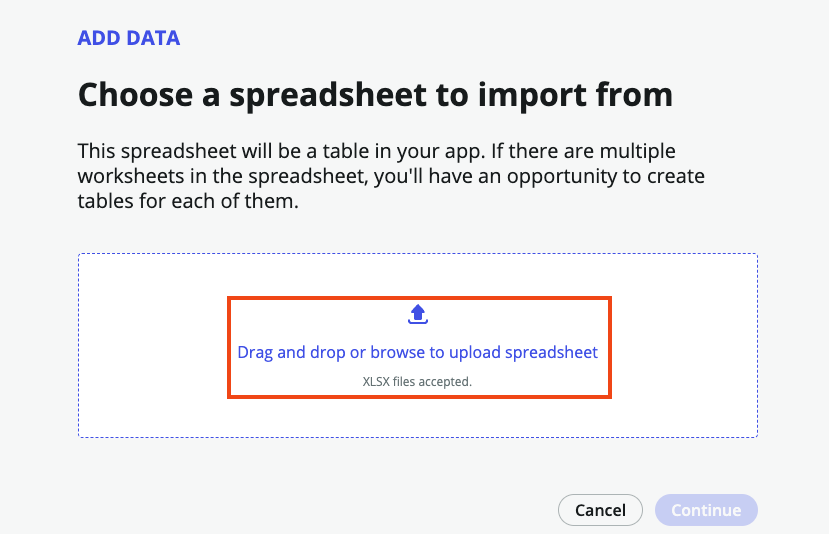
- Click Drag and drop or browse to upload spreadsheet.
Download this file: ComplaintsInvestigationImport.xlsx
and upload the file to the instance.
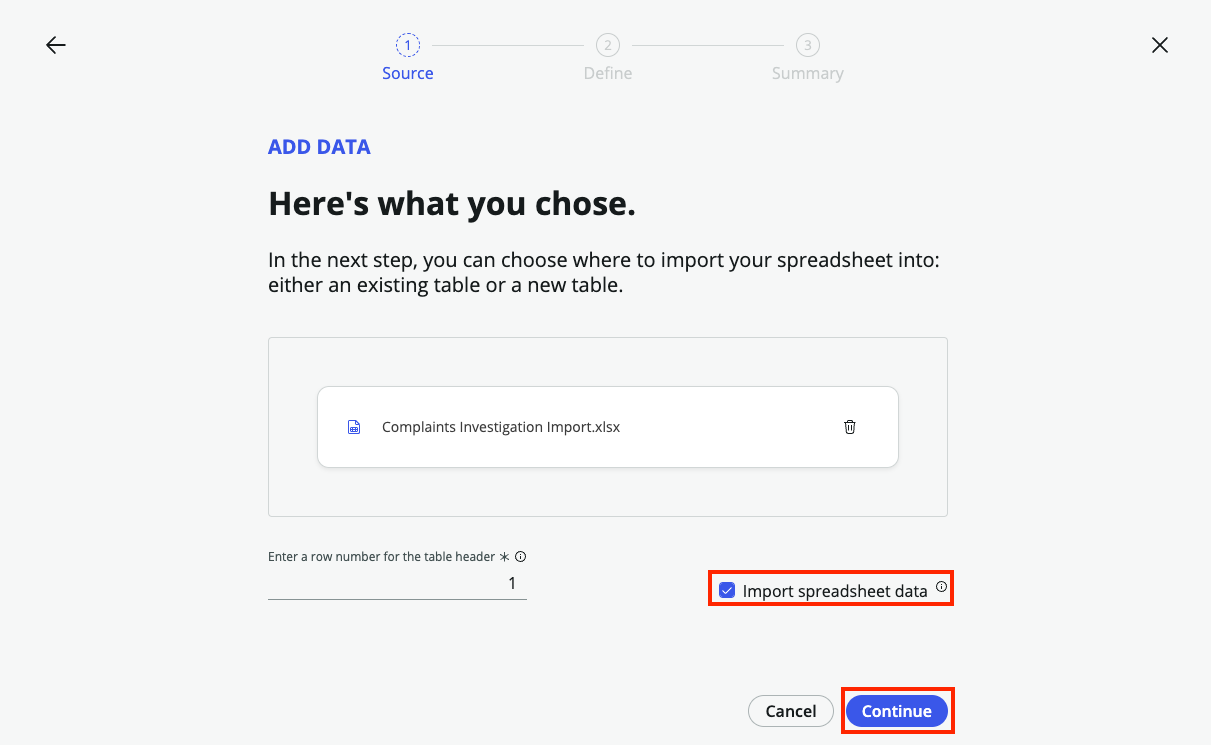
- Check the Import spreadsheet data checkbox and click Continue
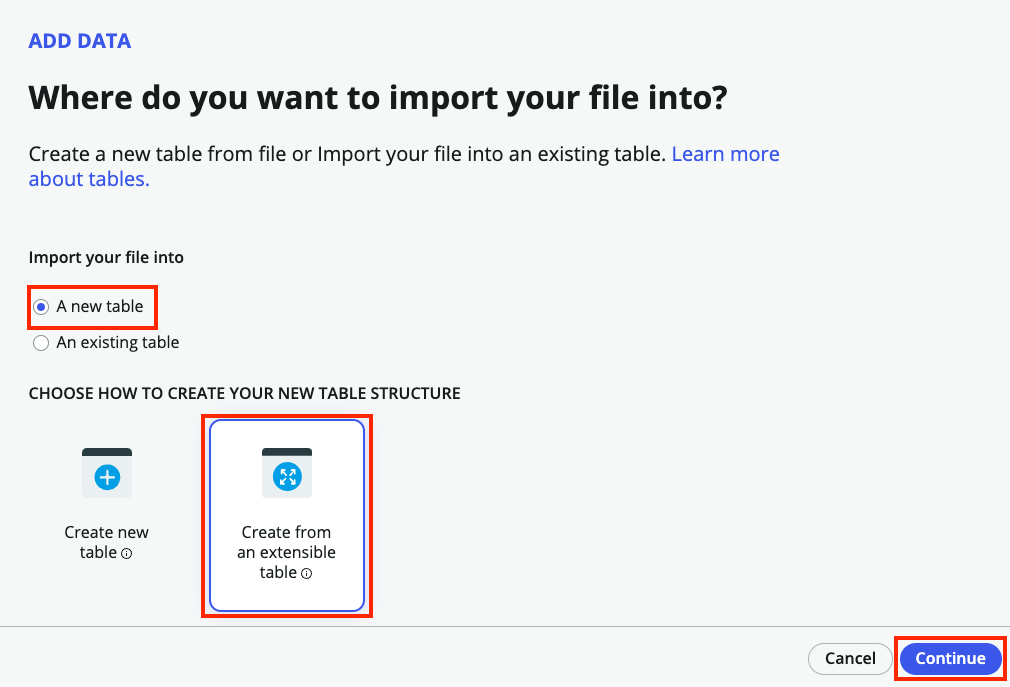
- On the next screen, keep the default option of A new table and choose Create from an extensible table then click Continue
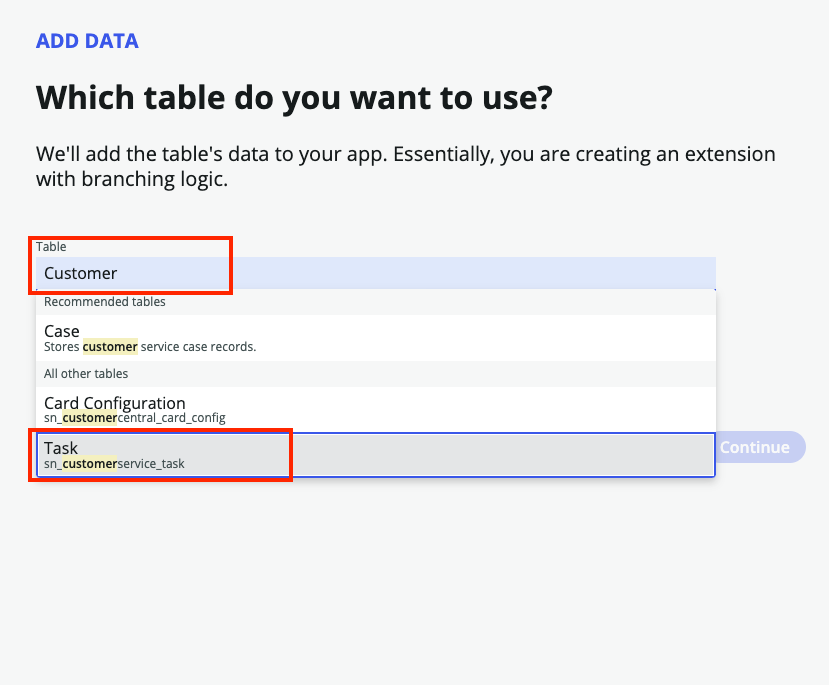
- Search in the Table field for Customer and choose Task from the list. Click Continue
- Set the Table label field to Complaint Investigation Select Auto number Set the Prefix field to CMPLINV
 info
infoSetting the Prefix allows us to distinguish our tasks from records created that are also extended from the Customer Service Task table.
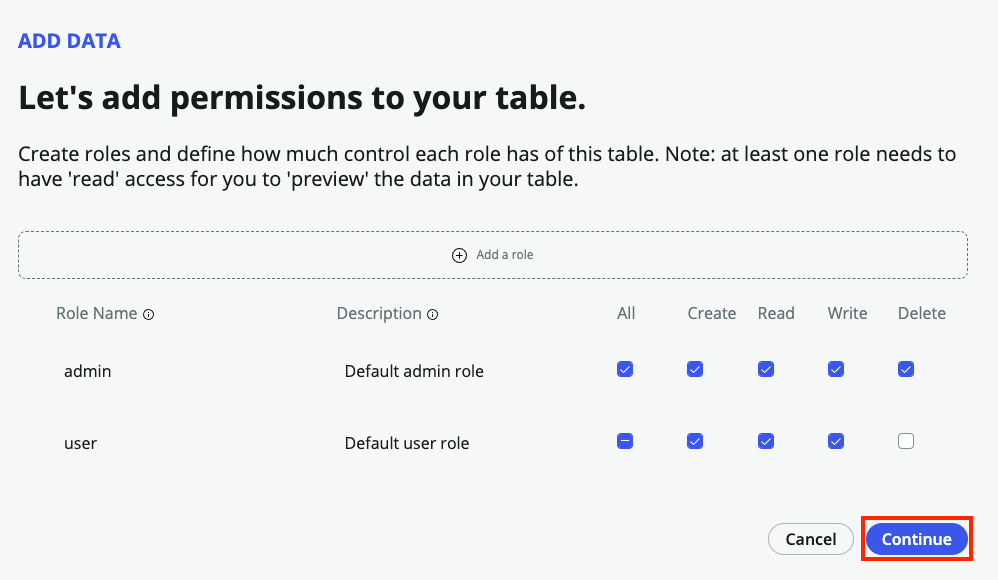
- The next step is to setup permission for the Complaint Investigation table. Assign full permissions to the admin role by selecting All. Select the Create, Read and Write permissions for the user role. When finished, click Continue.
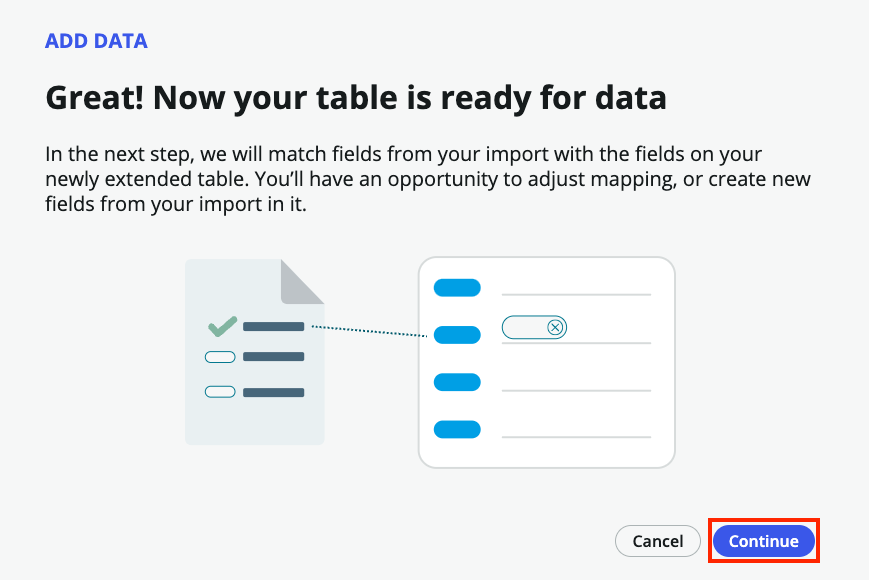
- Now, we wait for the platform to create our table. Select Continue once the table is created to move on to mapping our imported data to the appropriate fields.
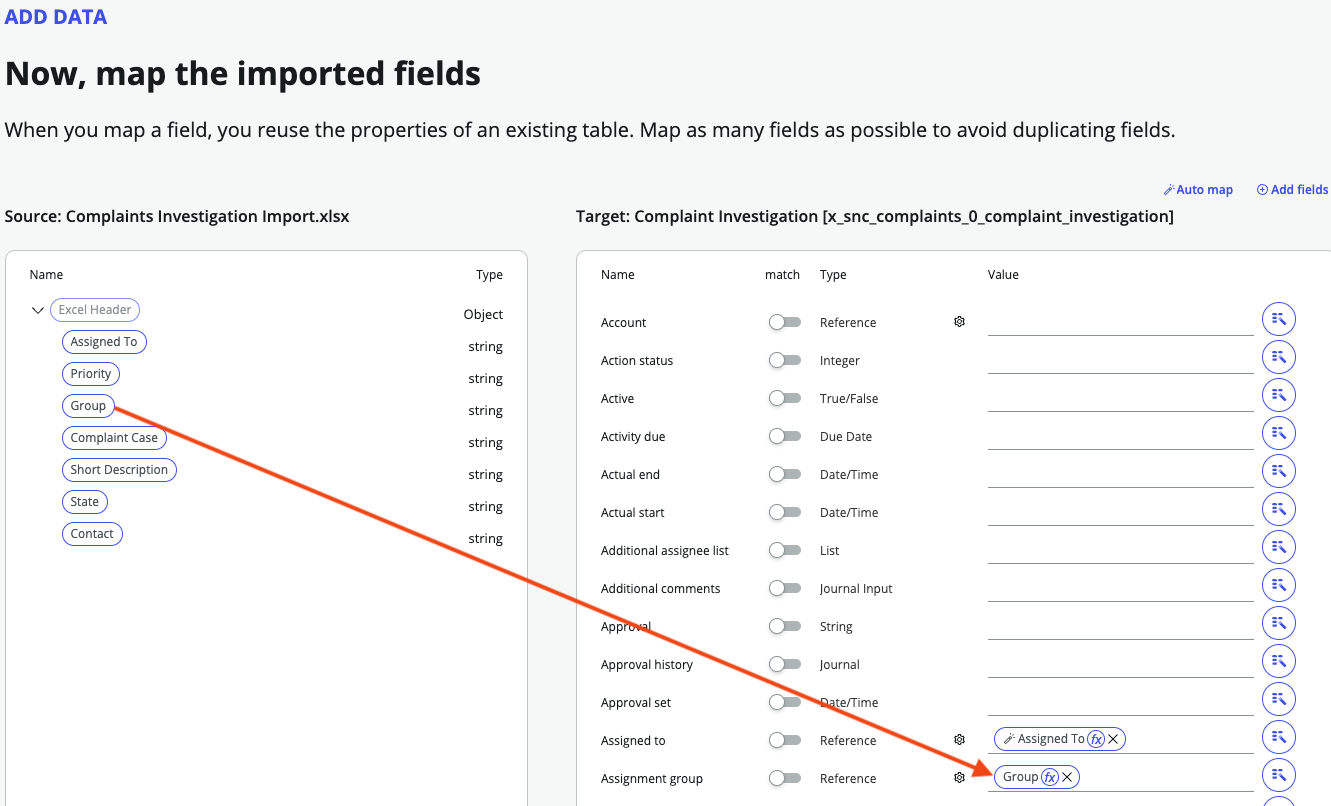
- Once the screen loads, you can exit out of any guided tour popup that may appear initially. Looking at the right hand column, you'll notice the platform automatically mapped our fields for us! This is indicated by the wand icon next to the column name

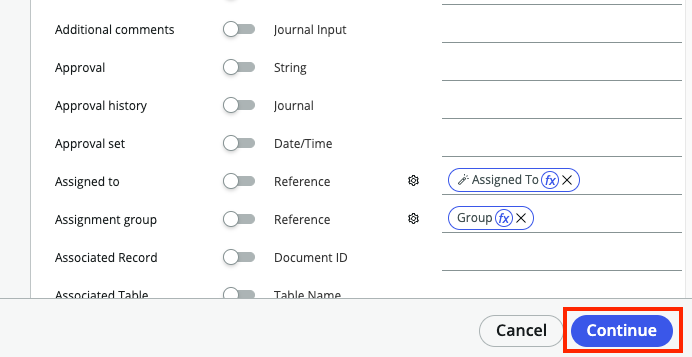
- Scroll through the list to ensure all your fields are accounted for. You'll notice that Group is not associated with the Assignment Group field on our table. Drag and drop it from the left side to the right next to the Assignment Group field.
- We also need to associate these existing complaint investigations with the cases they are related to. Scroll down until you see the Parent field on the right. Click the magic wand icon on the right of the field then the small arrow next to Source and choose the Complaint Case option from the menu.
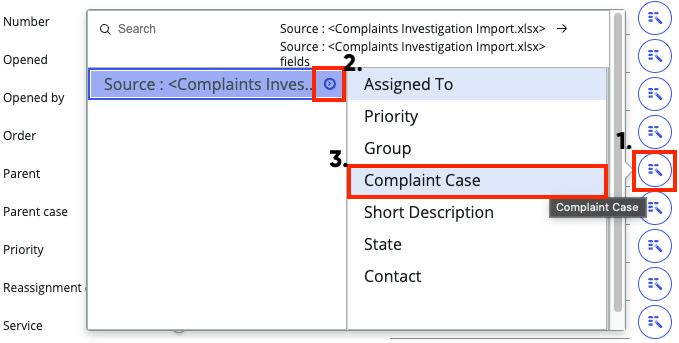 info
infoThis is referred to as 'dot-walking'.
- Click Continue
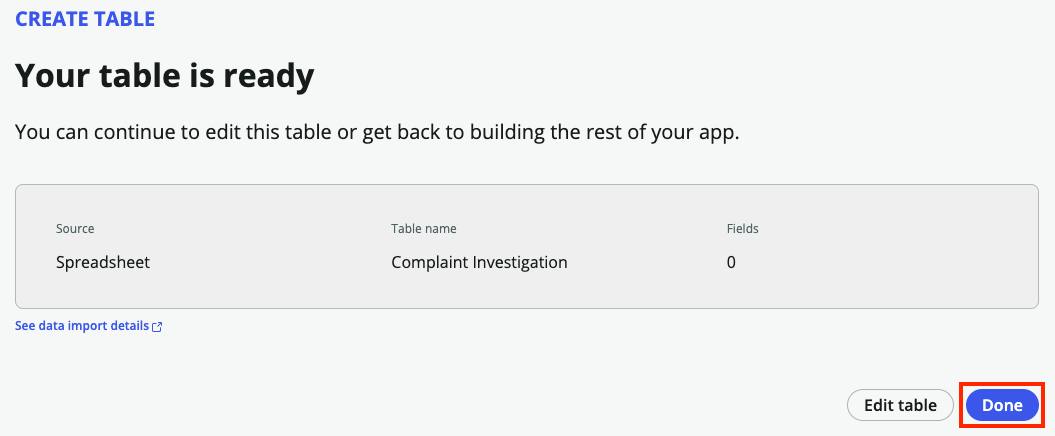
- Click Done once the table has been created to return to the App Home.
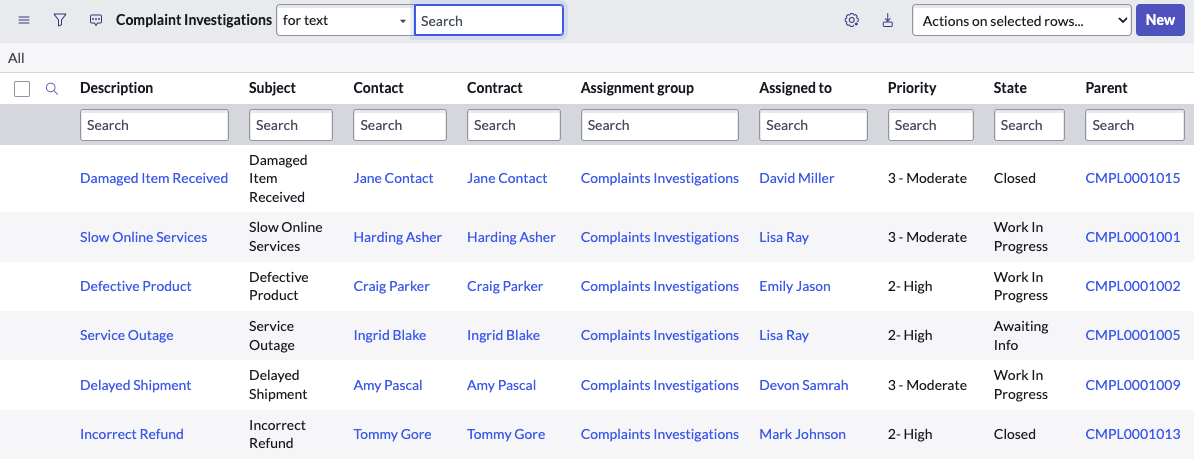
- Let's check our table to make sure the data is mapped correctly. You should see our newly created Complaints Investigation table listed under Data. Click on the Preview link

- Your screen should look similar to the one below
 Once you've finished reviewing the data, close the window to return to App Engine Studio
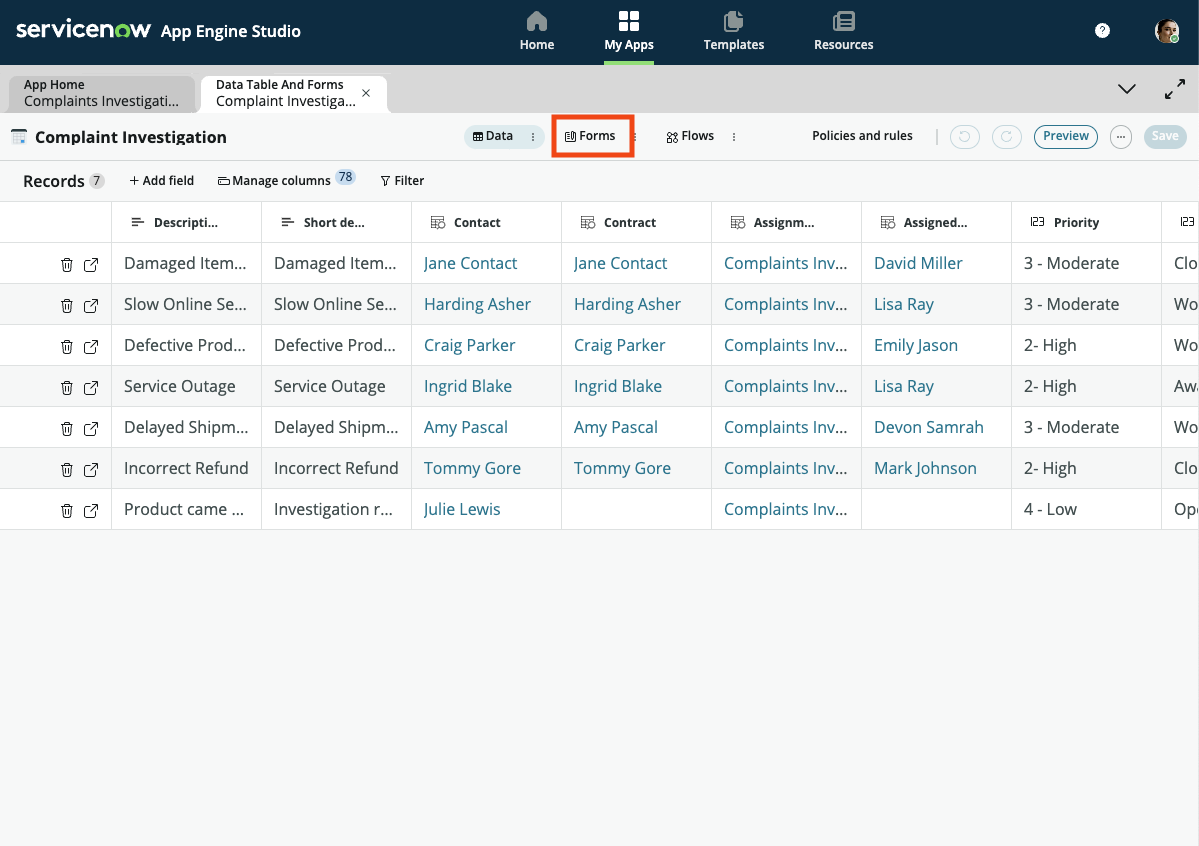
- Next, let's focus on the data we want to be shown on the screens when viewing these investigation records. In App Engine Studio, click on the table and click on Forms at the top of the screen to open Form Builder
- To make this form more useful for us, remove the Configuration Item field by hovering over the field and clicking on the X that appears
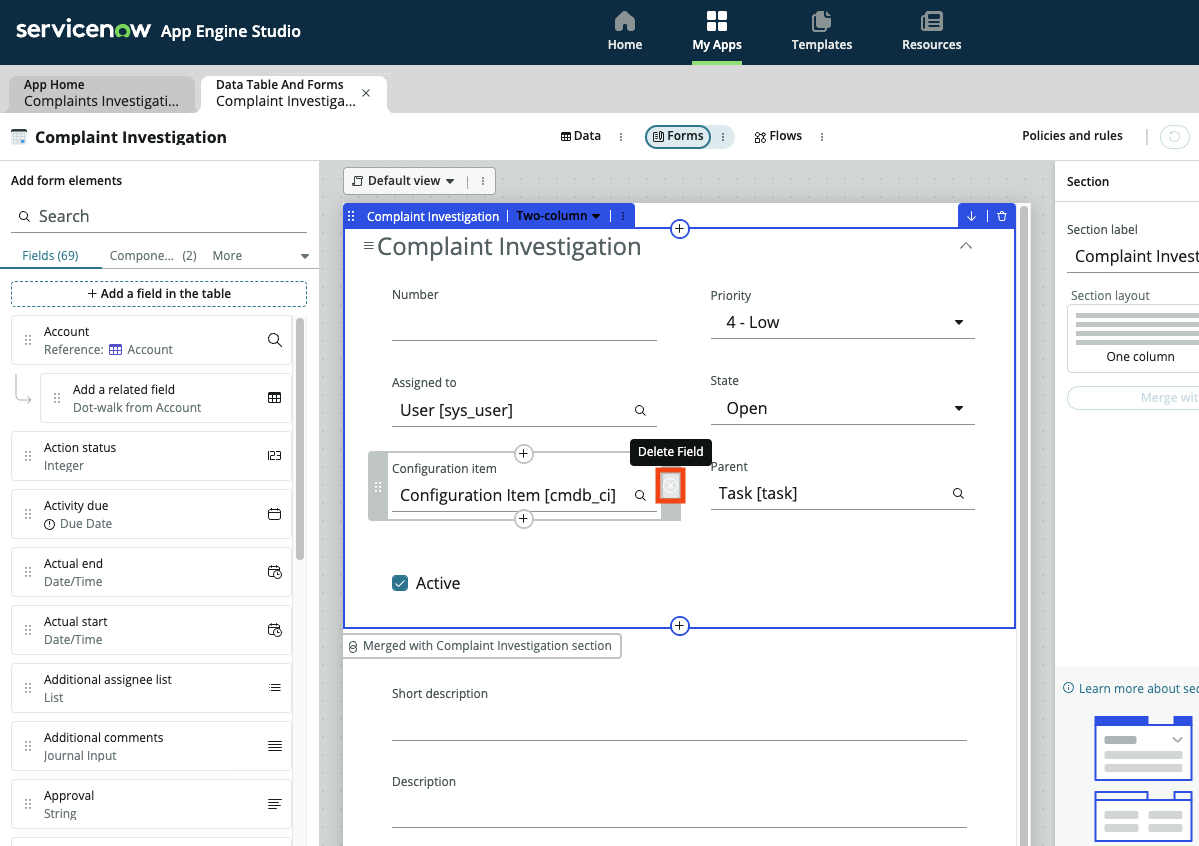
- Now we'll add some fields that help us with our investigation process. On the Add form elements side bar, search for the Assignment Group field and drag/drop it on the form. Repeat the process for Contact and save your form once complete. Your form should look similar to below

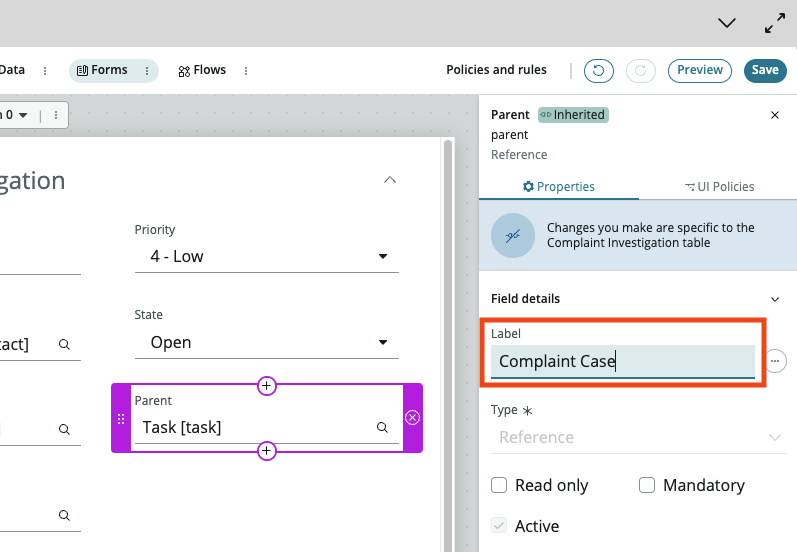
- Let's also rename the Parent field so it is more meaningful for our process. Click on the Parent field and change the Label field in the right configuration section to say Complaint Case and click Saveinfo
This label change will only be reflected in our Complaint Investigation table and will not impact the rest of the platform.
Excellent! Now that we have our legacy data in the plaform, let's look to see how we create our own Workspace to start managing these investigations using ServiceNow!