Exercise: Configure Pipeline in Prod
Estimated Time to Complete: 15 minutes
Overview
Pipelines ↗ establish the path an application takes from Development to Production.
This facilitates administrators' ability to efficiently transfer applications across different instances in the App Engine Management Center.
The process involves setting up and configuring your pipeline, specifying the Environments ↗ to include, and determining their position in the pipeline.
The Pipeline is exclusive to the Controller Environment, which in this case is the Production instance.
Before Exercise
After Exercise
Example of a Dev->Test->Prod Pipeline
In this Lab, you will only configure Dev and Prod in the Pipeline.
Pipeline records are only configured in Prod.
Instructions
Complete this exercise in the Global scope.
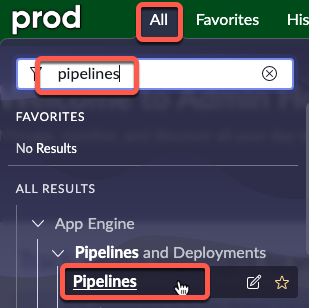
- Click All >> type pipelines >> click Pipelines.
- Initiate a new pipeline: Click New in the top-right corner.

Fill out the form as follows:
# Field Value 1 Name Main Pipeline 2 Pipeline Type Application Deployment 3 Source Environment Dev 4 Active Checked 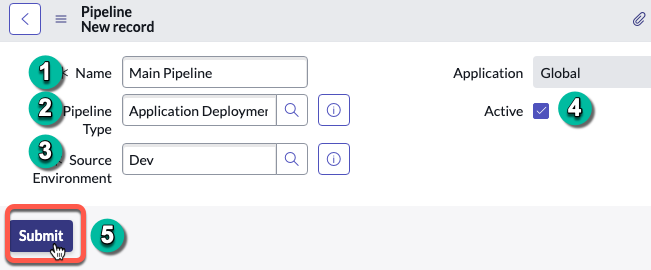
- Submit the form.

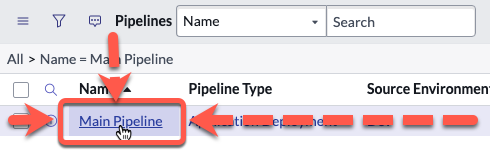
- Open the newly created Main Pipeline record.
- Click New in the Pipeline Environments Order related list.
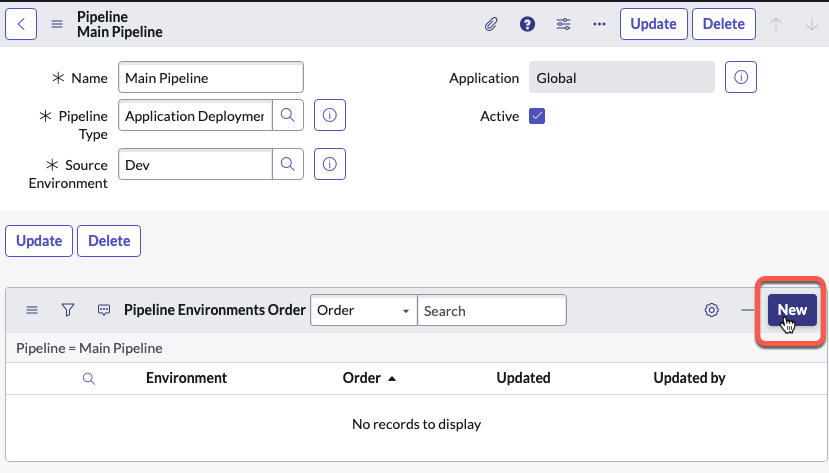
Complete the new form as shown below and click Submit when done.
# Field Value 1 Pipeline Main Pipeline 2 Environment Prod 3 Order 100 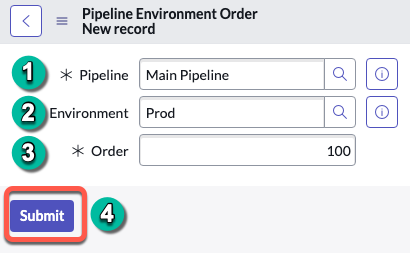
Click Submit.
- Your completed Pipeline record will look like this:
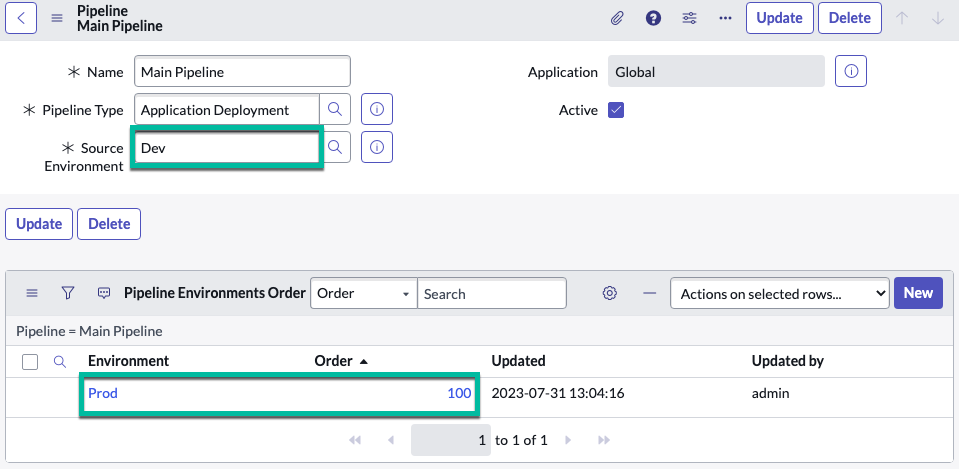
Make sure your Pipeline configuration matches the screenshot above.
DO NOT add Dev to the Pipeline Environments Order related list.
It is the Source Environment and does not get added to the additional environments list.
Lessons Learned
Through this exercise, we grasped the importance of correctly configuring the Pipeline in the Production instance.