Bonus Exercise 2.1: Create a Workspace
Duration: 30 minutes
caution
Pre-requisites: Bonus Exercise 1
Some screens will show forms that were configured in Bonus Exercise 1.
These are minor changes that will not affect the completion of this exercise.
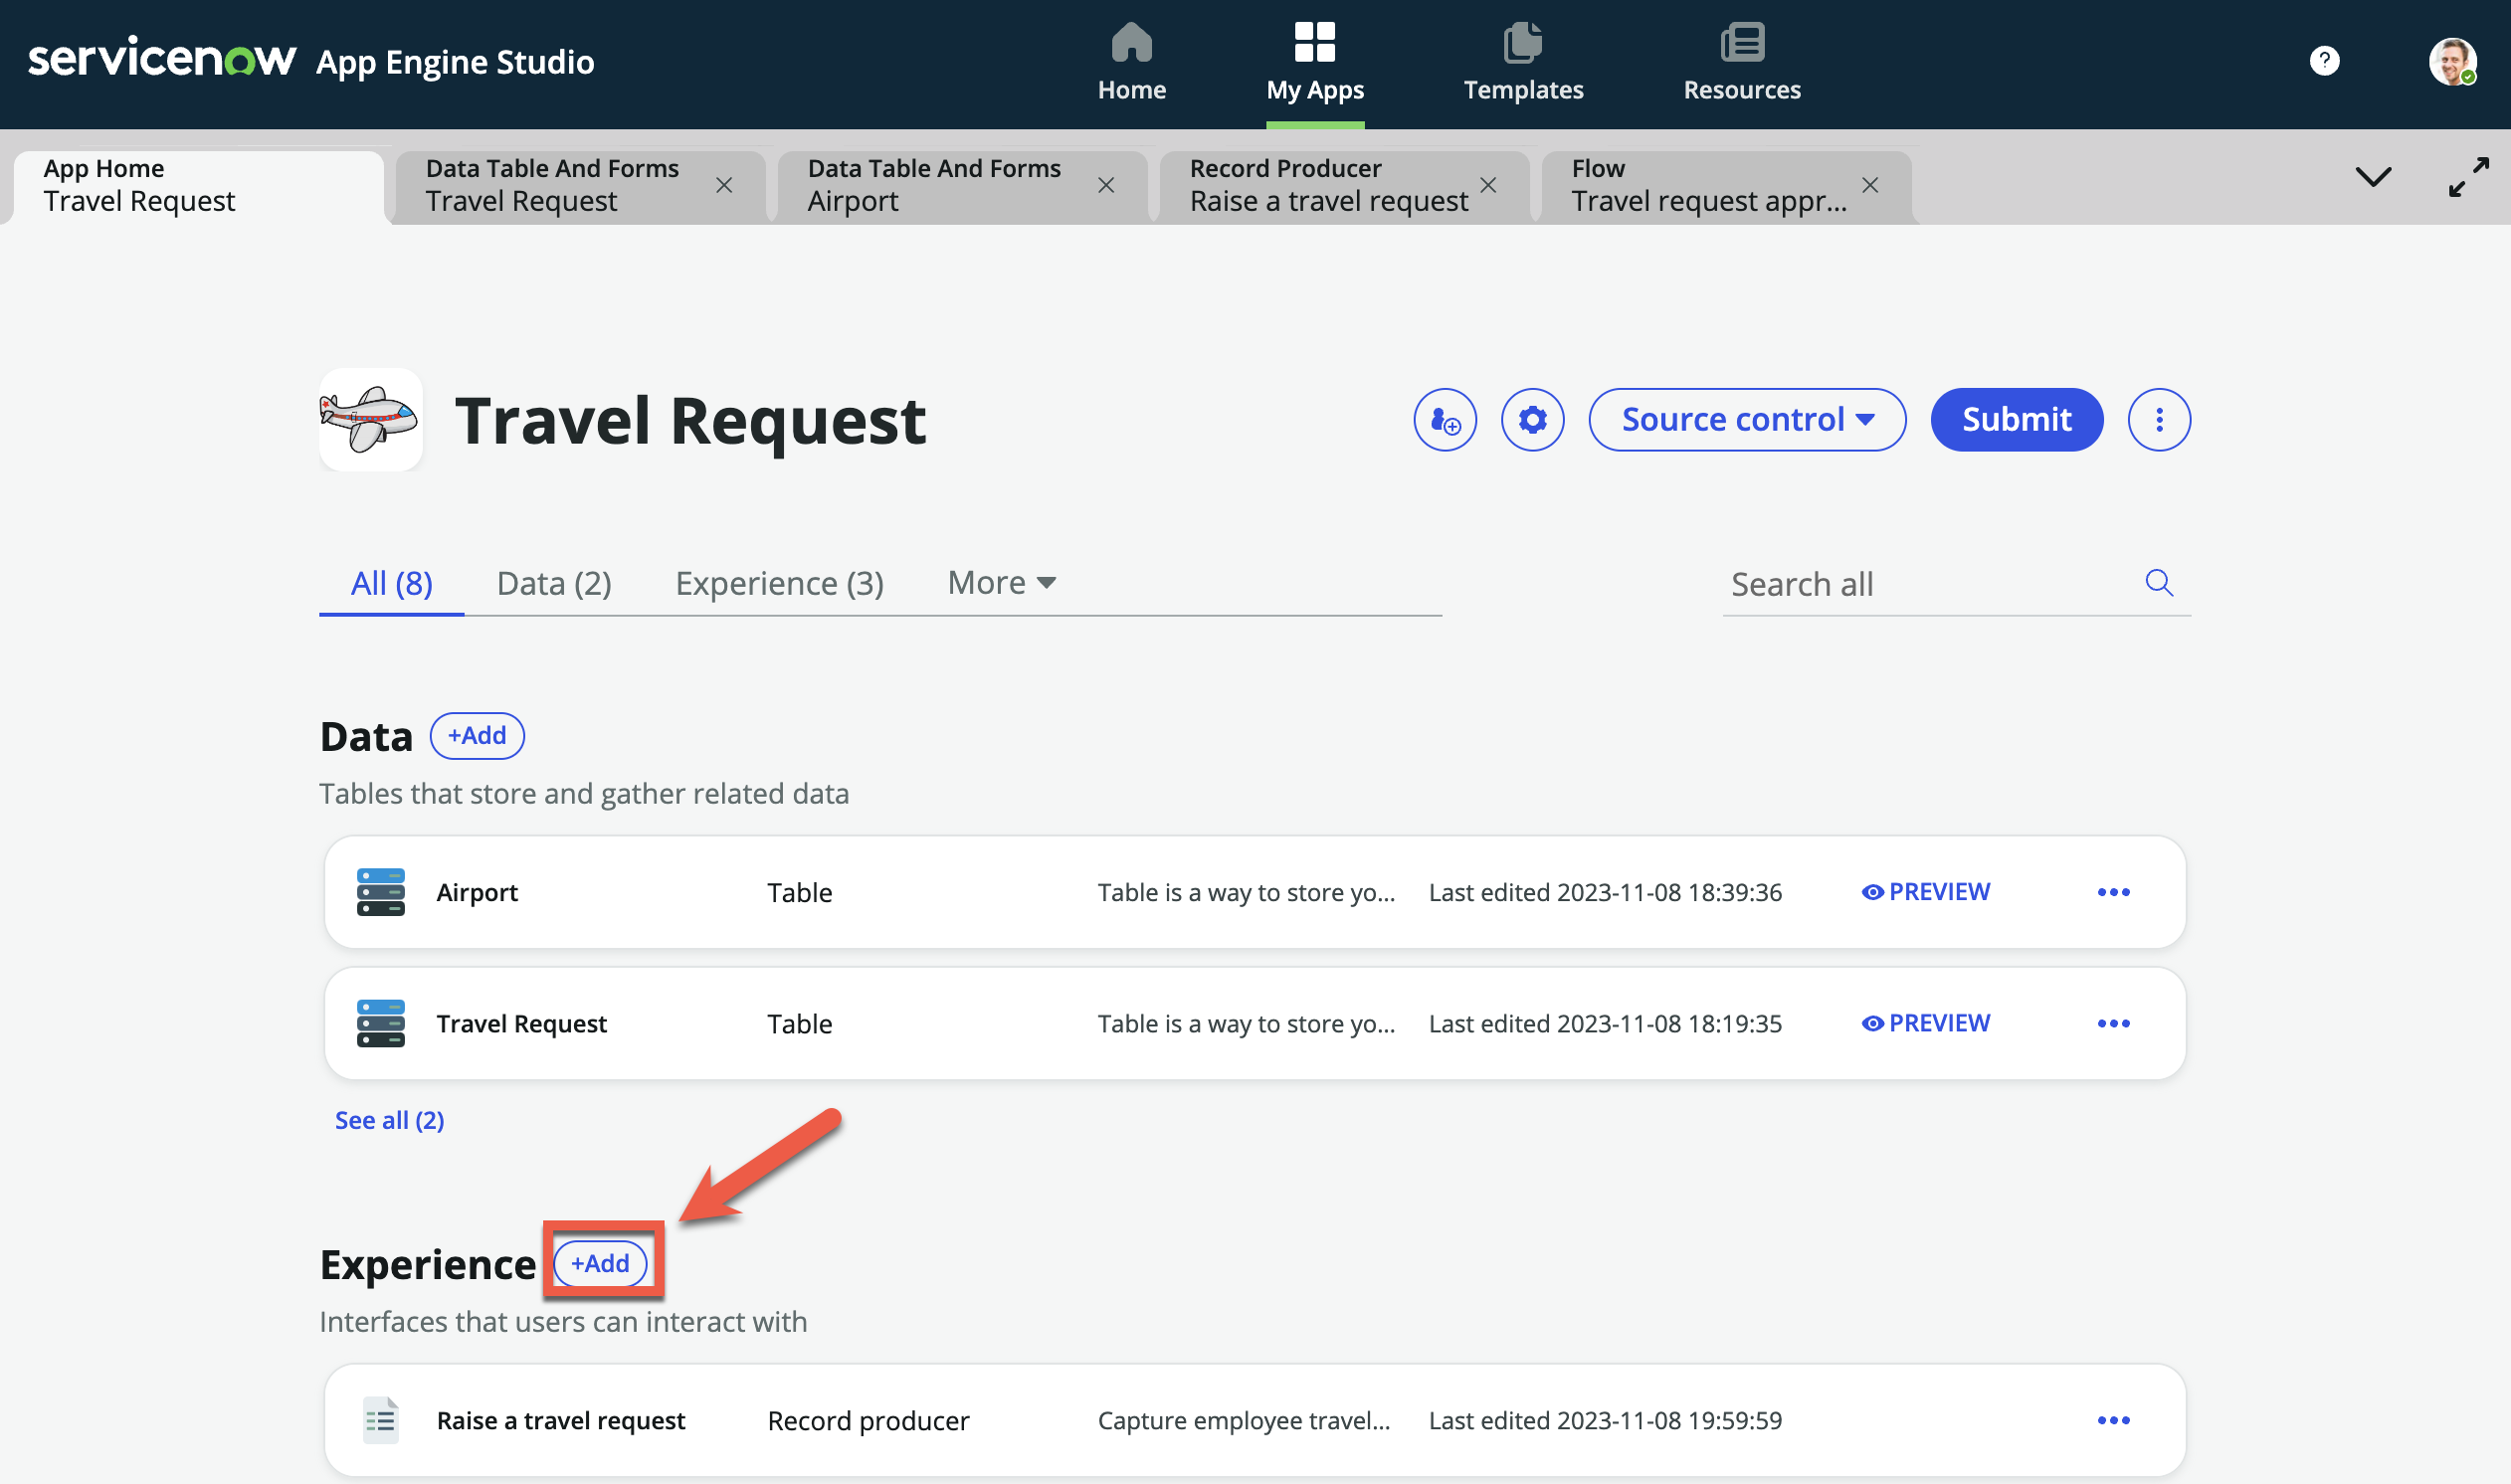
- Navigate back to your App Home screen if you are not currently on it, then click Add under Experience
- Click Workspace
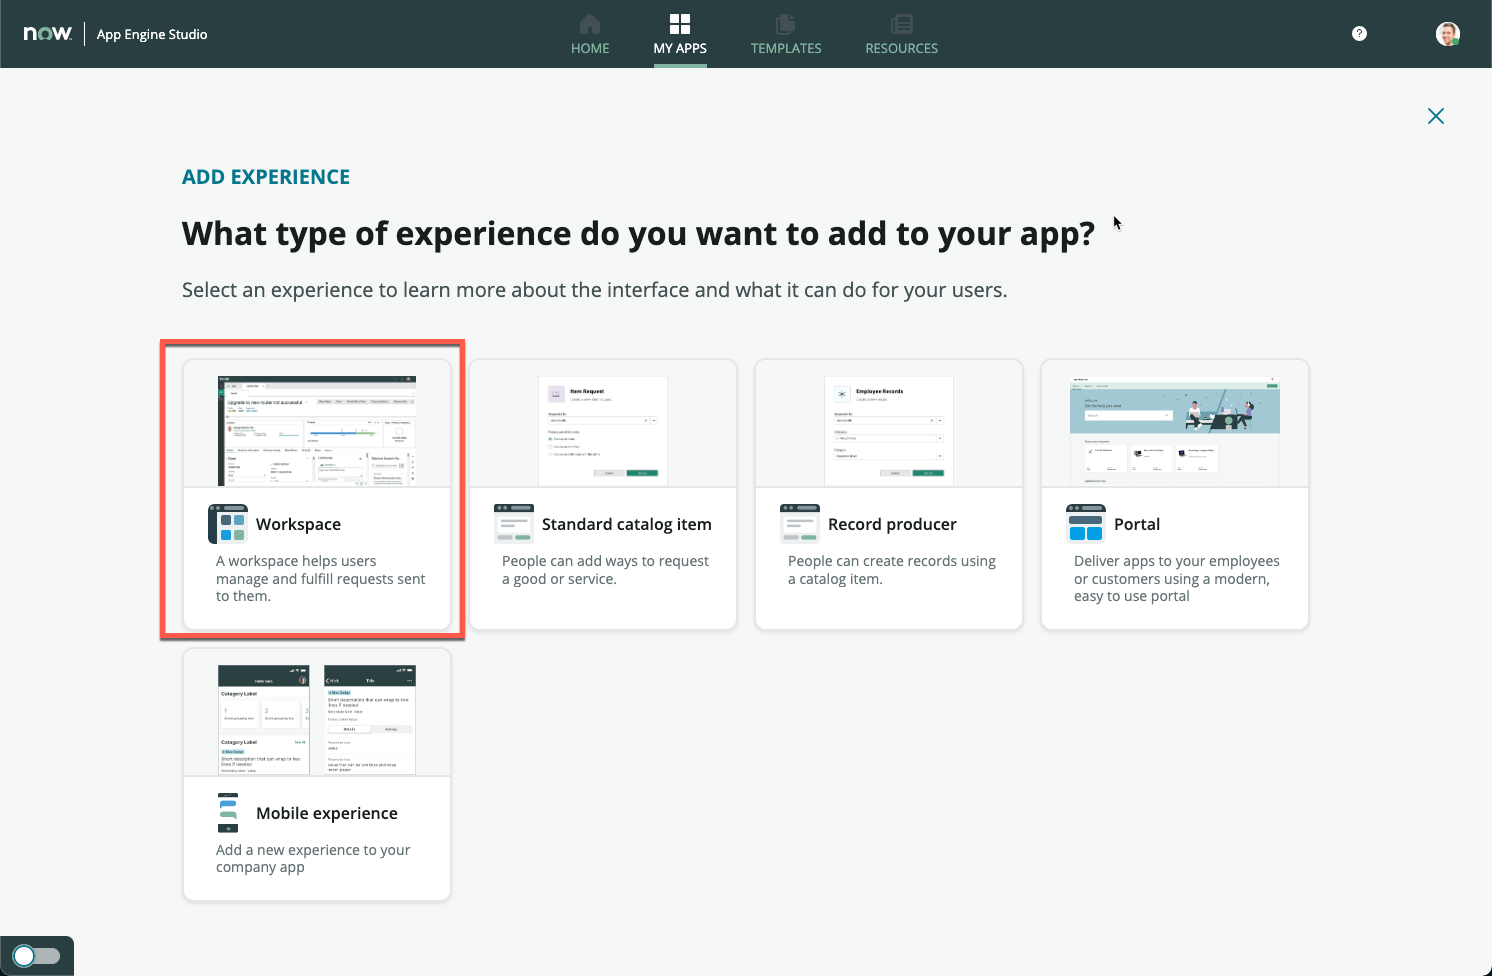
- Click Begin
- Change Name to Travel Request Workspace, Description to A central workspace to manage all travel requests
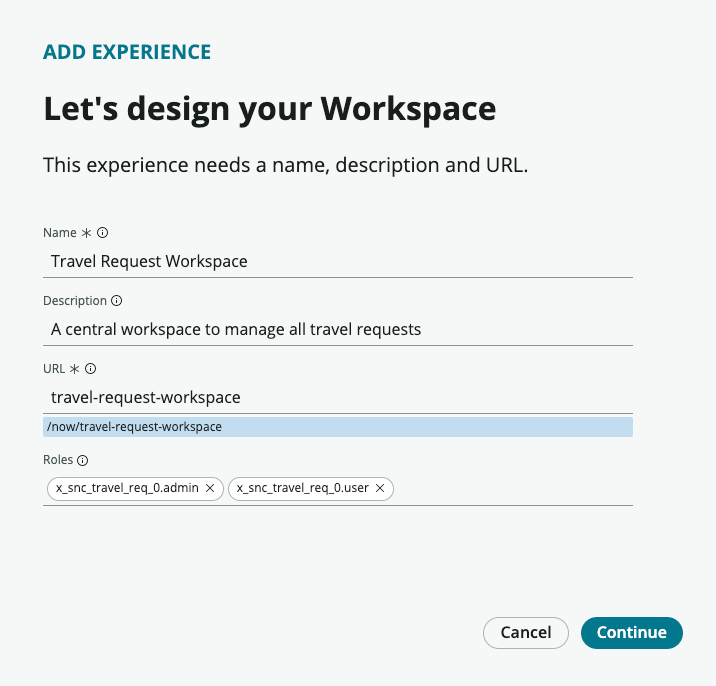
- Leave the rest default and click Continue
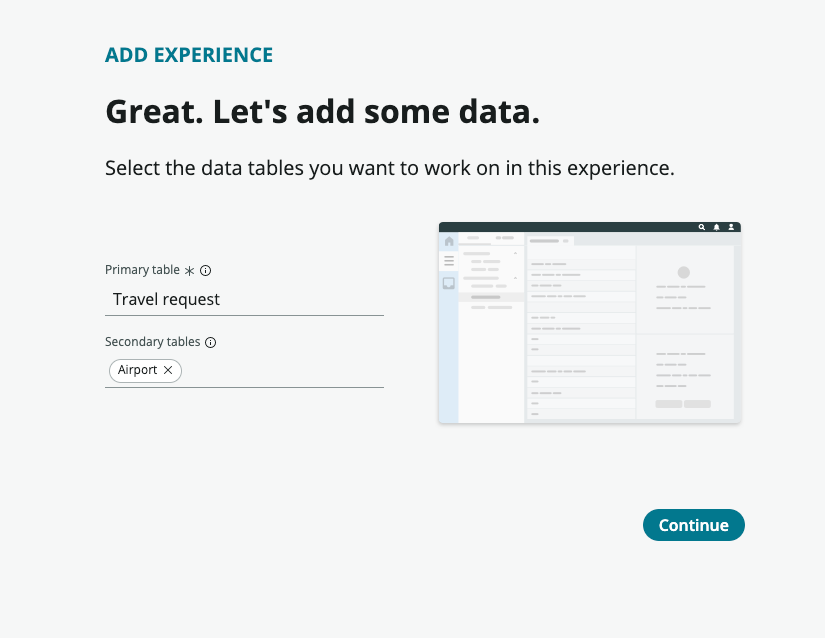
- Your screen should show Airport as the primary table, and Travel request in the secondary tables, we will need to swap these two around
- Search and select Travel request under Primary table
- Search and select Airport under Secondary tables
- Click Continue and wait for a short loading time. The experience is getting built based on your application configurations so far
- On the next screen, click Done
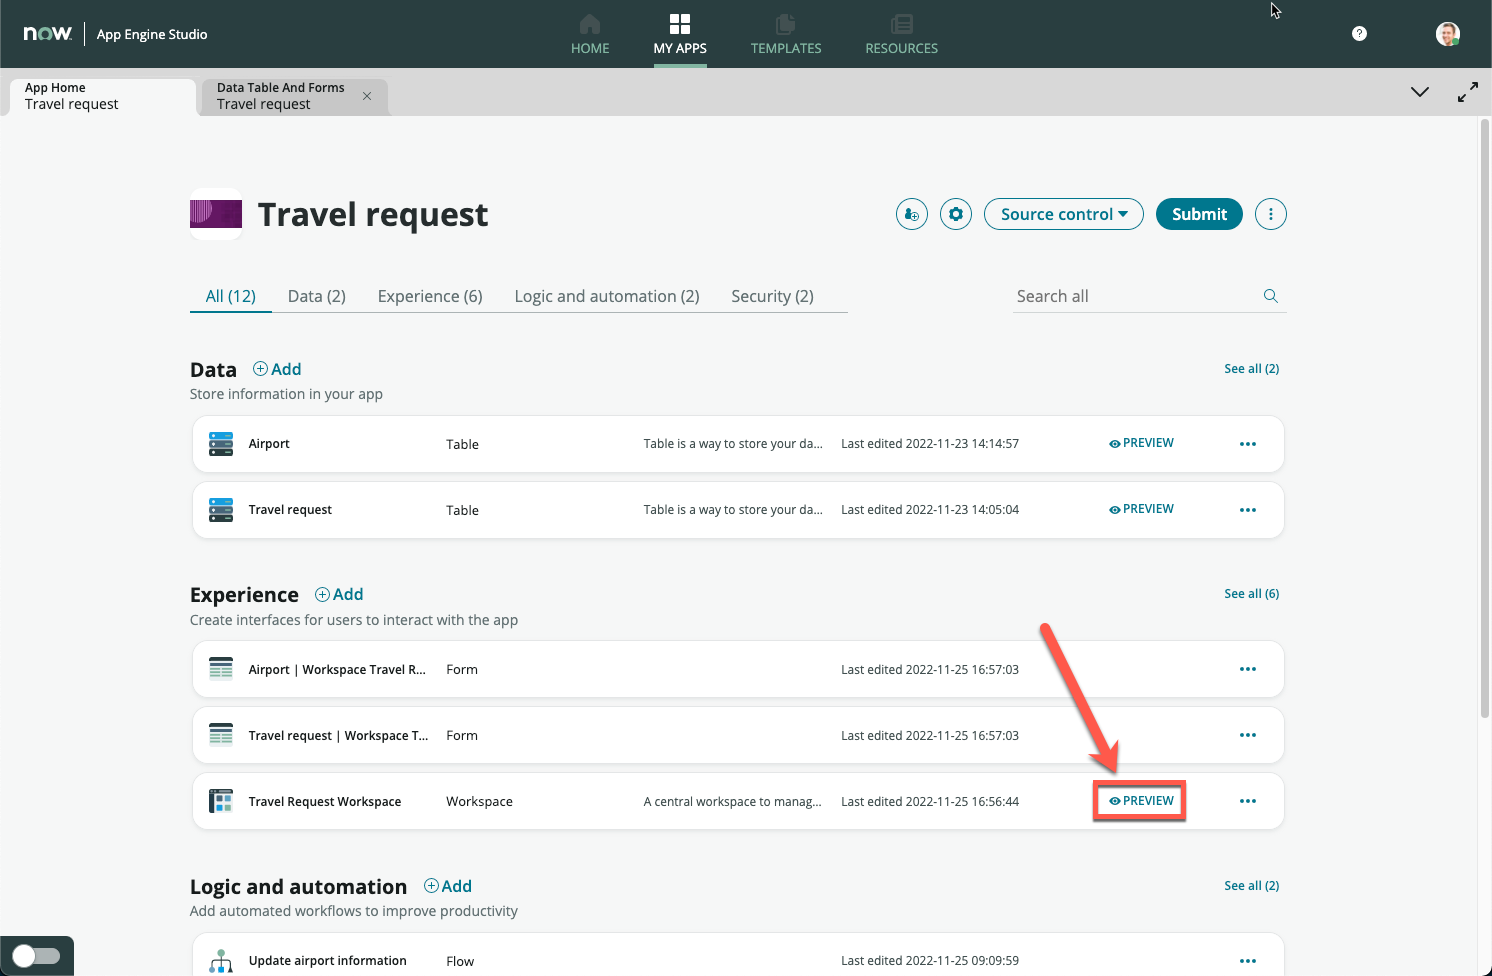
- You should be brought back to App Home
- Click Preview on the new Travel Request Workspace row
- A new browser tab will open and the workspace will be loaded
- Click on the list icon on the left sidebar
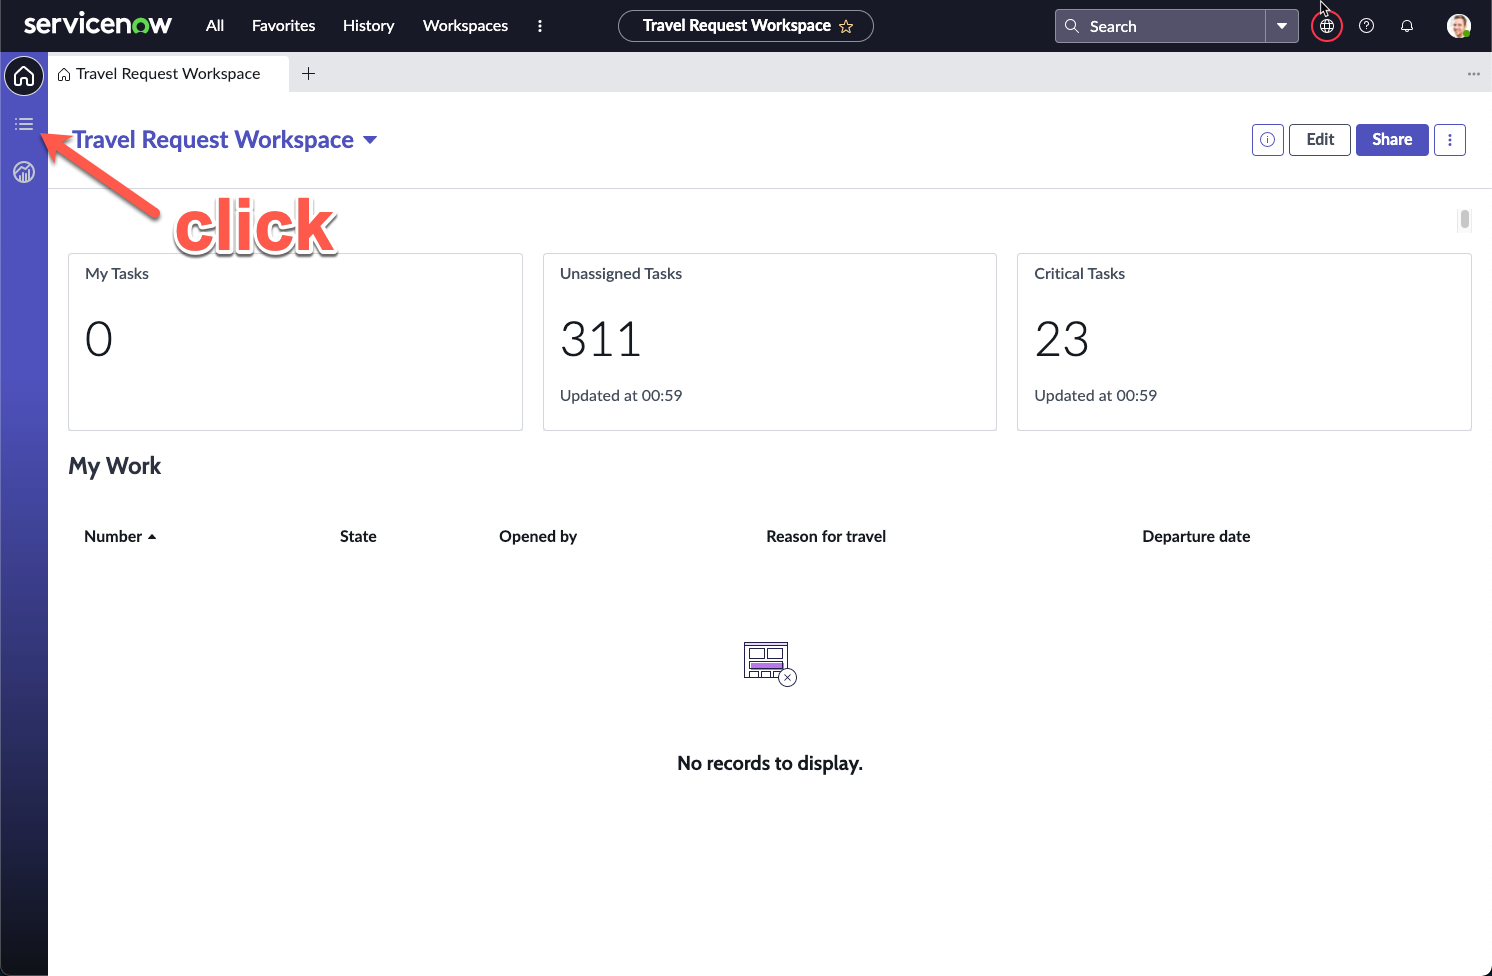
- Notice that on the Lists, your Travel request and Airport tables appear
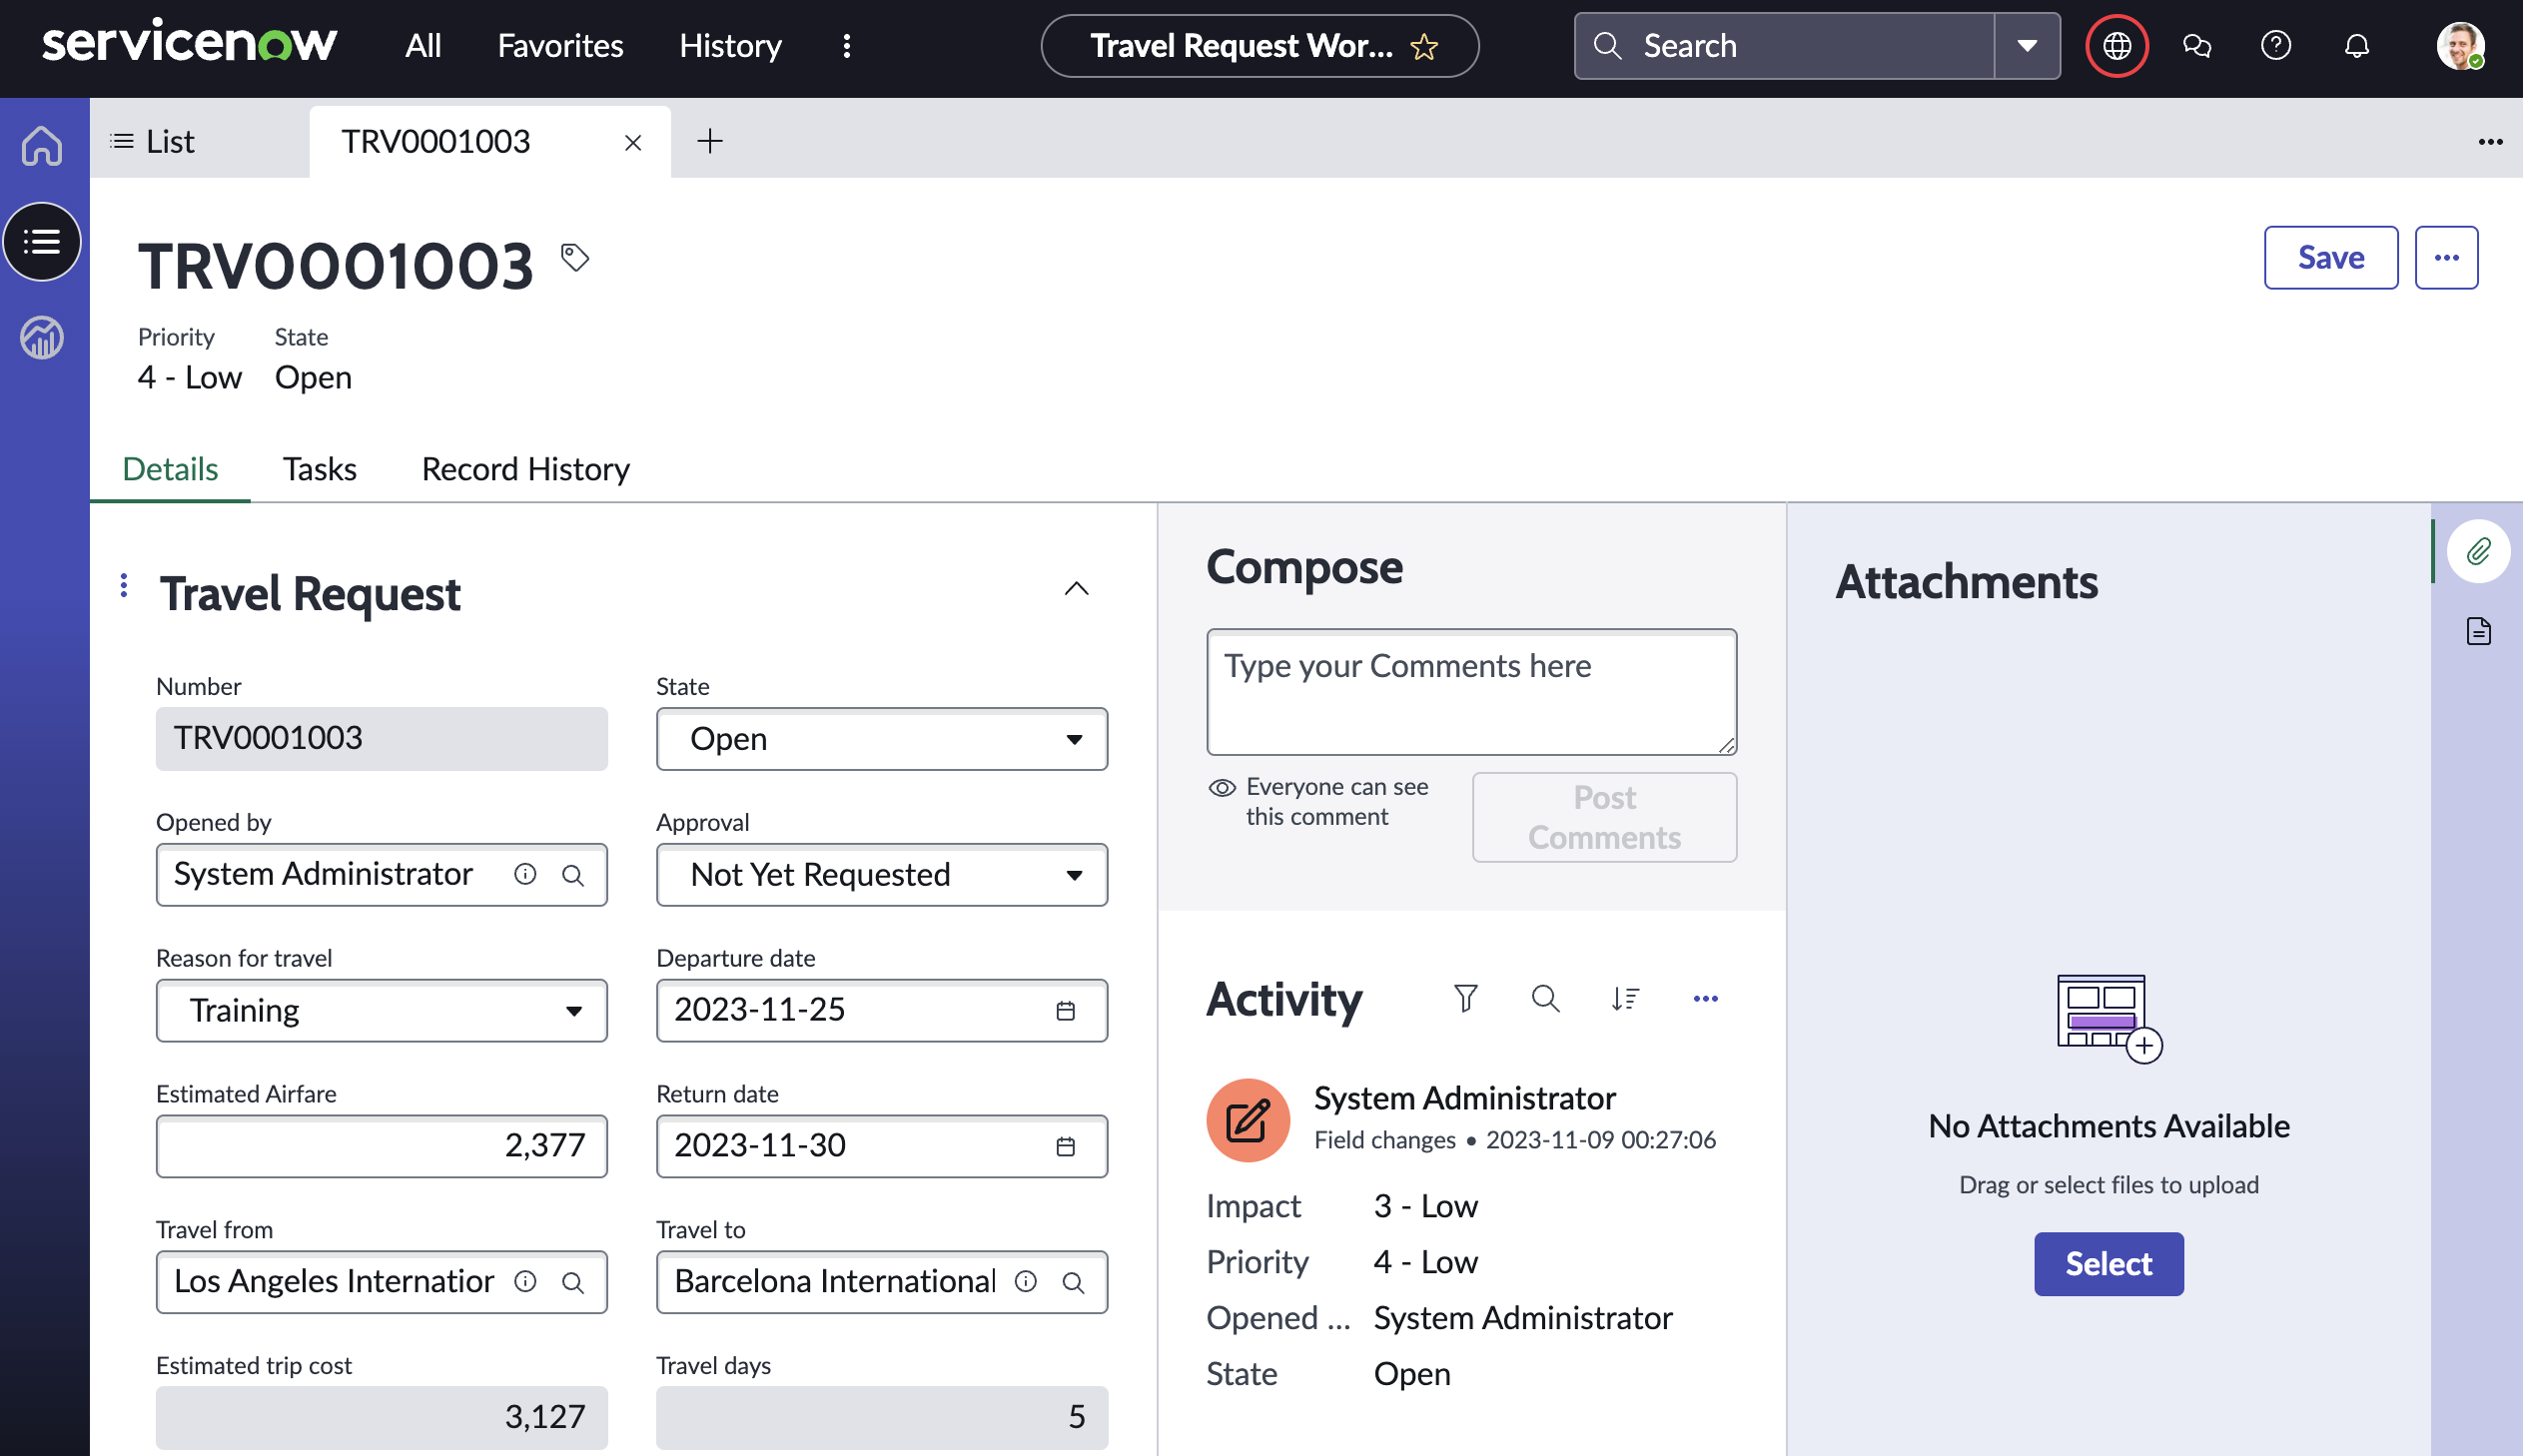
- Click All under Travel request, notice that this removes all filters and shows all your created travel requests
- Click New on the top right
- The form view appears. This should be the same as what you had configured in Exercise 1. There are the additional fields Travel days and Estimated trip cost from Bonus Exercise 1
- Fill in the form with data of your liking, then click Save
tip
On the right, Attachments can be added at any time. Attachments submitted together with our form in Exercise 2 will also appear here for viewing and download