Exercise 2.1: Create Travel Request Table
Duration: 10 minutes
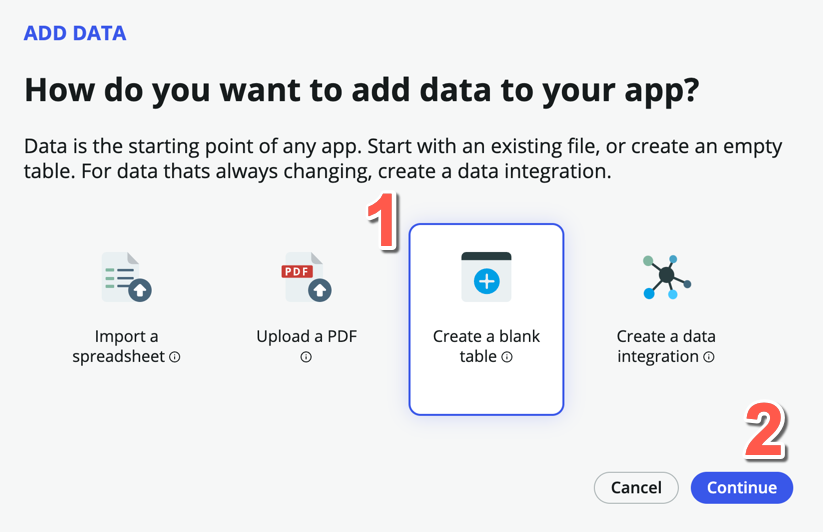
- Under Data, click Add

- On the Add Data page, click Create a blank table
- Click Continue
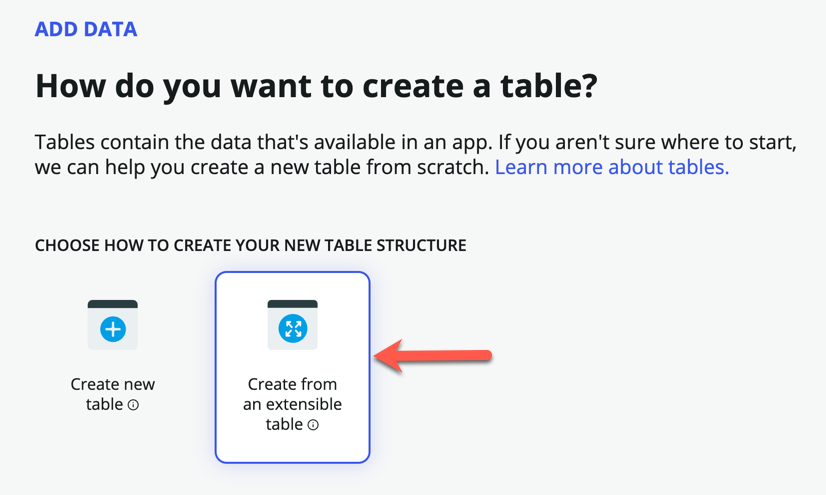
- On the next page, select Create from an extensible table
- Click Continue
- On the next page, click Table, and select Task under Recommended Tables
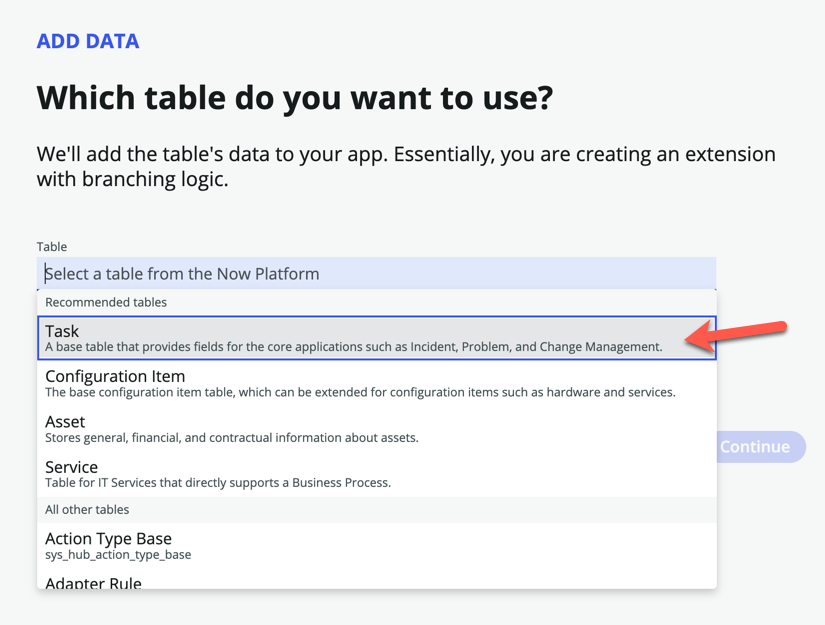
The task table is one of the core tables provided on the platform. Any table that extends task can take advantage of task-specific functionality such as SLAs and Approvals. This speeds up the overall process and ease of building logic and functionality.
- Click Continue
- For Table label, enter Travel request. Table name should be auto-populated.
- Check Auto number
- For Prefix, enter TRV
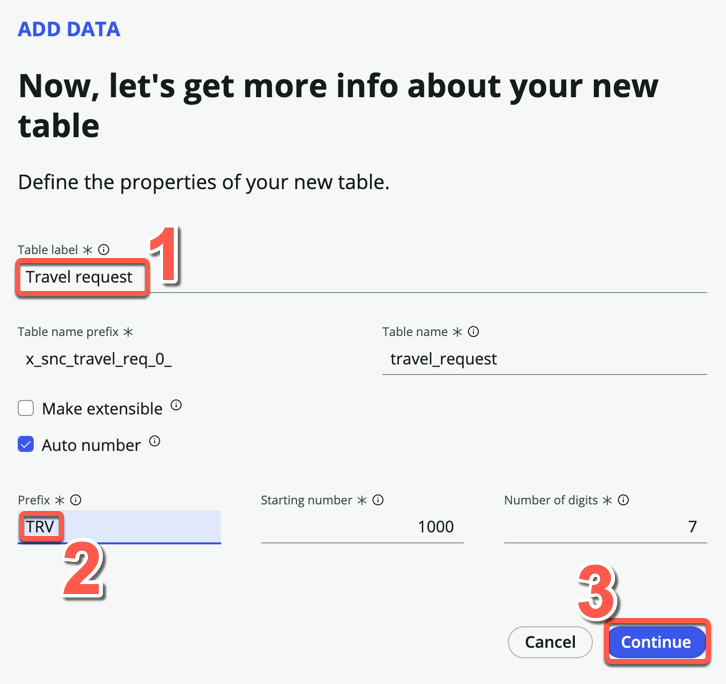
- Click Continue
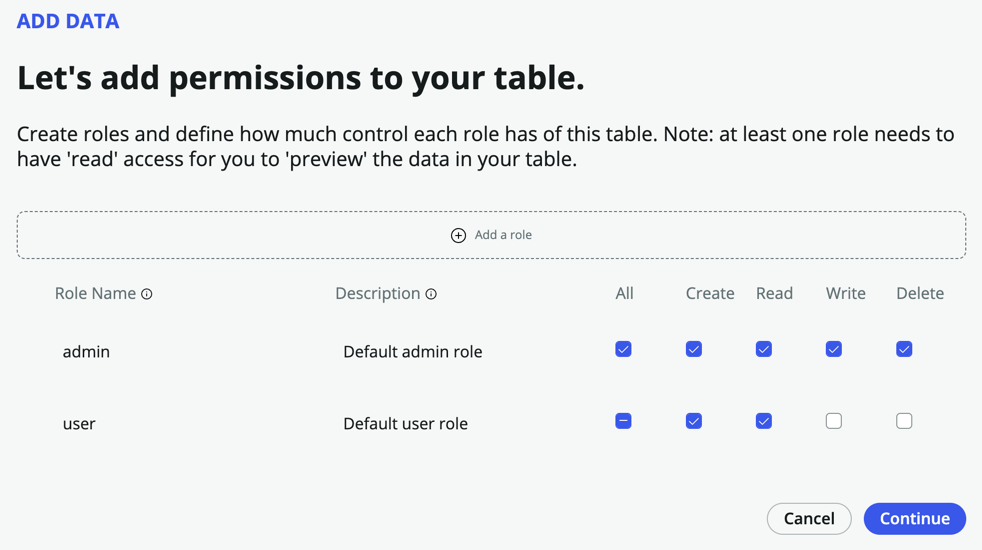
- Allow all access for admin and Create and Read access for user
- Click Continue
- Click Edit table
- If presented with the Welcome to Table builder pop-up, read through the steps, then close it
- You should now be on the Table Builder interface, in the Spreadsheet view
Instead of adding fields individually via table builder, we will add fields directly onto the form view instead. But note that there are several ways to add fields to a table.
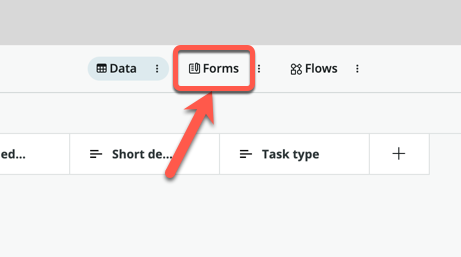
- Click on the Forms pill
- The current form layout is inherited from the task table, we will only keep the fields relevant to us
- Remove the following fields from the form:
- Priority
- Assigned to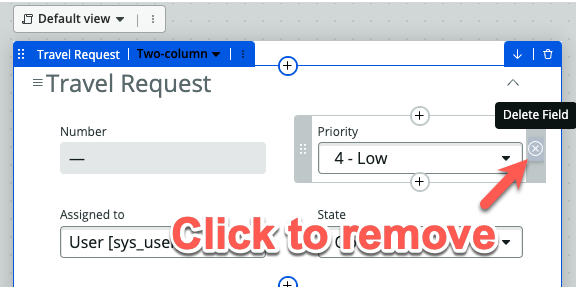
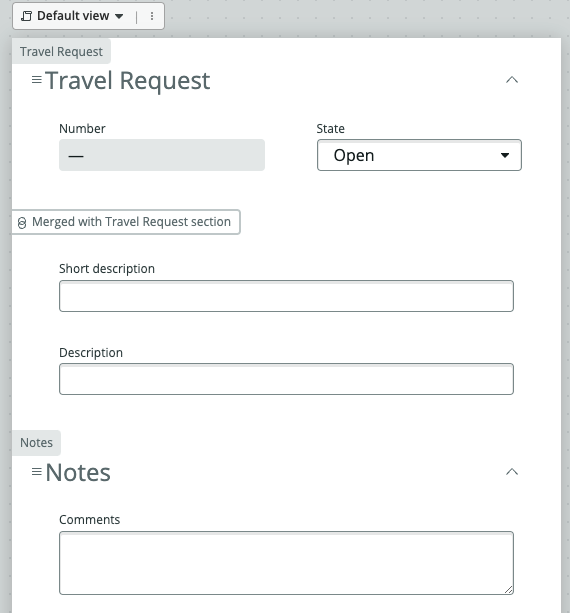
- The form should look like this
- On the left panel, click Add a field in the table
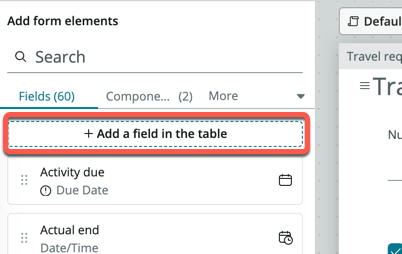
- On the pop-up modal, enter Departure date under Column label, the Column name should be auto-populated
- Change Type to Date
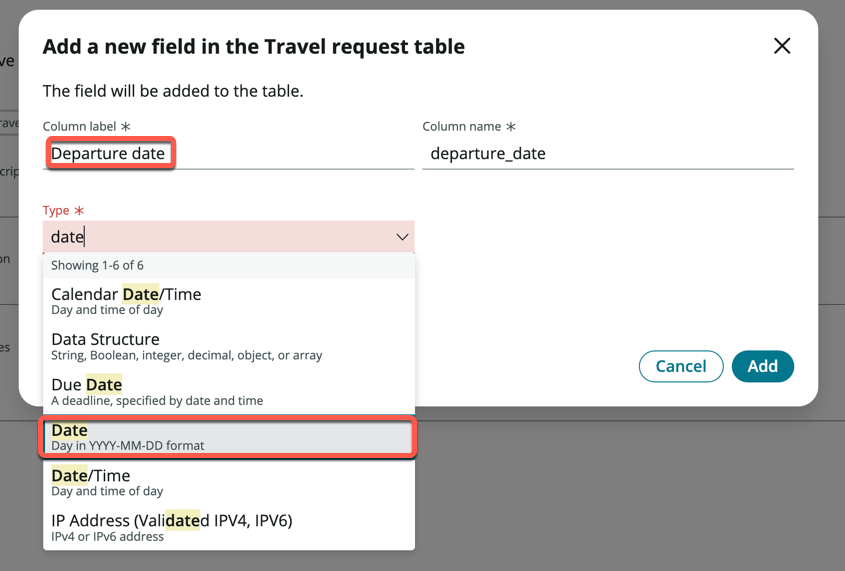
- Click Add
- Click Add another one
- Enter Return date under Column label, the Column name should be auto-populated
- Change Type to Date
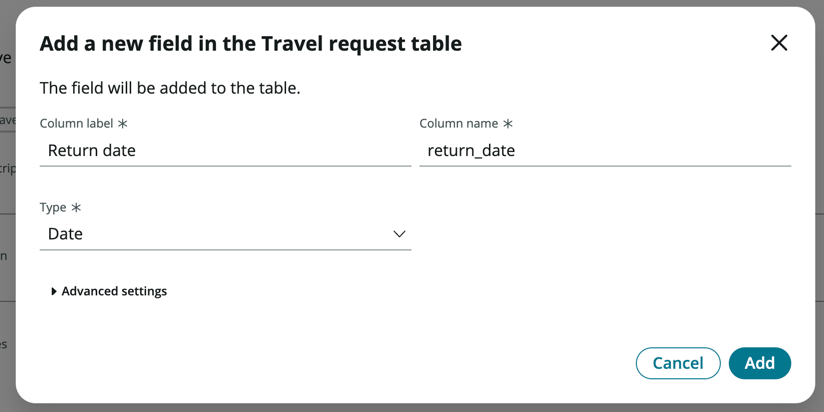
- Click Add
- Click Add another one
Repeat the steps above for the following 2 fields:
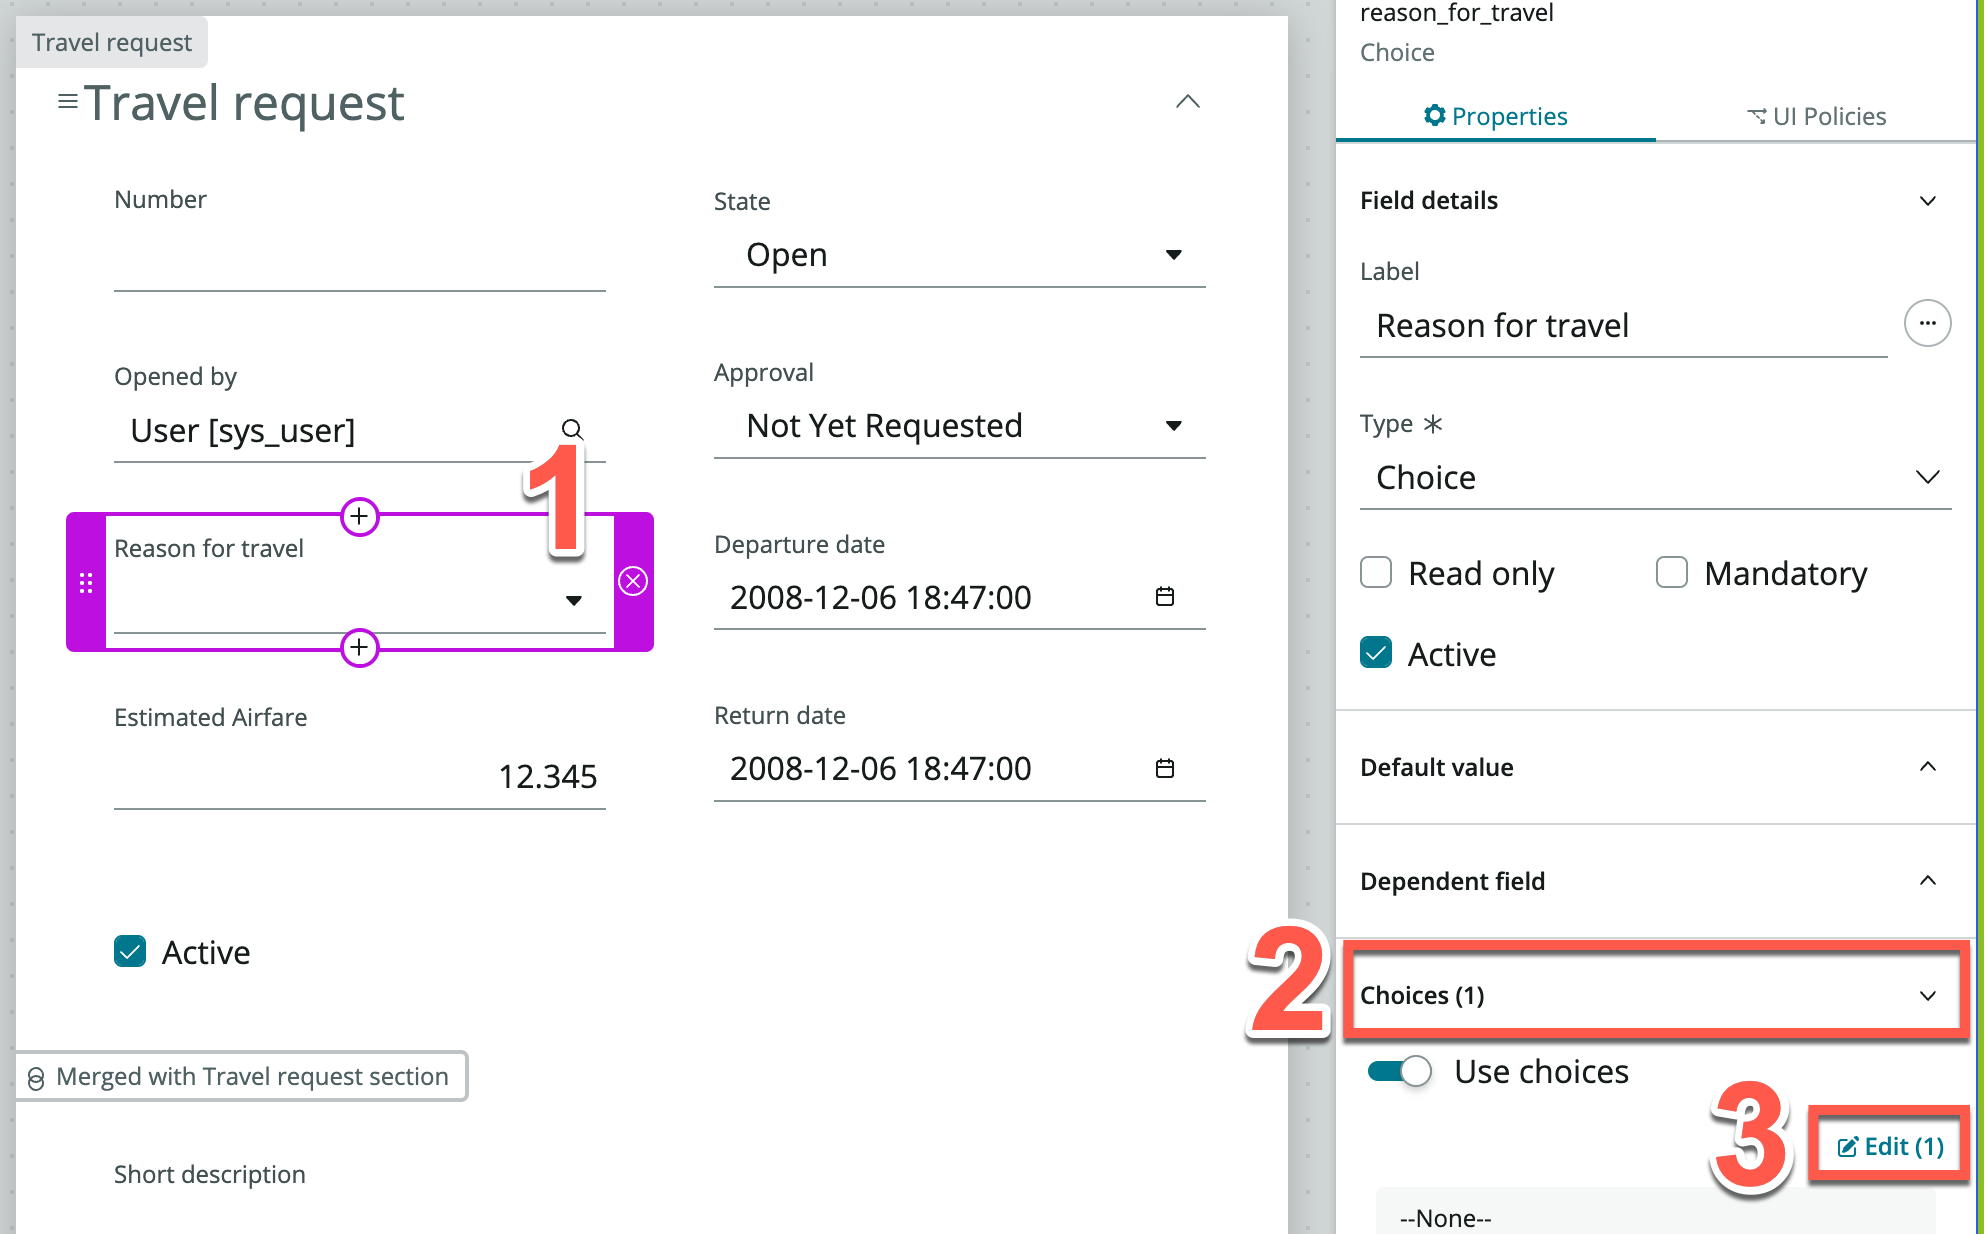
Column label Type Estimated Airfare Decimal Reason for travel Choice
- The panel on the left should show 4 new fields with a purple highlight
- Drag and drop those 4 fields onto the form
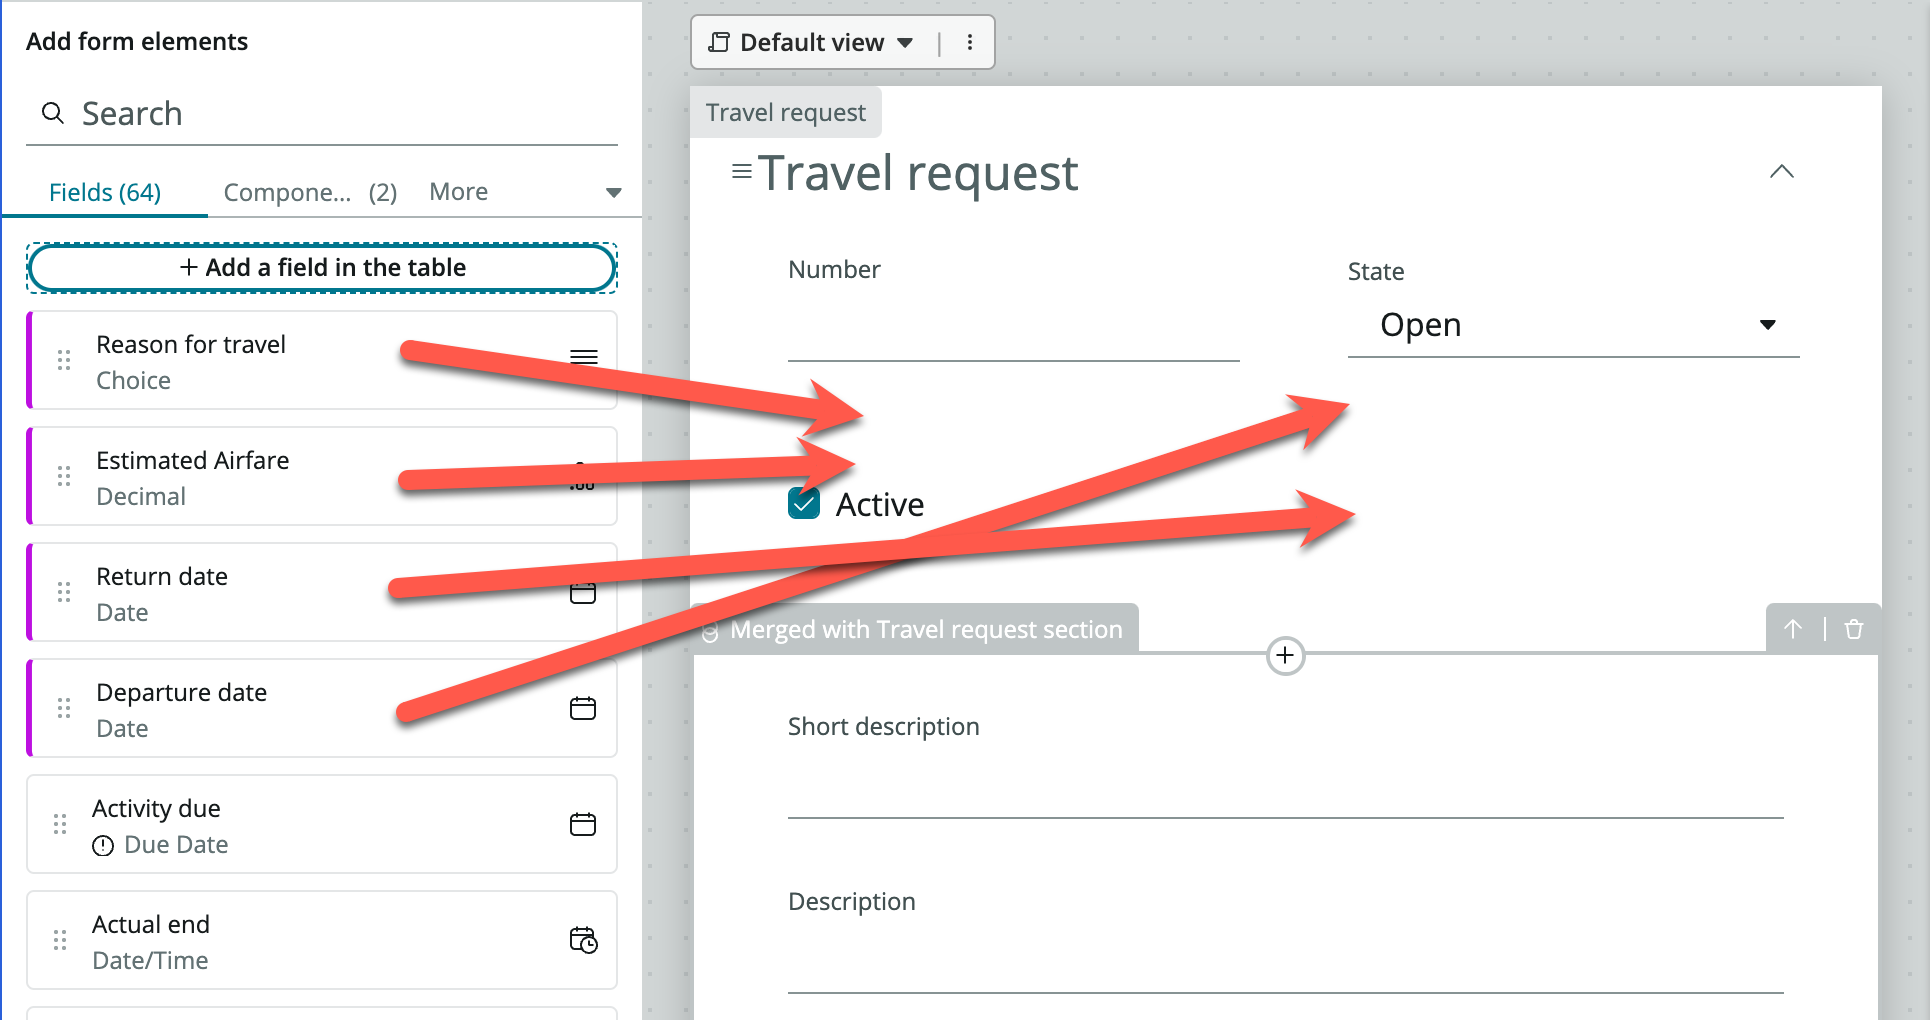
You will need to ensure that you see a grey outline box with a plus icon before releasing the field
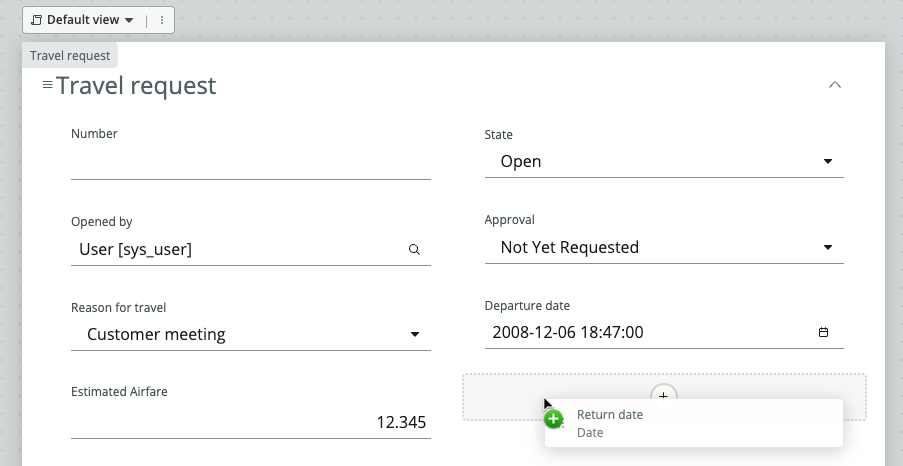
- Search and add two more standard fields onto the form beneath the Number and State fields: Opened by, Approval (These come standard with the Task table)
- Click Save on the top right of the form
- Within your form, locate and click Reason for travel
- The right-side panel will update for the configuration of this field. Expand Choices, then click Edit (1)
- On the Edit choices for Reason for travel screen, click + Add a choice
- Under Label, enter Customer meeting, the Value field should auto-populate
- Add another two Labels: Internal meeting and Training
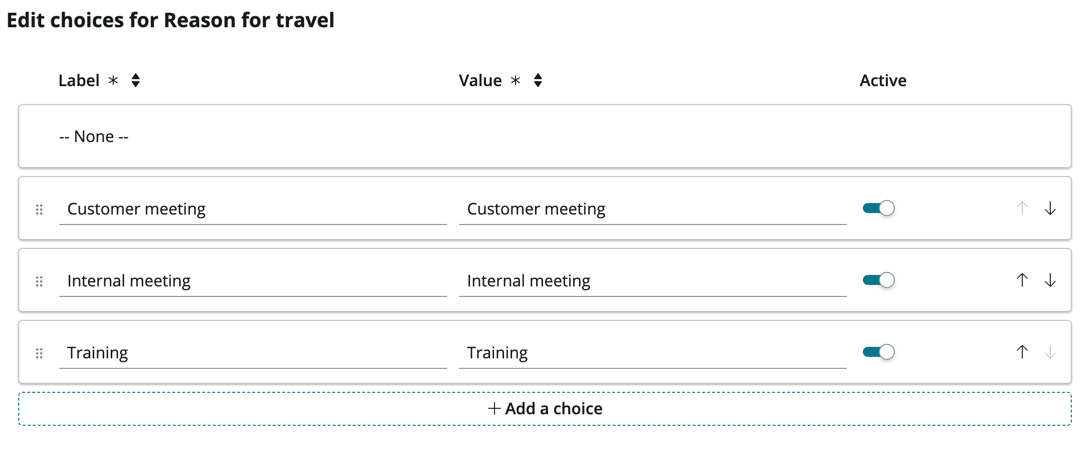
- On the bottom right, click Apply
Click Save
At this point, we could also capture the Origin and Destination via a String field so that the users can enter free text, but for more consistency, let's create an Airports table so that users can select these locations (like how you would select on any airline reservation website)
Great, you now have a table to store the Travel Requests!